Get more from your device

Whatever your gadget, there are little tips and tricks to squeeze more out of it in terms of performance. Digital Life writers share their favourite ones.
Android

1. Back up to the cloud
Cloud services like Gmail, Box and Evernote allow users to back up items to online storage services, so that they can also be accessed from another computer or device at a later time.
This eliminates the hassle of copying a file from a phone and transferring it to the other device.
If you take many photos with your smartphone, consider backing up all your photos to the cloud. The great thing about Android is that Google provides 15GB of cloud storage to each user, which is more than the default 2GB offered by the likes of Dropbox.
Download the Google+ app and in settings, choose to automatically back up your photos using your data plan, or only with a Wi-Fi connection.
Using a Wi-Fi connection is cheaper as this does not eat into your monthly data cap, but you have to remember to connect your phone to a Wi-Fi network frequently.
Here is a little known bit about the photo back-up service in Google+. If you back up photos at the standard size setting, instead of the full-sized one, you get unlimited free storage.
So if you have exceeded the 15GB of free space, you can still back up your photos, albeit at a lower resolution.
2. Clear the junk
Like a computer, smartphones tend to collect junk files over time, whether they are redundant installation files or apps that are no longer being used.
But short of doing a factory reset, which wipes the device completely, clearing the phone of such files can be tedious and time consuming.
Apps such as Clean Master actually monitor your Android device and can periodically offer to clean the device by notifying owners of old files and unused apps.
Use Storage Analyser if you want to scan the size of folders within your device, so that you can free up some space when needed.
Xiaomi devices, among others, offer a similar app as part of its user interface.
3. Use a third-party launcher
While Android fans love Google's operating system because it offers customisation, different hardware makers implement their own versions of the software. This has led to many variations of the basic user interface. So, for example:
-Brands such as Xiaomi do not use a main menu drawer to house all app icons;
-HTC uses a top/down scrolling main menu;
-Samsung and LG use a left/right method.
One way to achieve a consistent user experience is to install a third-party launcher. This replaces the existing user interface. When the launcher is used across multiple Android devices, users get a consistent interface without worrying that one brand has it done this way, instead of that way.
Google has its own Now Launcher, while others, such as Apex and Nova, also have their fans. I use Yahoo's Aviate.
4. Cut down on data syncing
The curse of having a connected device that syncs with different services is that it can slow down the device considerably, especially if you are in areas with a poor connection, such as an underground train tunnel.
Choose to back up your photos over a Wi-Fi network and turn off notifications for services like Facebook and Twitter if you are prone to checking your social networks every minute or so.
Go to Accounts in the Settings option and run through all the services that use data syncing. Select the ones you can sync manually, such as your Calendar, Contacts and Dropbox.
5. Boost your battery
Portable battery packs are a boon to phone owners whose devices easily run flat in under 12 hours. However, there are some steps owners can take to conserve battery life.
Turning off the phone's GPS, Wi-Fi and Bluetooth when not in use is a must and when you really need to squeeze that little extra juice, consider battery apps such as Juice Defender or Battery Defender.
You can set the phone to turn off data when the battery slips below a certain level, or turn on the data every 15 minutes for a quick burst of data syncing, instead of pulling data every minute.
Apple
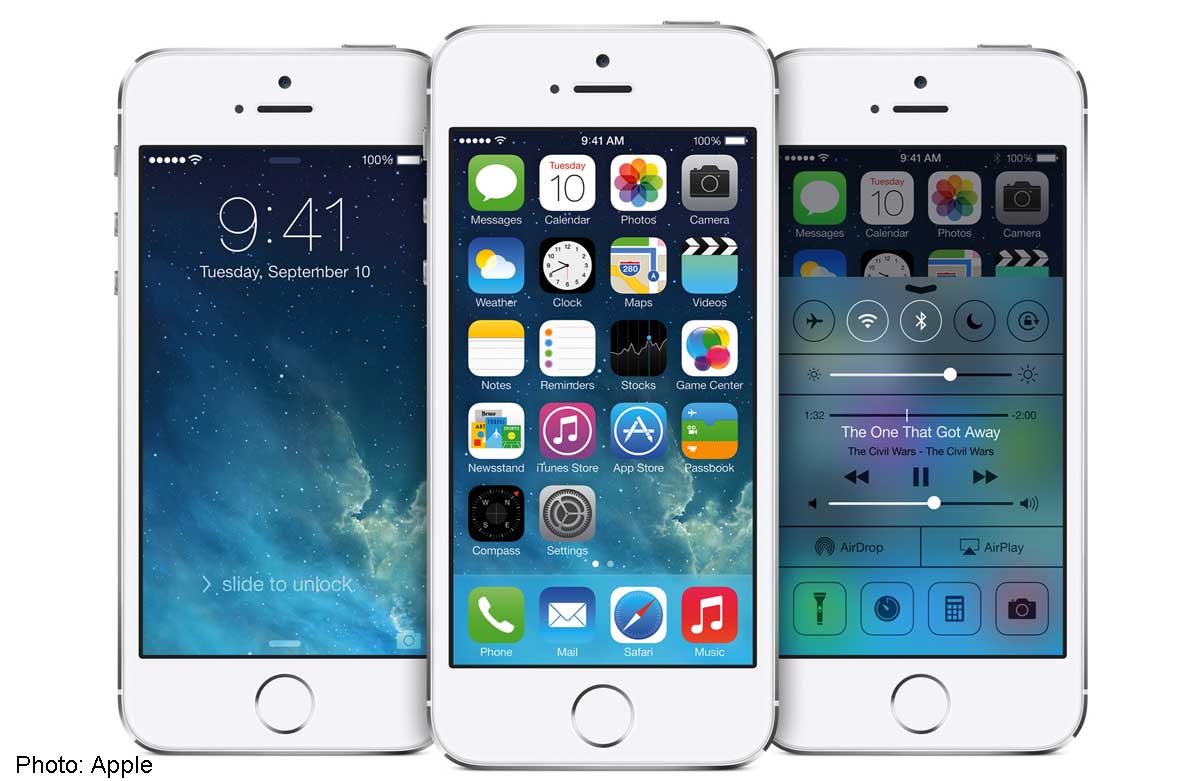
1. Take a photo with EarPods
The earphones or EarPods that come with your iPhone 5/5c/5s are good for more than just listening to music. With their in-line remote control, you can answer calls and activate Siri. But do you know you can even use them to take a photo?
Plug the EarPods into your iPhone, iPad or iPod touch.
Start the native Camera app, press the "+" or Volume Up button on the in-line remote control and the camera will snap a photo.
Now that iOS 7 has changed the function of the hold-and-release camera icon from reducing camera shake when snapping a picture, to shooting a burst of photos, this EarPods trick is the closest we get to avoiding camera shake.
It also comes in handy for taking a group selfie. Just have one person in the group hold the iPhone steady, and another click the Volume Up button when everyone is ready.
2. Enlarge text
One of the many complaints from Apple naysayers concerns the iPhone's "too small" screen size (at least until the much-rumoured 5.5-inch iPhone 6 makes its debut).
So why not just increase the font size so you can read text more easily?
Go to Settings >General >Text Size. Drag the slider to the desired font size.
If you want it even bigger, go to Settings >General >Accessibility >Larger Text. Turn on the Larger Accessibility Size option and adjust the size by dragging the slider here.
Putting text in bold face may help, too. Go to Settings >General >Accessibility and turn on the Bold Text option. Note that this action will restart your iPhone or iPad.
For extra help, especially if you have to read in dim light or in the dark - on a long-haul flight, for instance - you can change the default from black text/white background to white text/black background.
Go to Settings> General >Accessibility. Under Vision section, activate the Invert Colors option.
3. Undo deleted messages with a shake
There are times when your fingers move so swiftly that you accidentally delete an important message or e-mail. There is no need to leave the Inbox in order to retrieve that deleted item from your beloved (or your boss) from the Trash folder.
All you need to do is to give your iOS device a shake. This will bring up an Undo dialogue box on screen. Tap on Undo to put that precious e-mail or message back where it belongs to ensure your blissful life is back on track.
4. Find your Touch ID
If you have an iPhone 5s, you probably know how to set the Touch ID home button to recognise your fingerprint.
But there may be times when the device has difficulty recognising one or another of your fingers. You will need to scan that fingerprint again. The best way is to delete the original and start all over again.
Oops! You cannot remember which finger it was as all the prints are simply labelled Finger 1 to Finger 5 in the Touch ID settings.
Go to Setting >Touch ID & Passcode, put the likely finger on the Touch ID, and the corresponding label under the Fingerprints section will turn grey.
5. Block annoying calls
Despite signing up for Personal Data Protection Action, you are still getting annoying cold calls, or maybe the calls are from someone you really do not want to talk to. You can block these calls and messages very easily in iOS 7.
If it is an unsolicited call, just add it to your contacts. If it is a friend-turned-enemy, the person is probably in your contacts.
Next, tap on Contacts and look for the particular contact you want to block. Tap on the contact name, then scroll down to the bottom to find the Block This Caller option. Tap on this option and you will not receive phone calls, messages or FaceTime video chat requests from this number.
In the event that you think you have blocked someone by mistake or if it is time to forgive and forget, you can edit the blocked list by going to Settings >Phone >Blocked.
Here, swipe from right to left on the contact you want to unblock and you will get an Unblock option. Tap on it to kiss and make up.
Windows Phone

1. Minimise data use
Windows Phone devices have been around for some time, but failed to dominate the smartphone market. This means the platform lacks the large number of third-party optimisation apps found on the competing iOS or Android platforms.
On the other hand, the platform itself has plenty of customisable features and users simply have to know where to look.
If you are prone to busting your 2GB monthly data plan, use the Data Sense setting to limit data use.
In the App list, tap the Data Sense icon and then the Settings icon at the bottom. Scroll down to Browser data savings and choose from standard, high, or automatic. Microsoft recommends placing it on automatic, which lets the phone decide the best setting.
Putting it on high compresses pictures and can even block some ads. This also downloads parts of a webpage to cut data transmission.
With Data Sense, users can also keep tabs on the data consumed by individual services, like OneDrive or Skype.
2. Back up photos
As with Android and the auto back-up feature of photos to Google+, Microsoft has a similar service in the form of OneDrive. This is a cloud storage service and currently offers 15GB of free storage.
Under Photos, go to Settings and scroll down to enable auto upload of photos to OneDrive.
If you choose Good quality, pictures will be uploaded to the service using your data plan. Choose Best quality and the larger files will be uploaded only when the phone is connected to a Wi-Fi network.
Videos can be uploaded only via a Wi-Fi connection.
For those looking at more storage, subscribing to Microsoft's Office 365 service will give users 1TB of OneDrive storage space.
3. Limit background tasks
If you use Windows Phone 8, this setting can be found under Settings, Applications and background tasks.
For Windows Phone 8.1 users, the ability to stop apps from running in the background has been moved to Battery Saver.
Select to show apps that can run in the background and a complete list of apps on the phone that fit the bill will show up.
Users can then choose if the app is allowed to run in the background, or only when selected by the user.
Users can also choose if the app has priority to run, even when the Battery Saver mode is turned on.
The Battery Saver mode allows the phone to conserve battery life, but users also have the option to allow specific apps, such as WhatsApp, to continue to operate.
4. Enable Cortana
Cortana is a personal assistant for Windows Phone 8.1. With it, users can set reminders and search for information, using voice commands. Its name is taken from the artificial intelligence Cortana, from the Halo series of games published by Microsoft.
The beta software is available only in the United States for now. But users can tweak phone settings to match the US one and thus enable Cortana.
First, go to Settings and scroll down to language. Change it to English (United States).
Before you restart the phone to enable this change, select region in the same Settings menu and switch it to United States. Once you restart the phone, Cortana will be installed in the phone.
Run through the set-up and the search results will be provided by Bing, which has comprehensive listings of local offerings, from food to entertainment.
5. Make use of Cortana
The Cortana app is heavily integrated into Windows 8.1 and its features are available beyond search functions.
For example, you will notice that appointments sent via e-mail and SMS messages will be highlighted. Tapping on a highlight will prompt Cortana to ask if you want to schedule it into your calendar.
To set an alarm, simply speak to Cortana to create an alarm for a certain time. You can then edit that alarm to make it a recurring one or a one-off event.
Users can also create reminders by starting off a voice command with "remind me". This creates an entry in your phone.
The software is intuitive enough to recognise words like "in three days" or "next Wednesday", so you do not have to spell out everything when addressing Cortana.
OS X Mavericks

1. Finder Tabs
Finder Tabs is a big feature in Mavericks that many people remain surprisingly clueless about.
It lets you have tabs in one window, instead of requiring you to open multiple windows on the Finder.
If you have been using tabs in the latest Internet browsers, this feature should be familiar.
Finder Tabs really helps to declutter your desktop, as there is no limit to the number of tabs you can have in a window.
To add a tab to your Finder window, press Command and T. To open a folder in a new tab, hold down the Command key and double click on the desired folder.
This way, you can open a tab for your documents, another for your music and a third for your pictures.
To transfer items from one folder to another, just open both folders in tabs and drag the items from one to the other. If you drag and hold an item to another tab, this tab will behave like a spring-loaded folder and become active.
You have too many windows open on the desktop? No sweat. Mavericks allows you to merge all these windows into tabs in a single window.
Go to Window on the Desktop Menu and click on the option Merge All Windows. You now have a single window with multiple tabs.
2. Use Preview to sign off PDF documents
At work, you may find that you need to sign off on a PDF document. Instead of printing it out, signing it and then scanning the document to e-mail it, just use OS X's Preview to sign PDF documents.
First, take a picture of your signature. In Preview, go to Preferences, click on Signatures, then click Create Signatures.
Sign your "autograph" in black ink on white paper and hold it up to your Mac's camera so your signature rests on the blue line.
If the signature preview looks good enough, click Accept. You can use the same signature again and again. Or save another signature for other uses.
Now, click Show Edit Toolbar and, from the Signature pop-up menu, choose the signature you created and click on where you want it to be.
Save the PDF and shoot back that coveted contract in no time.
3. Writing in Chinese, literally
I am seriously bad at hanyu pinyin, but I know how to write Chinese characters. In OS X Mavericks, you can easily use your MacBook Pro and Air's trackpad (selected models) or the Apple Wireless Trackpad to write the Chinese characters you want.
Go to System Preferences >Language & Region. On the Preferred Languages panel, add Chinese (Simplified) or Chinese (Traditional).
Next, you will be prompted to select your input sources from: Pinyin, Stroke, Trackpad Handwriting and Wubi Xing. You can choose Pinyin first.
Here, there is a short-cut button to Keyboard Preferences. Click on it to reach Input Sources under Keyboard Preferences.
Click on the "+" button and on Chinese (Simplified), which I had chosen earlier, choose Trackpad Handwriting.
Now, hold down Shift, Control and Space Bar at the same time to bring up the virtual trackpad on screen. Write on your trackpad and watch the character form.
Several options will be offered on the right column of the virtual trackpad.
Tap on the physical trackpad to select the Chinese character you want.
4. Disable apps that launch at start-up
If you find your Mac taking longer and longer to start up, it may not be a problem with your ageing computer. Instead, check what apps OS X loads during start-up.
Go to System Preferences >Users and Groups. Look for the Login Items button, click on it and you will see a host of applications that "need" to launch automatically when you log in. Check or uncheck the applications you want to launch automatically when you start up.
I have unchecked every single application. That ensures that my Mac starts up as quickly as possible.
5. Screen video recording
Want to show a friend how to sync her videos to the VLC app on her iPad? Instead of taking multiple screenshots and typing her a super long e-mail, use OS X's built-in screen recording facility to capture the steps you take on the display.
To record an on-screen video, start the QuickTime Player application (see Applications folder).
From the file menu, click on New Screen Recording. You can choose the audio source (line in or internal microphone) and whether to show mouse clicks in the recording.
Ready? Hit the record button. You can opt to record the entire display or select part of the display. Once you are done, click on Stop Recording, then click Save (or press Command and S) to save the recorded video.
Windows 8
1. Use the search feature
Microsoft has long pushed users to make use of the built-in search feature in Windows to locate apps, files and system settings. Windows 8 goes further by integrating Bing Search to find relevant answers from the Internet.
To search from within the Modern tile-based interface in Windows 8, just start typing. The search box will appear on the right side of the screen. You can limit the search to local files and settings using a drop-down option.
In Windows 8's desktop mode, you can bring up the search box by pressing the Windows logo key and S together. You can search in Windows 7 by pressing the Windows logo key.
As an exercise, use the search feature for the remaining four tips below. You may find that this is faster than following our instructions, which is the conventional way. For instance, start by typing "default" into the search box for the next tip.
2. Set default apps
Not a fan of Microsoft's Internet Explorer browser or the Windows Media Player? Replace them with third-party apps and make these new ones the default.
Swipe in from the right edge of the touchscreen or trackpad to bring up the Charms bar.
Select Settings >Change PC Settings.
Click on Search and apps and select Defaults to see the current list of default apps. There are two additional options on that page to associate specific file types or protocols with default apps.
In Windows 7, click on the Start button >All programs and select Default programs.
3. Boot to desktop in Windows 8
The Windows 8's tile interface may be great for touchscreen devices, but it is not as user-friendly for desktop PC users.
Recognising this, Microsoft added a feature in Windows 8.1 to let users boot directly into the desktop environment.
Assuming that your PC has booted into the tile-based Modern interface, click on the Desktop tile to get into the desktop environment.
Right-click on the taskbar and select Properties. Under the Navigation tab, check the box "When I sign in or close all apps on a screen, go to the desktop instead of Start".
Bonus tip: you can get the Start button back by installing a free app called Classic Shell. Download it at www.classicshell.net.
4. Check the size of your Windows 8 apps
Most Windows users probably know they should head to Programs and Features in the Control Panel if they need to see all that is installed on their PCs. Besides displaying the disk space taken up by these apps, this list also shows the version information and installation date.
But what about the Windows 8 apps you have downloaded from the Windows Store? These apps appear only in the tile-based Modern interface and are not listed in the Control Panel.
To find them, open the Charms bar and select Settings. Choose Change PC Settings and then pick Search and apps from the list.
Click on App sizes to see all the installed Windows 8.1 apps, sorted from largest to smallest. To remove an app, select it from the list and click Uninstall.
5. Save files to OneDrive
Microsoft recently increased the amount of free OneDrive cloud storage from 7GB to 15GB. So why not upload files on your PC to OneDrive to make them available on another computer?
You can even configure Windows 8 to do this automatically as OneDrive is now integrated in the operating system.
To start, swipe and bring up the Charms Bar and click on Settings >Change PC settings. Select OneDrive >File storage and toggle the option to save documents to OneDrive by default.
If your PC has a built-in camera, you can also enable it to automatically upload any photos and videos to OneDrive.
You can browse files stored in OneDrive by clicking on the icon in Windows Explorer.
If you are unsure of your Internet connection (and require your files all the time), you should right-click on the OneDrive icon and select the option "Make available offline".
Other related settings include syncing PC settings, including open browser tabs and sign-in information across multiple computers.
For devices with SIM cards, the option to upload files and sync settings should be disabled by default for roaming connections, but double-check this to make sure.
![]()
This article was first published on August 13, 2014.
Get a copy of Digital Life, The Straits Times or go to straitstimes.com for more stories.