An unbelievably simple IKEA hack for storing bulky items - DIY your shopping trolley storage in 4 simple steps

PHOTO: Pexels
Finding a proper storage solution for oddly shaped bulky items is a challenge, especially if they come with wheels! Last weekend, we were presented with a difficult task of finding storage space for a typical shopping trolley with climbing wheels.
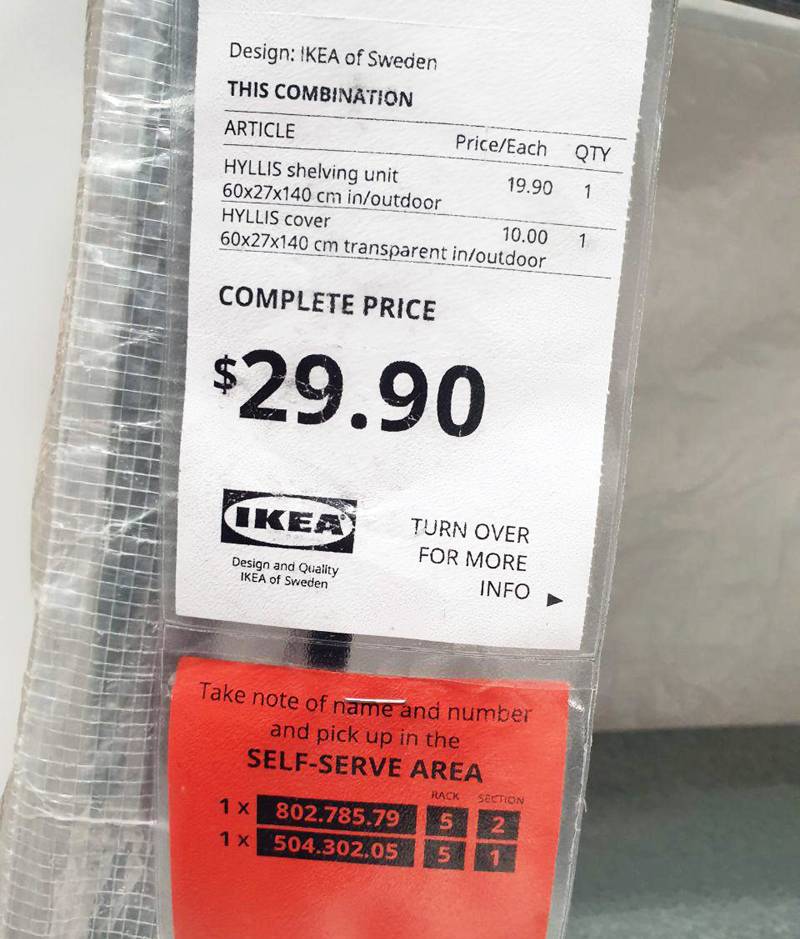
As great fans of IKEA, we decided to start our search there and our findings eventually led us to the open HYLLIS shelving, in/outdoor galvanised unit, which fits snugly in the small balcony.
It is made of galvanised steel which has been coated with zinc to make them corrosion resistant. Furthermore, the open HYLLIS shelf also has a protective cover which transforms it into an enclosed storage solution!
This helps to protect the shopping trolley from water and dust! The semi-opaque cover will keep the stored items away from prying eyes. In addition, there is an opening at the top of the cover for air circulation.
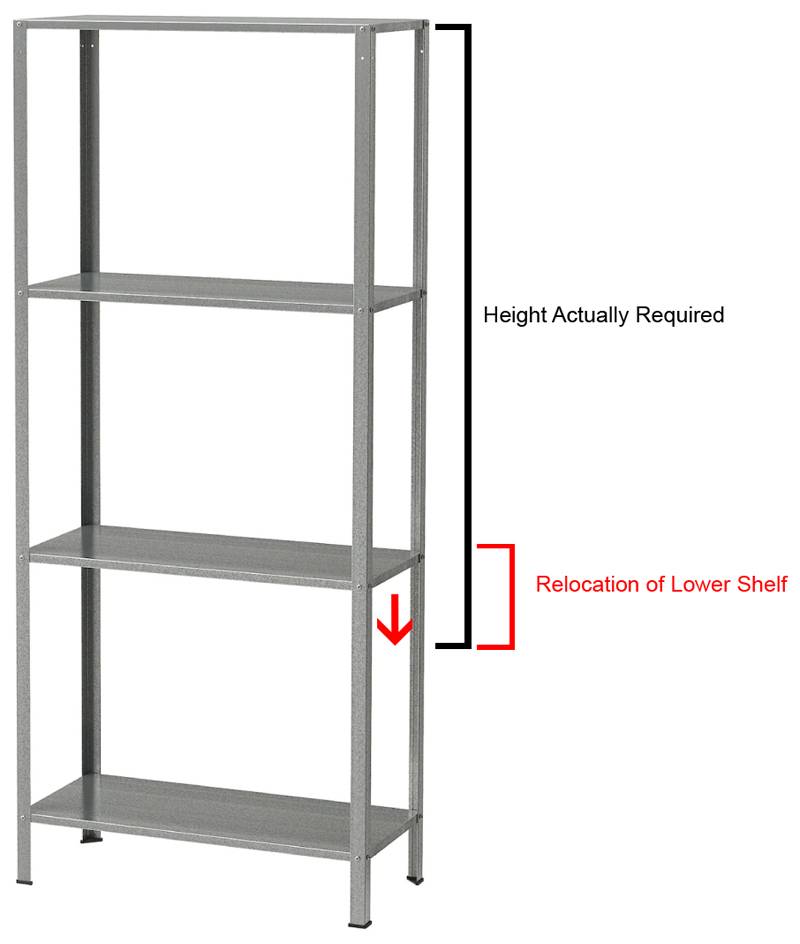
As the open HYLLIS shelf comes with 3 shelves, the lower shelf can be used to store other items too. The total package is very reasonably priced and costs below $30.
Nevertheless, the solution is not perfect. We realised that some simple modifications are needed before the HYLLIS shelf can be used to store the shopping trolley; the lower shelf has to be relocated further down to accommodate the 1m of clearance height set aside for the shopping trolley to be taken in and out of the shelf comfortably.
WHAT ARE THE TOOLS NEEDED?
The relocation of the galvanised steel shelf will need the following:
Estimated time needed: 30 mins
STEP 1: ASSEMBLE THE HYLLIS SHELF
Unpack and follow the instruction manual and assemble the HYLLIS shelf.
Only install the top and the 2nd shelf shelf with the help of the IKEA electric screwdriver.
You can view the following video instructions to assemble the HYLLIS shelf.
[embed]https://youtu.be/6E8KLOZusPs[/embed]
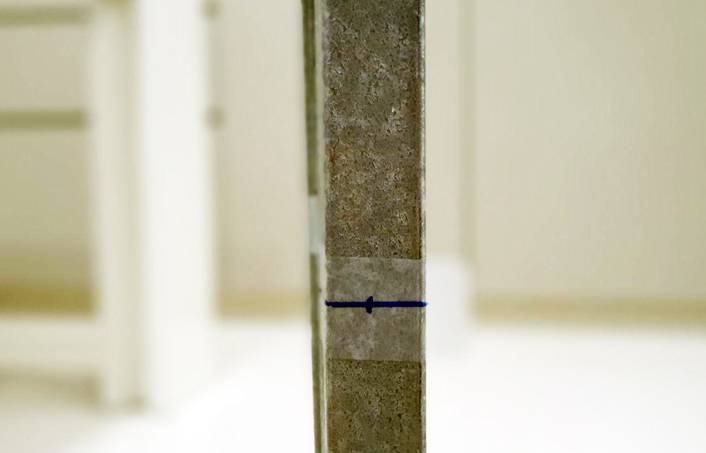
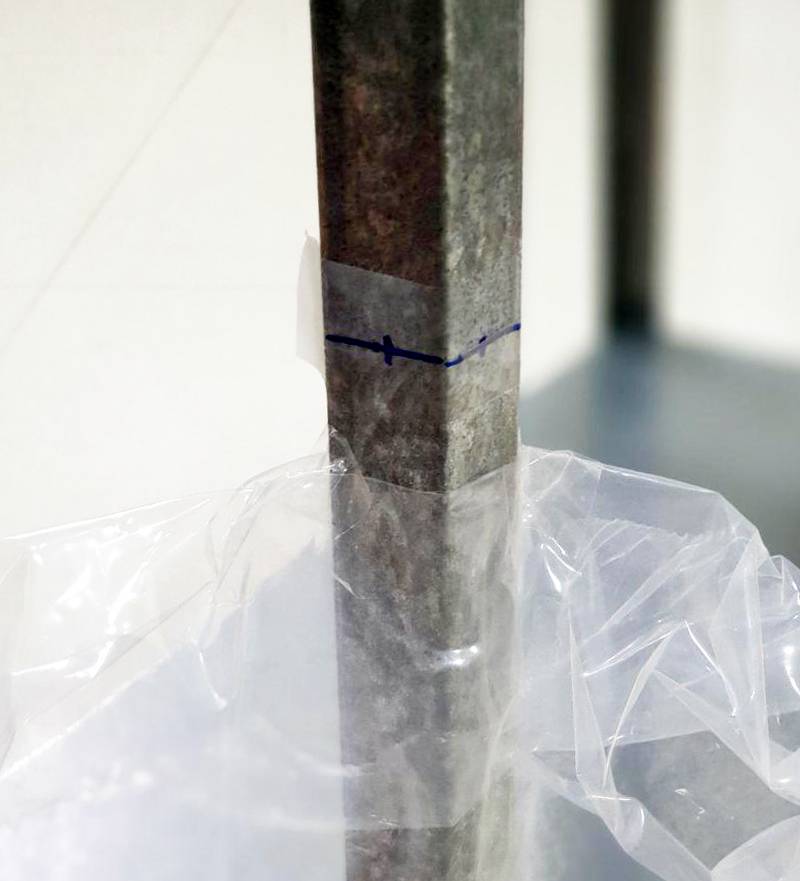
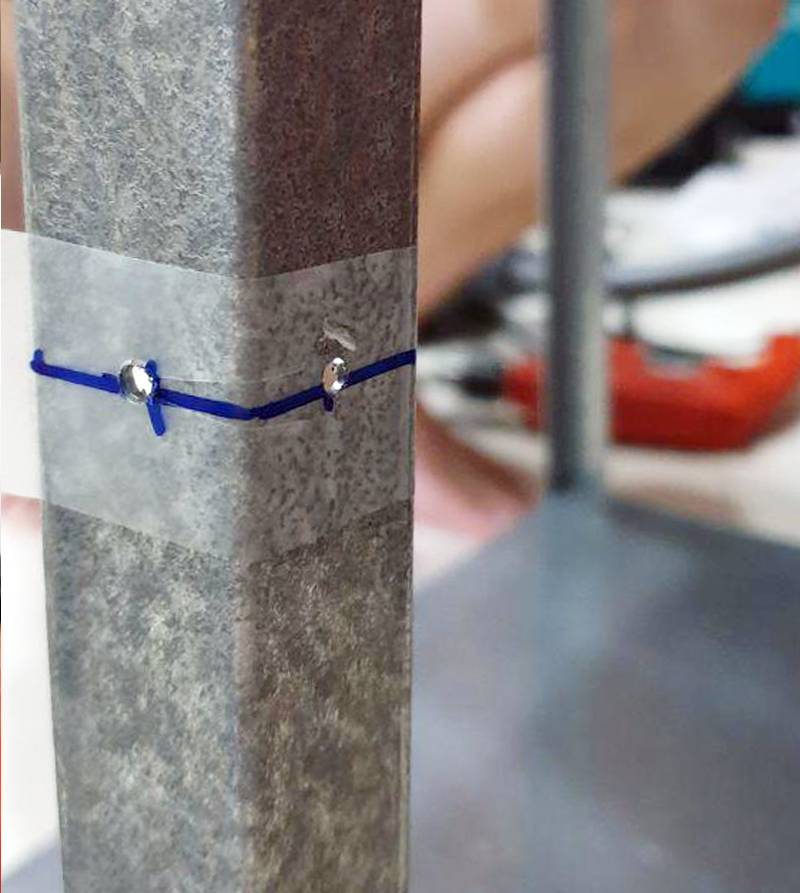
STEP 2: INDICATE THE POSITION OF THE RELOCATED SHELF SCREW-HOLES
Measure the amount of offset needed for the 2nd shelf's screw-holes with the ruler.

Tape the shelf-leg with masking tape, before marking the exact position of the relocated screw-hole with a cross, with the permanent marker.
Repeat the same for the remaining 3 screw-holes.

STEP 3: DRILL THE SCREW-HOLES FOR THE RELOCATED SHELF
The most challenging part of this IKEA hack project is the drilling of the screw-holes. Before the drilling starts, remember to tape a plastic bag near the newly marked screw-holes. The purpose of the plastic bag is to collect the galvanised steel bits that fall out once the drilling starts.
Hold the vacuum hose near the newly marked screw-holes once the drilling begins.

STEP 4: INSTALL THE RELOCATED SHELF
Once the screw-holes have been successfully created, install the 2nd shelf with the help of the IKEA electric screwdriver.

We have decided to store the unused shelf on the 2nd shelf, before covering it with the protective cover. This step also marks the end of our simple IKEA hack project!
THE FINAL PRODUCT; AN OUTDOOR SHOPPING TROLLEY STORAGE SOLUTION!
Here is how the HYLLIS shelf looks like after having one of its shelves relocated.

A bungee cord is used to secure the shopping trolley to the shelf. In addition, there is still plenty of space left for storing of other household stuffs too!

You do not always have to rely on expensive off-the-shelf storage rack for your home; with a small hack and a tiny bit of work and patience, you can easily convert and tailor any ready-made solution to address your specific needs!
This article was first published in Renonation.