

An $80k HDB renovation breakdown: How this couple achieved a cosy dark modern theme at home

PHOTO: Stackedhomes
It is often said that paint is the most affordable way to make a drastic change to a space. Especially when you convert to a dark mode, the vibe that you create is one of incredible cosiness (with the right lighting too, of course). Do it right, and you may just never want to leave home.
So while a darker theme is often not as advised when you have a smaller space, Charlene and Nigel had the luxury of a spacious 1,377 square foot home to play around with. (Follow their reno journey at Seventhfloorflat).
Curious how first-time homeowners Charlene and Nigel pulled their dark-themed home off? Let’s take a closer look.
The couple’s initial reno budget for their 5-room HDB unit was $100k. But they were able to tone it down even before they started the actual renovation. “We did some financial projections and decided to keep it at $80k. Then when we proposed our budget to IDs, we told them $55-60k,” Charlene shared.
“The initial quotation with our ID went up to more than $90k, but we managed to push it back down to $80k,” she added. Indeed, it took some haggling. But setting a bigger initial budget can give you more room to manoeuvre in case of unexpected expenses. And fortunately for the couple, these unforeseen costs didn’t come during the renovation.
If you’re flustered about the $80k renovation cost, here are two of the most painful costs their budget had to endure – the windows and the feature wall.
“Since our windows were ¾ length, they had to be considered and renovated as full-length windows,” said Charlene.
Under HDB regulations, they had to shell out additional money for Professional Engineers to come and endorse. She elaborated more, “We also had to pay extra for the different window changing method, and then paying even more for the special glass that is needed to ensure the integrity of the building’s structure.”
Since they decided to lengthen their living room’s feature wall, they had to pay double the usual price of such a task.
Still, their budget was able to cover the costs, so it was well and good on this front. But what about their design and style choice?
“It was mostly inspired by Nigel’s love for the black and dark house kind of look,” Charlene revealed, “while I liked a bright and breezy house. But I also like the clean and modern look that dark houses offered.”
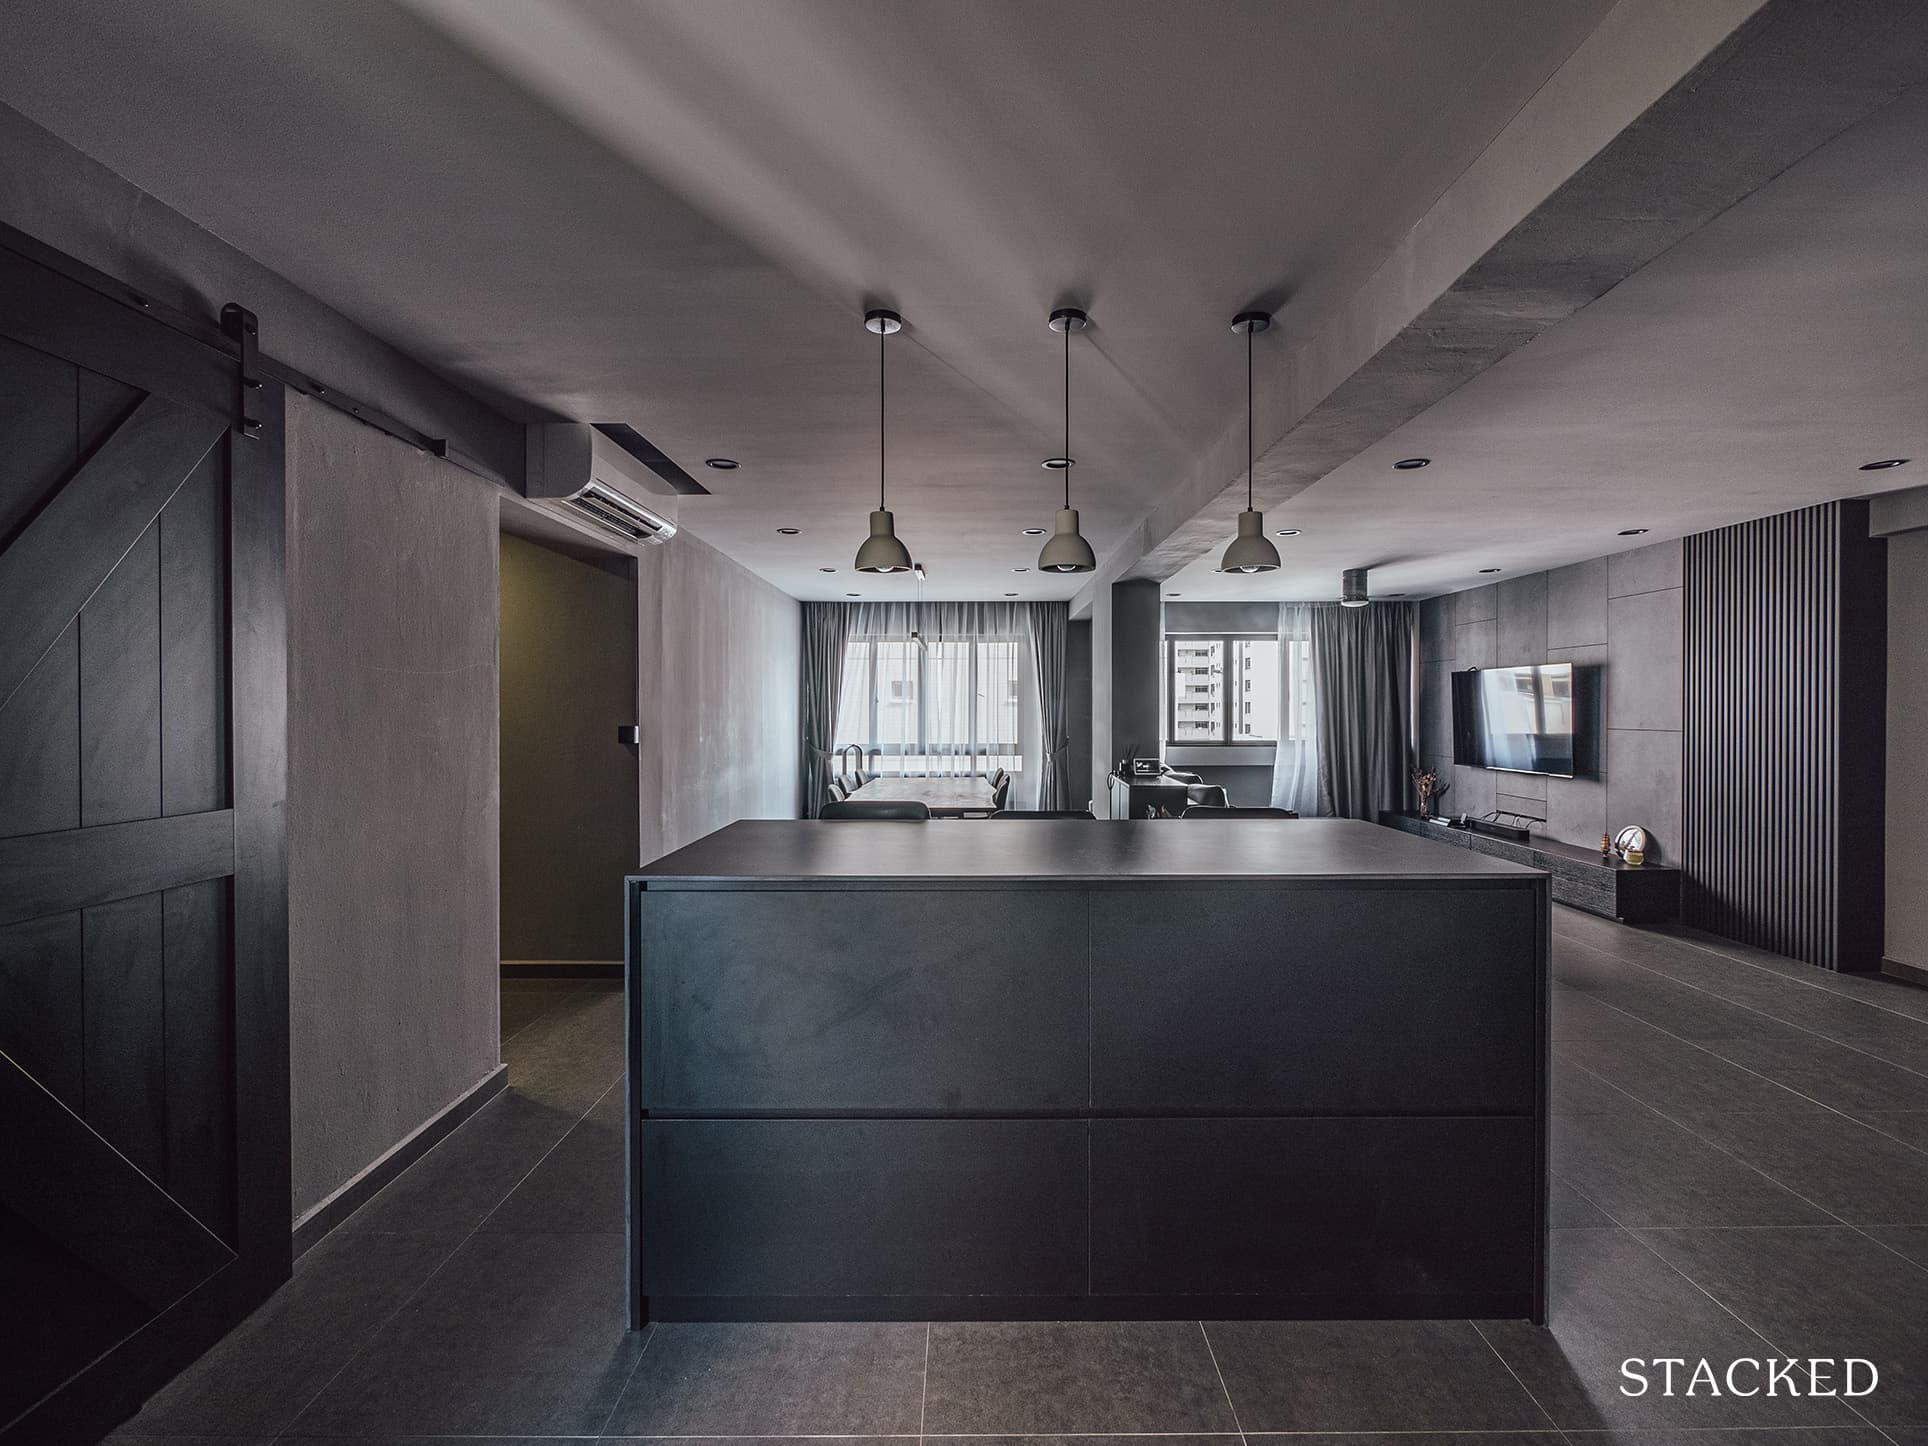
And, sure enough, their home now radiates a sleek and contemporary look.
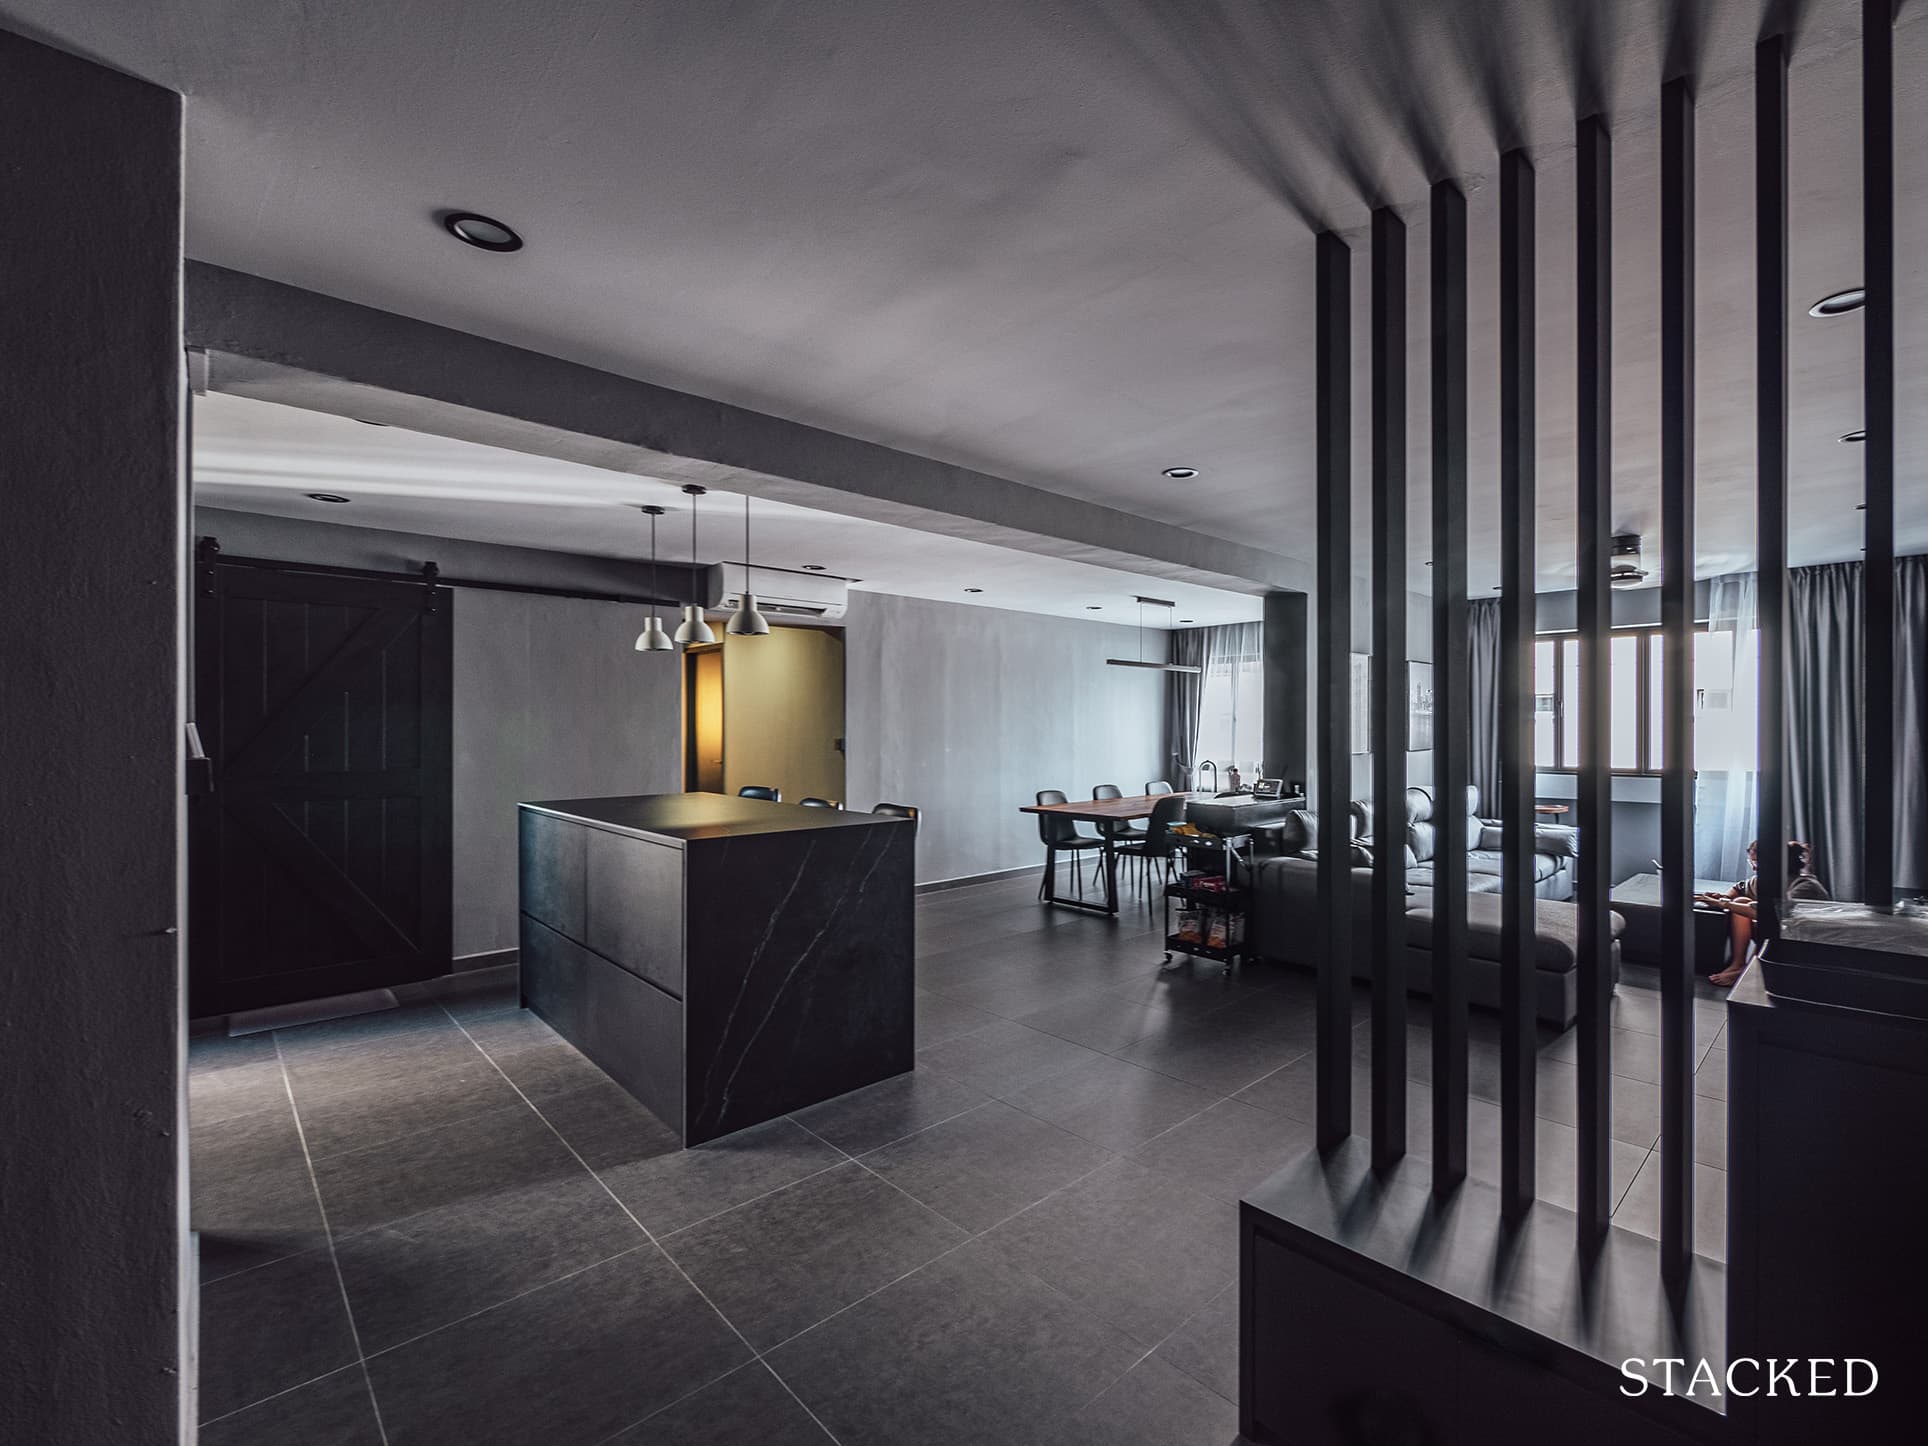
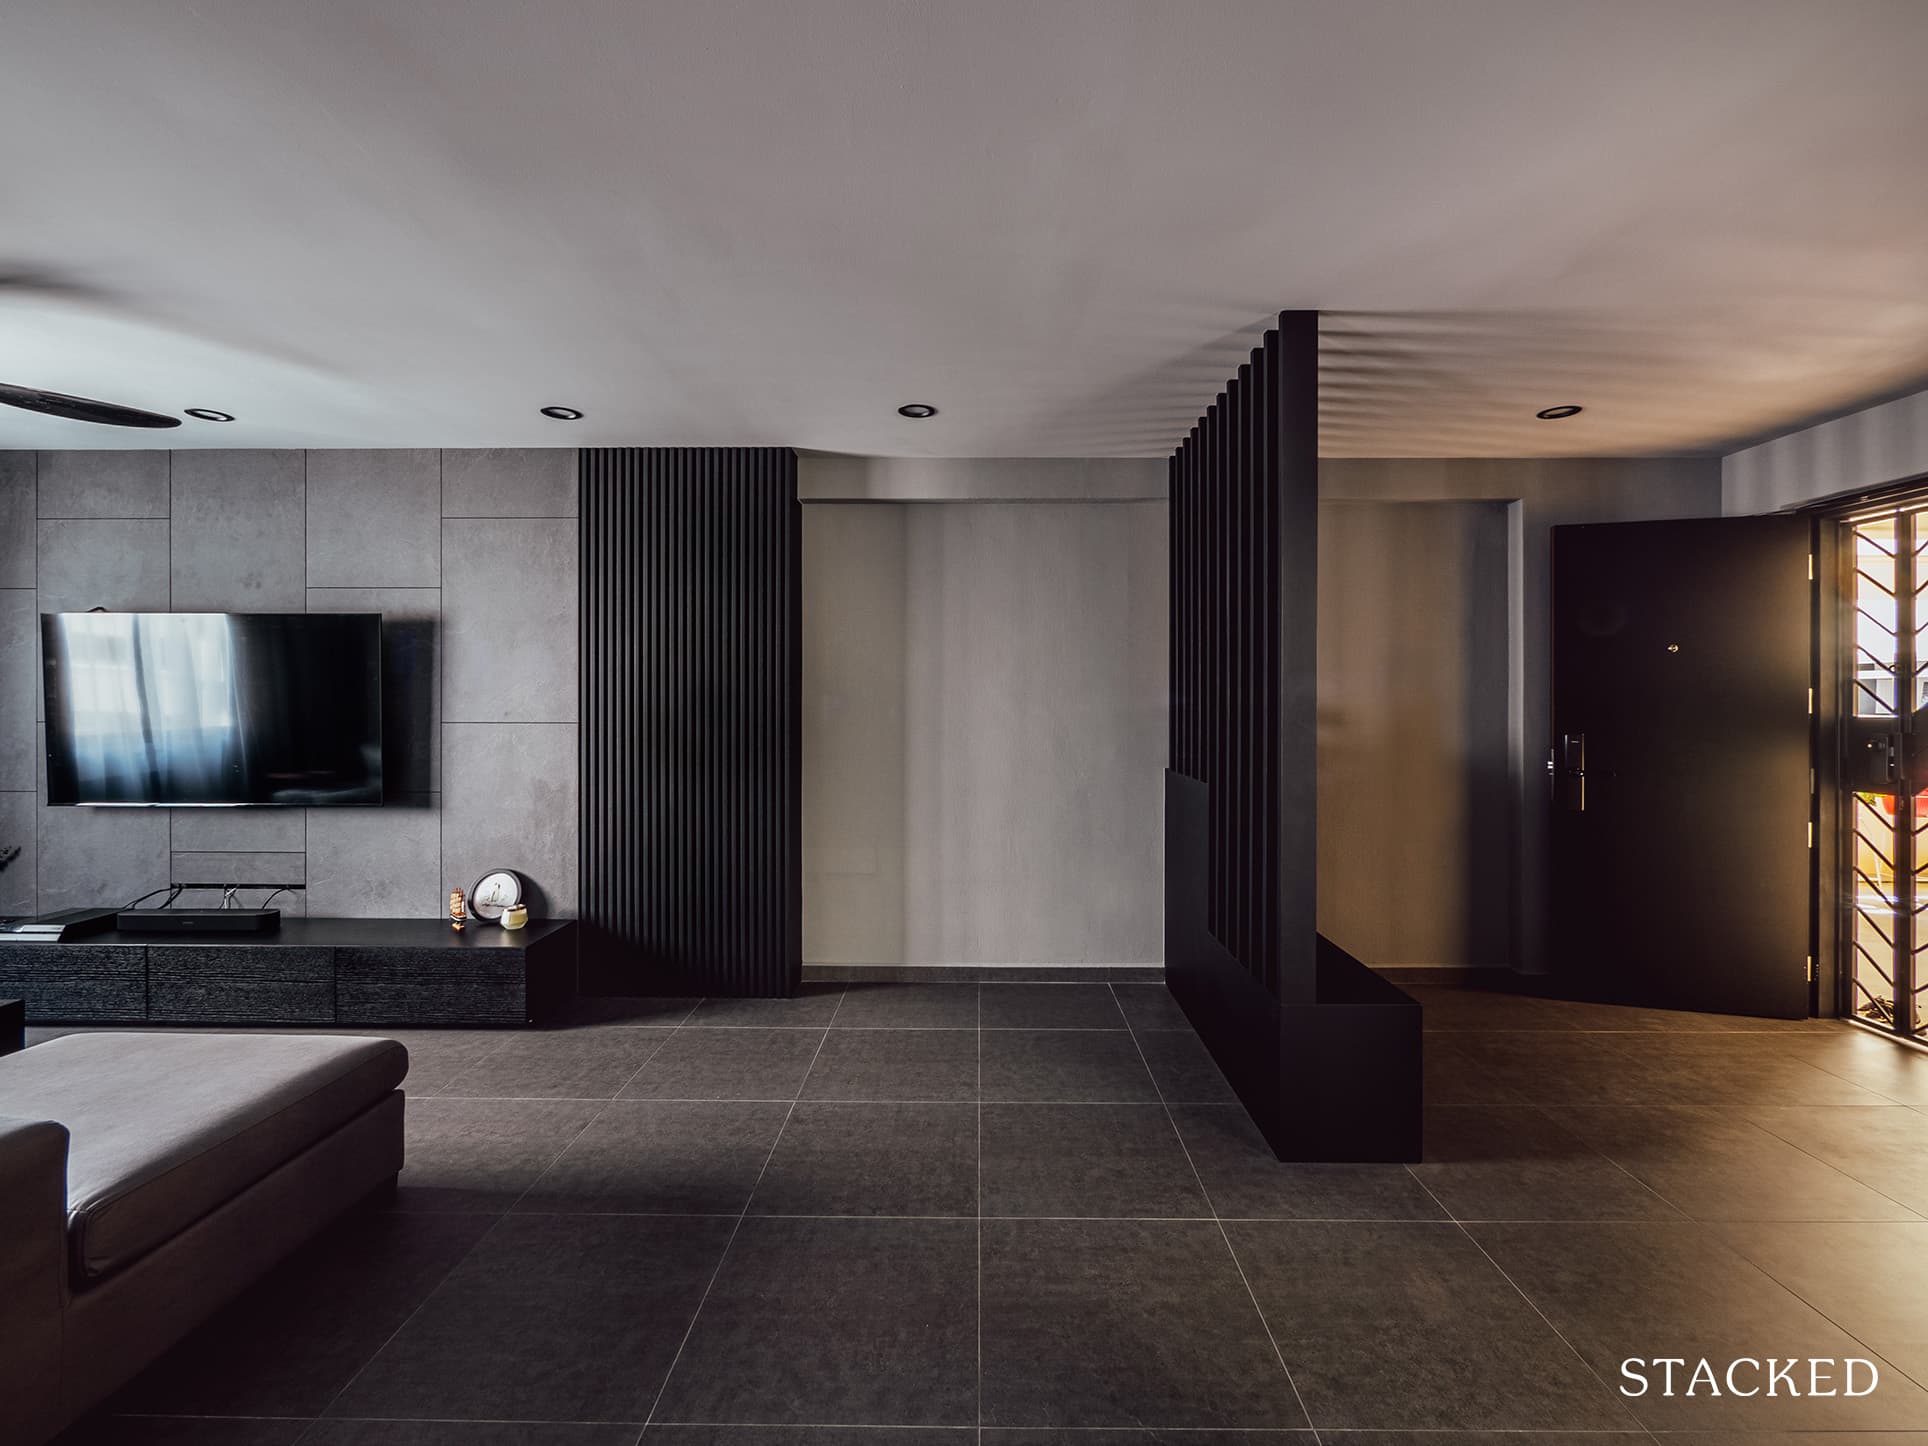
The couple didn’t follow a fixed style, though. Instead, they picked and chose certain key features they wanted, such as their fluted panel feature wall and niche in the master’s bedroom. The rule of thumb they both decided to follow is to adhere to the colour scheme.
The couple created a small foyer at the entrance, furnishing it with a shoe cabinet and a settee. But aside from the functional purpose, it also satisfies their parents’ Feng shui demands. They installed a fluted panel style to “block the bad energy coming from the staircase and facing the front door directly,” as Charlene said.
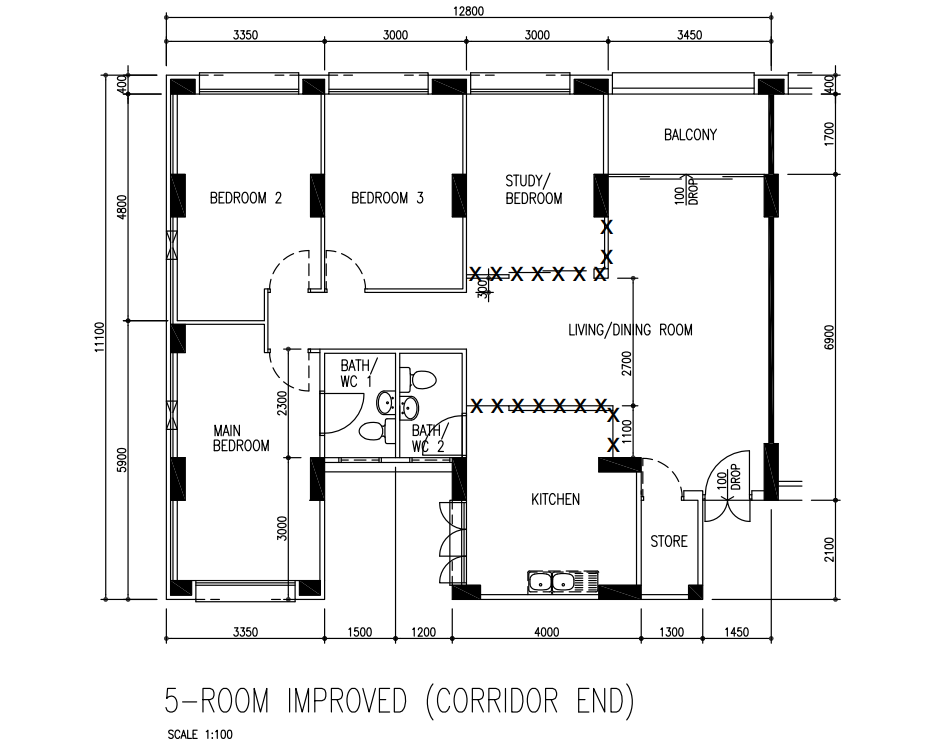
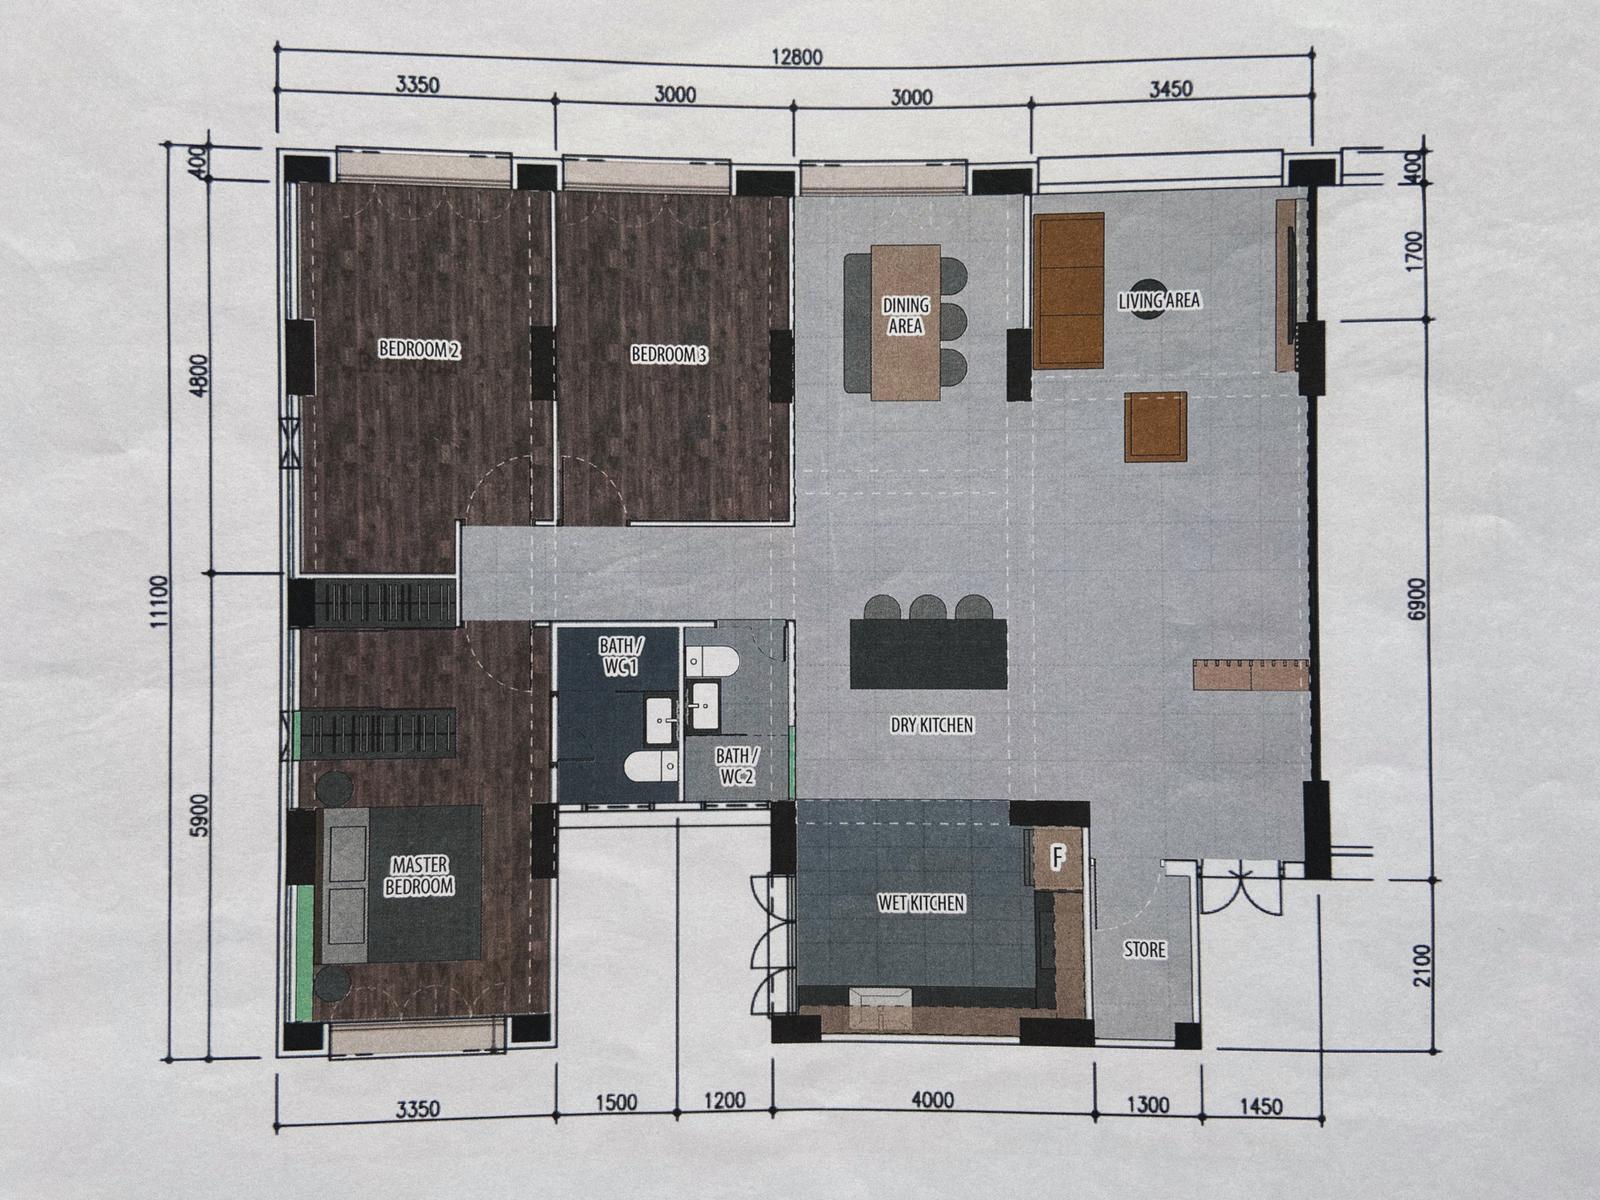
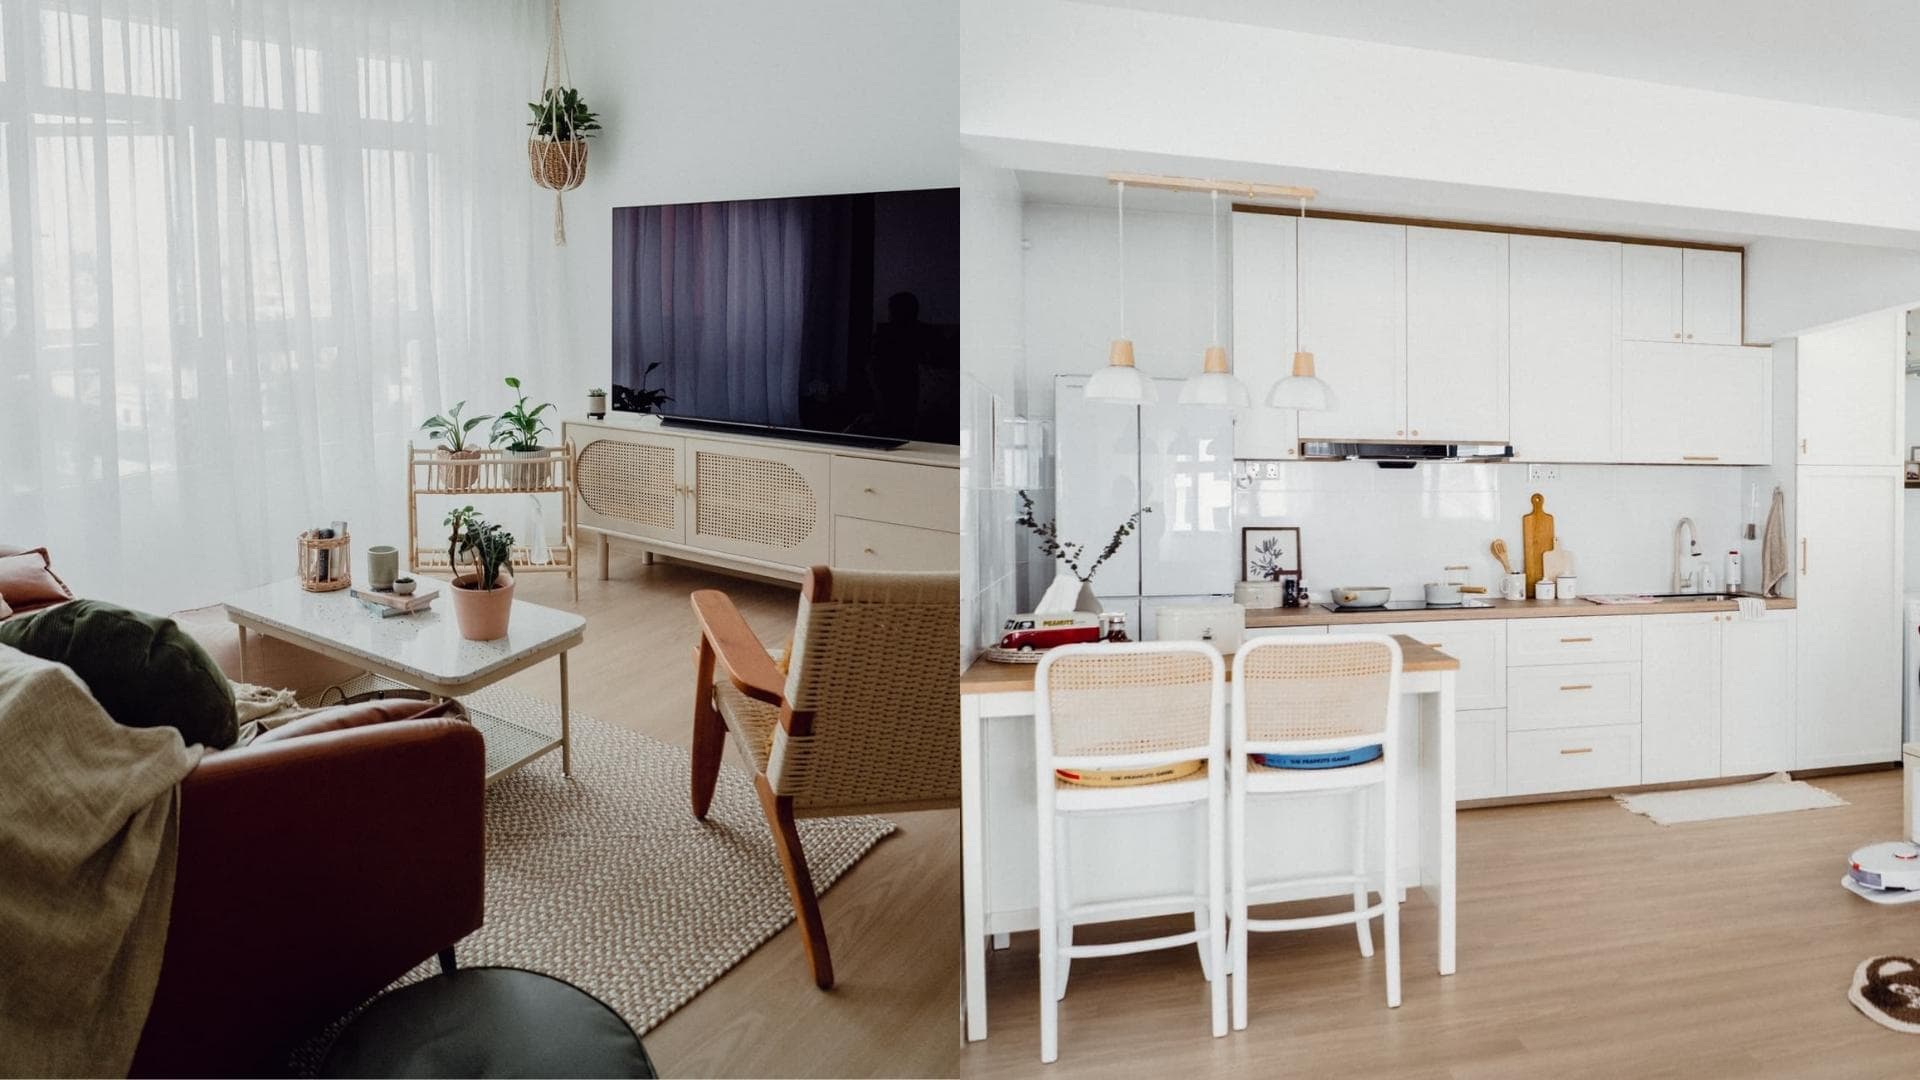
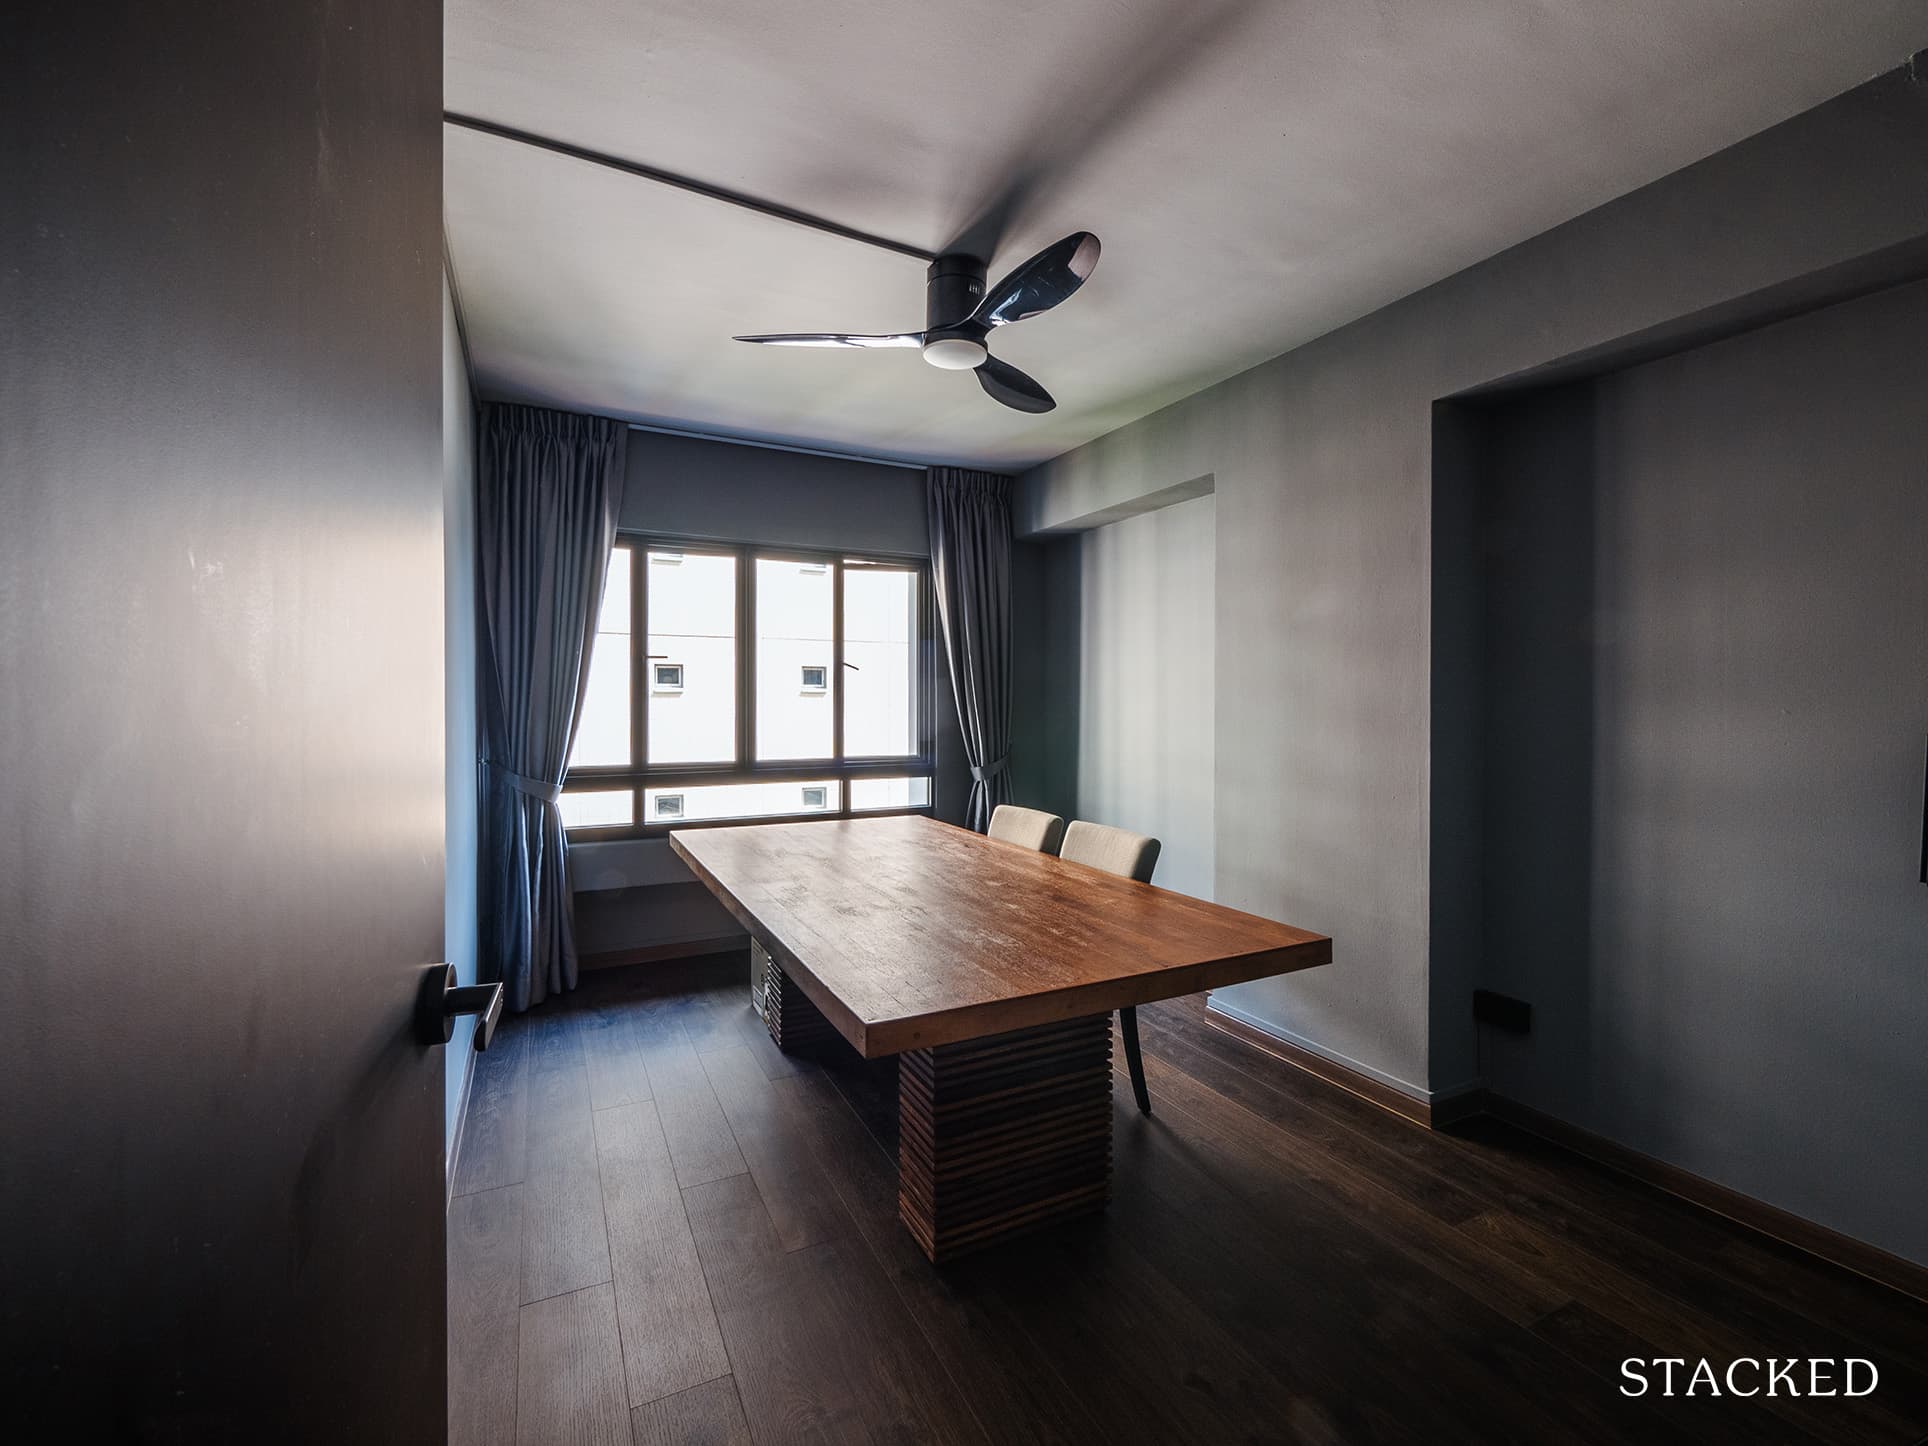
While not necessarily a full open concept floor plan, the couple’s decision to level out the balcony made the living room bigger. Charlene mentioned that the original floor plan featured a fourth bedroom, but the previous owners had already hacked the wall, so thankfully they didn’t have to incur additional costs.
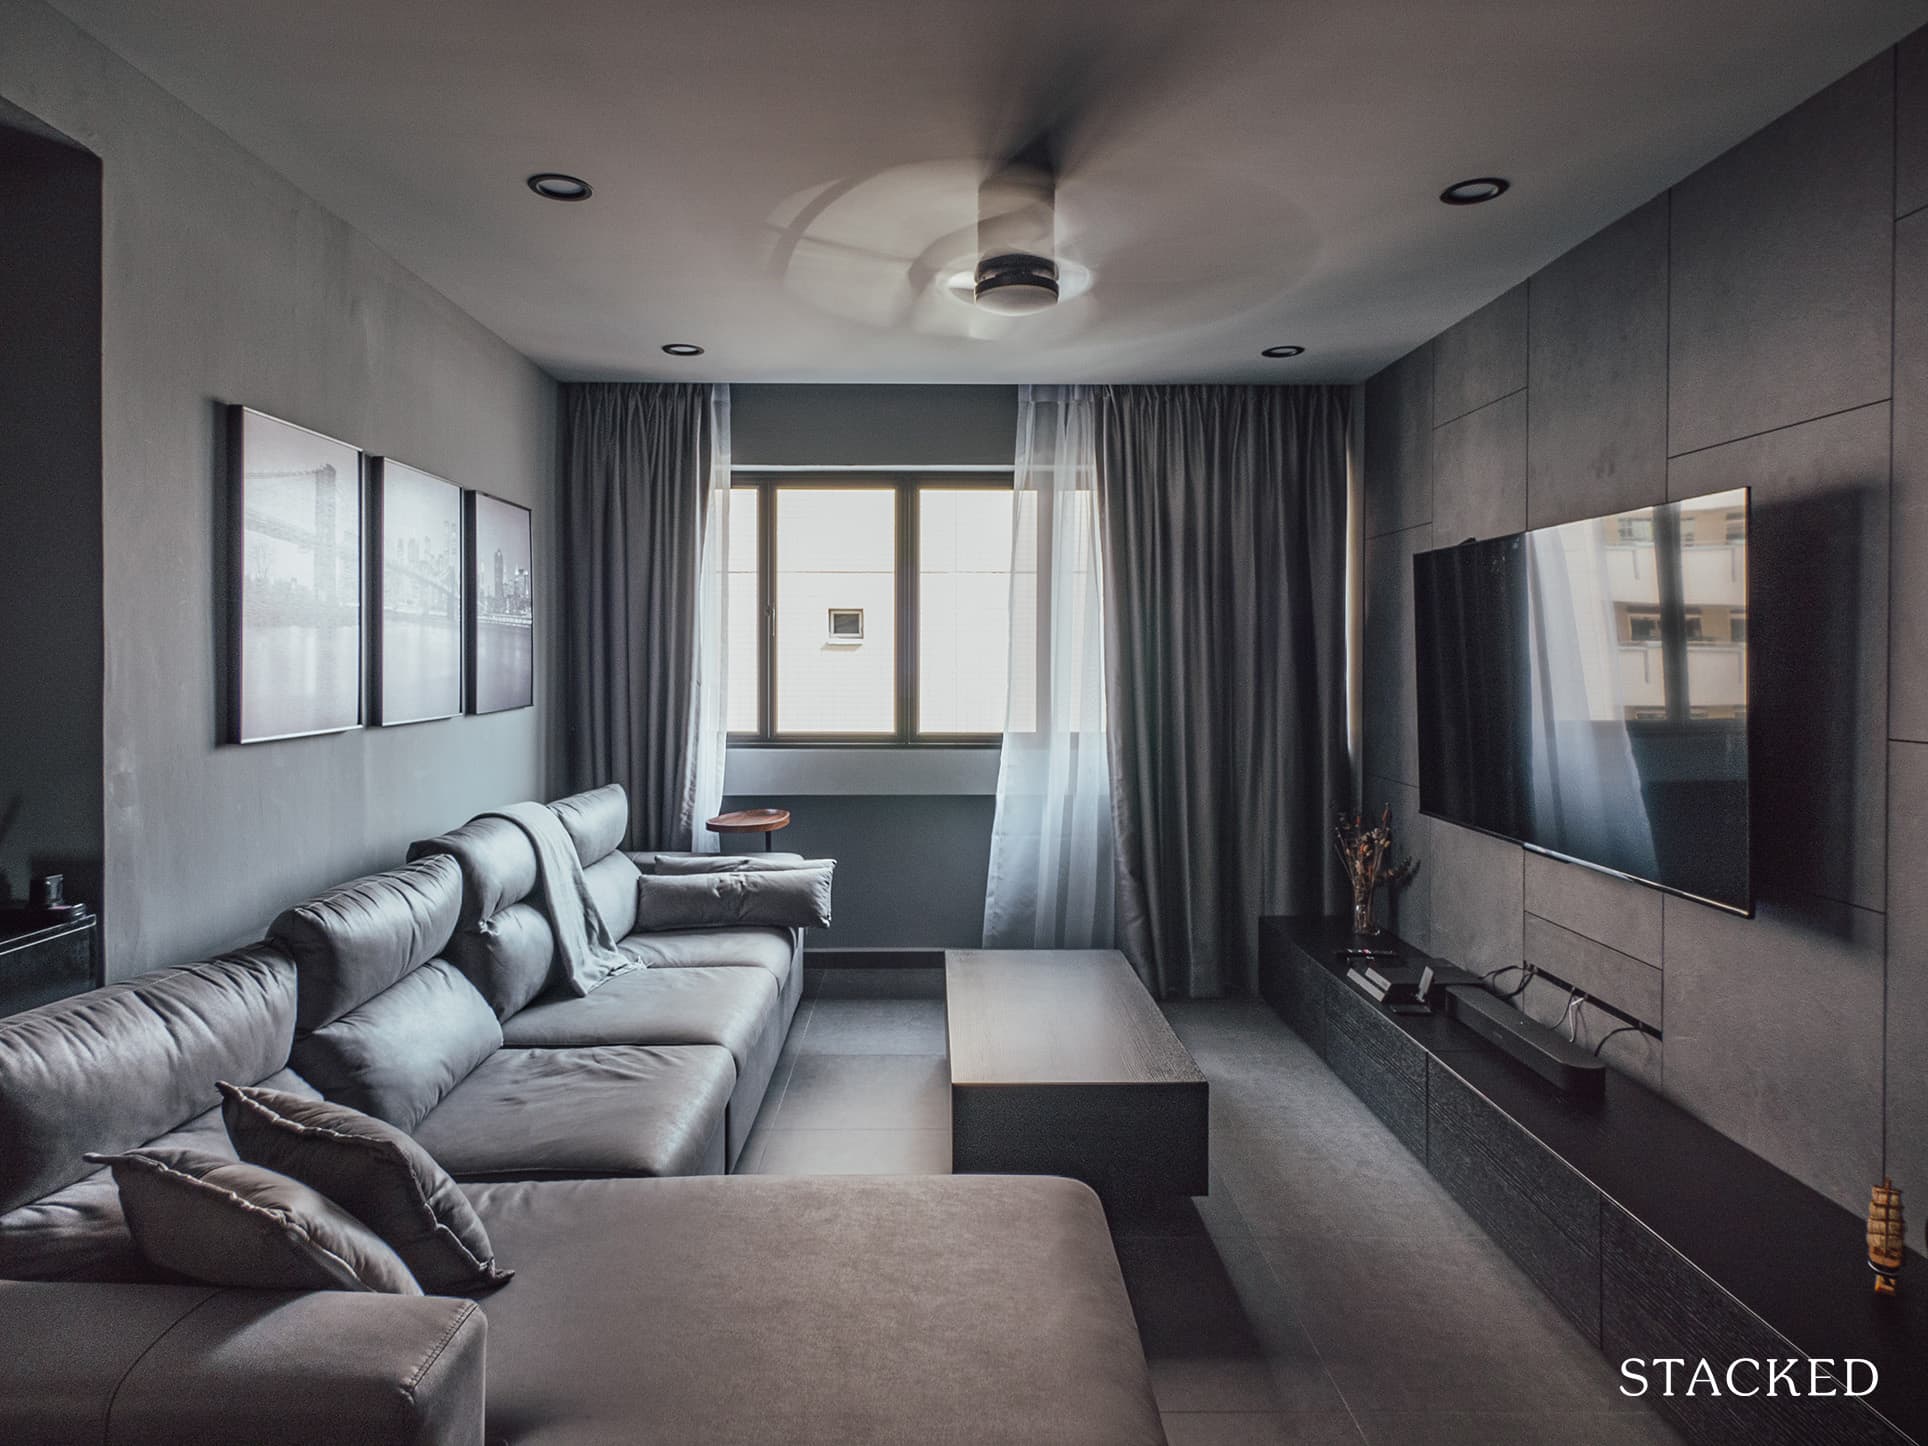
Truly, the hacked wall of the fourth bedroom allowed the living room to have a bigger space.
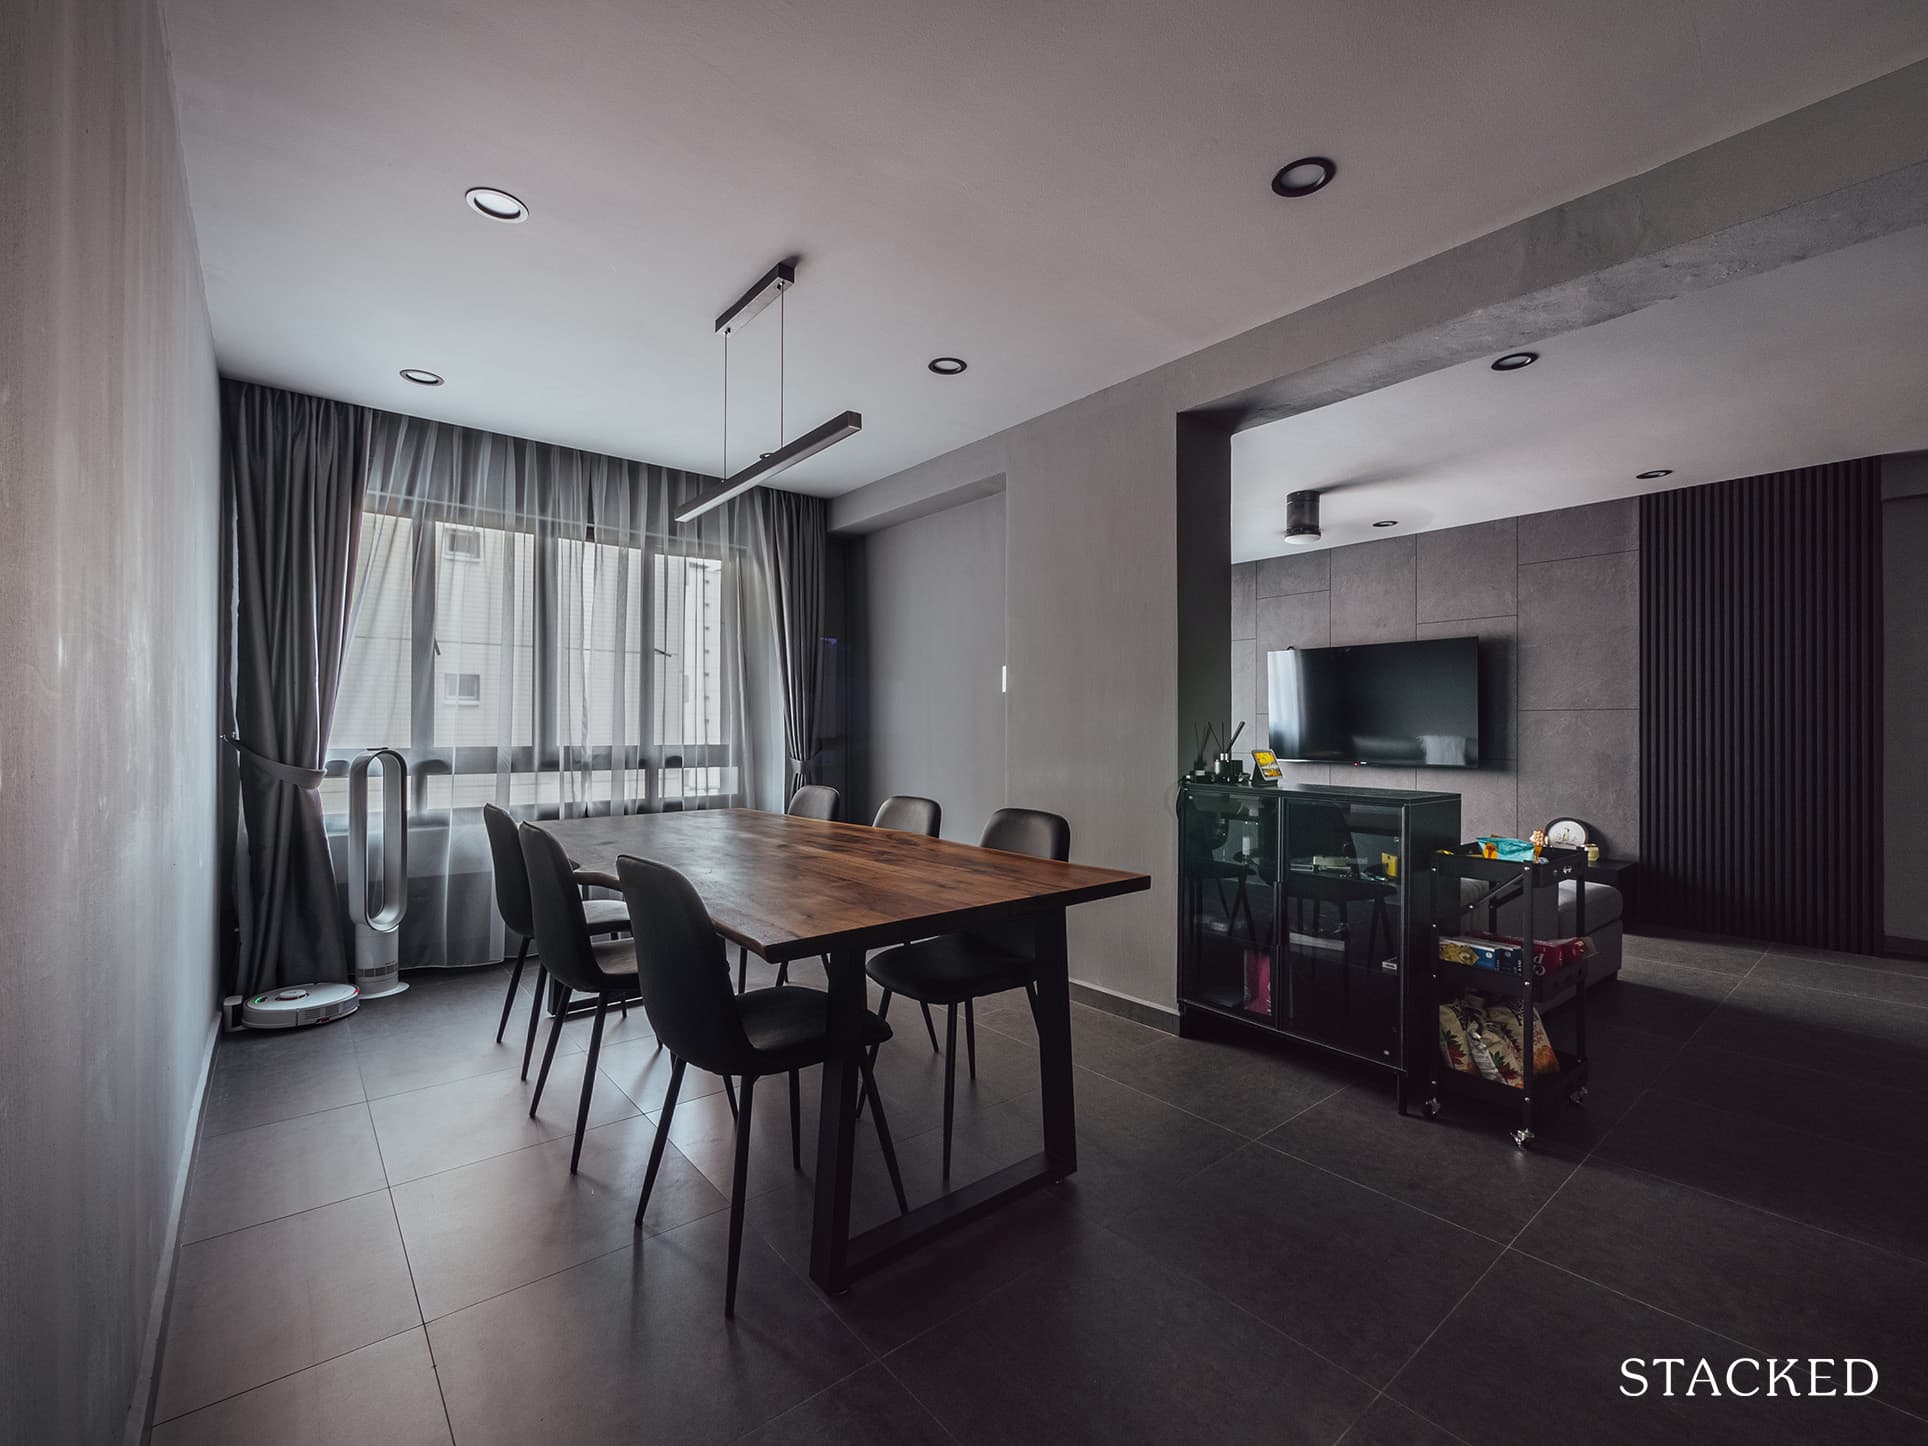
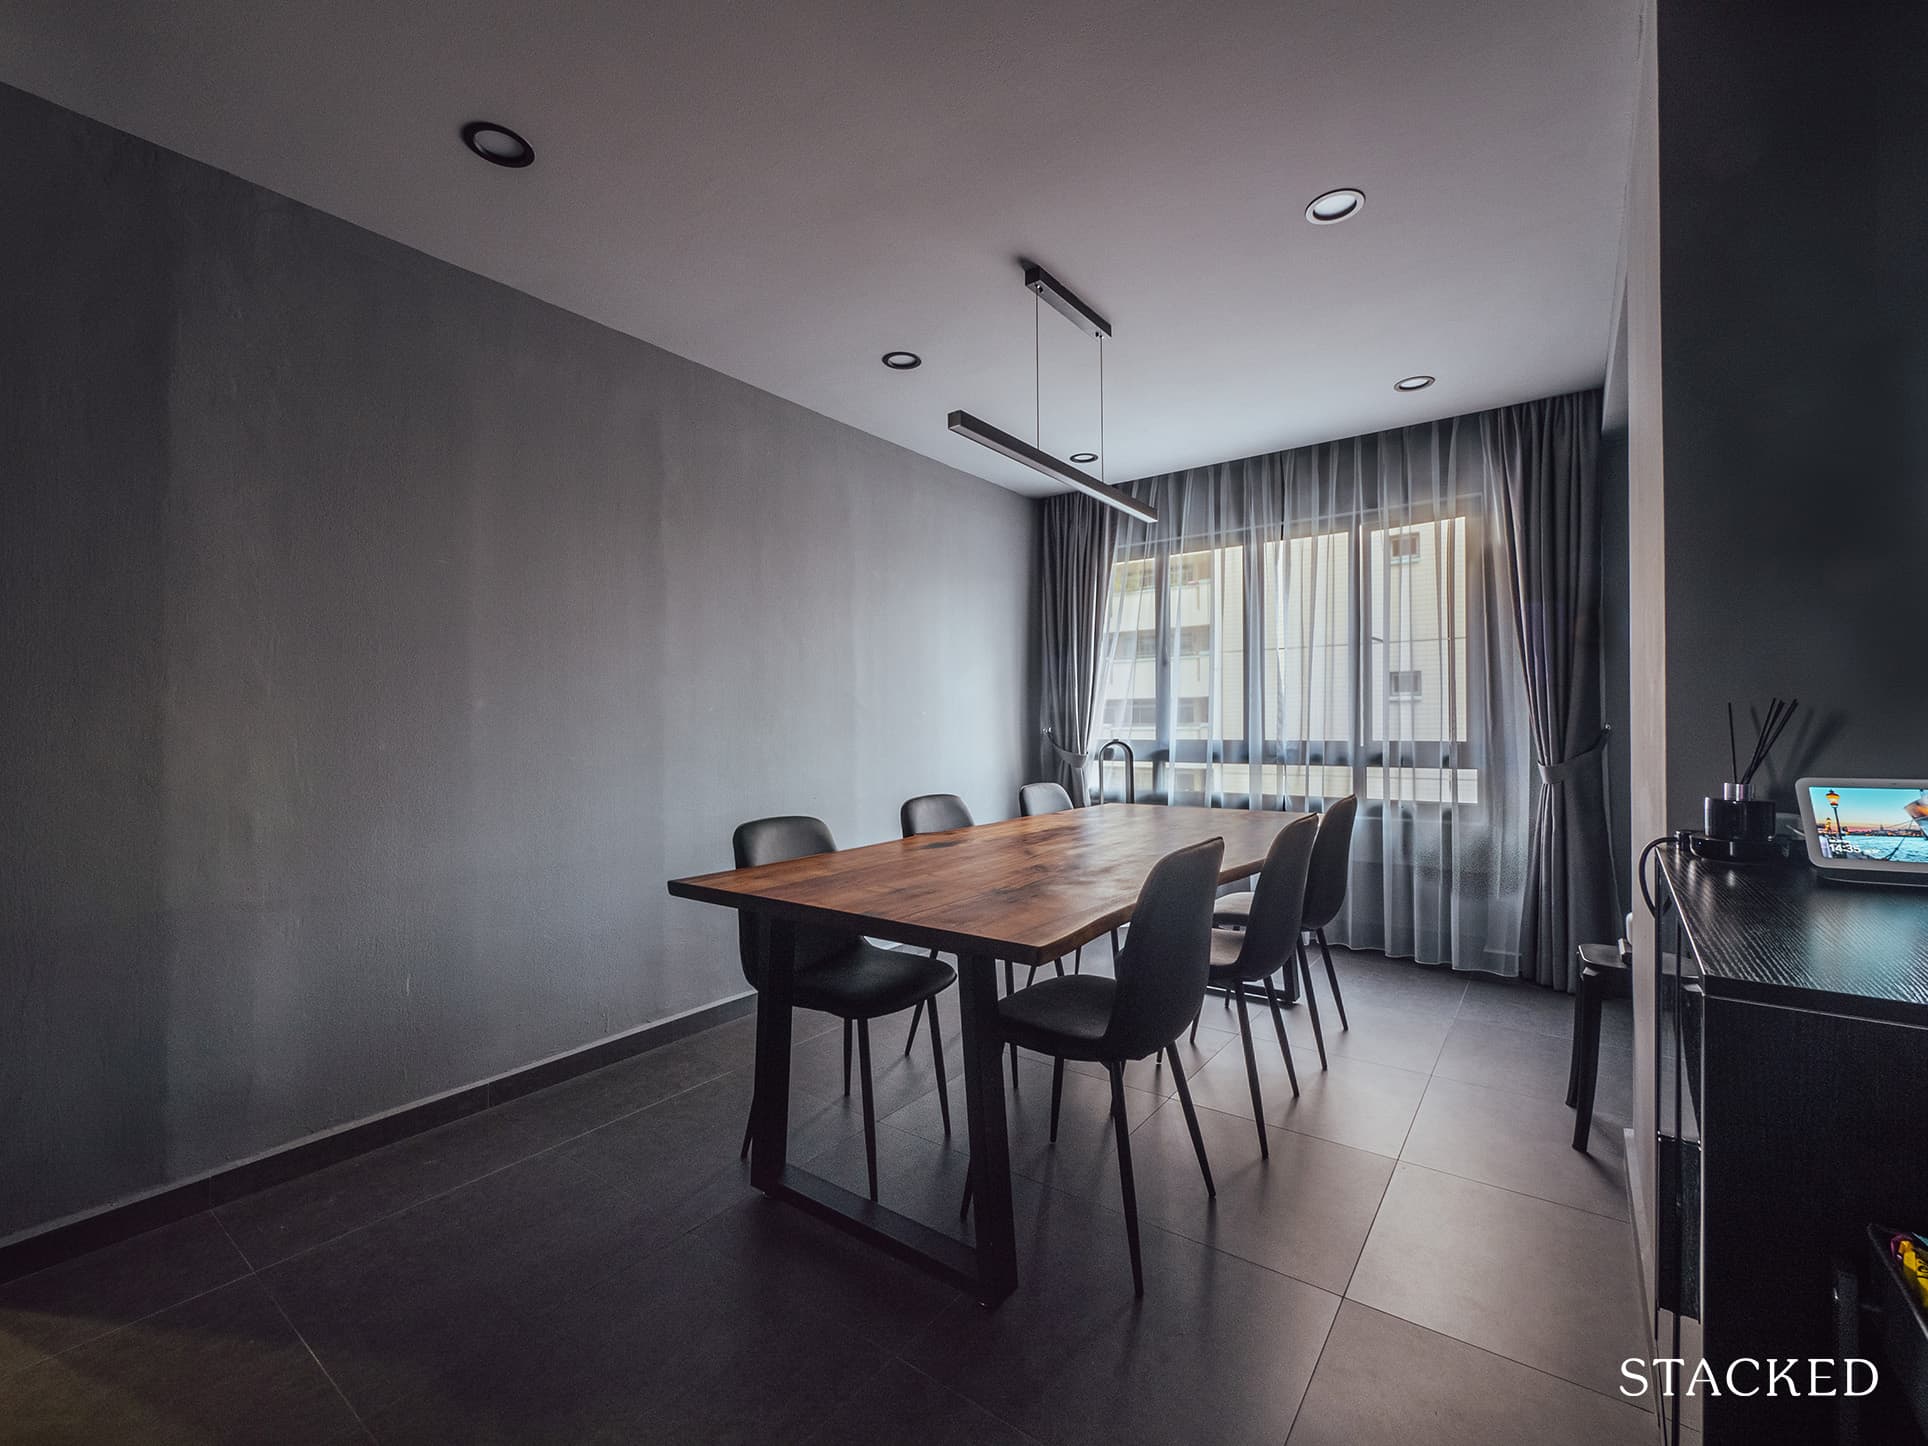
The colours of both rooms were consistent with the monochromatic theme of the house. Except for the brown dining table, everything in their home was in black and grey. And so apart from providing a good accent in the dining area, the table favourably added warmth to the place.
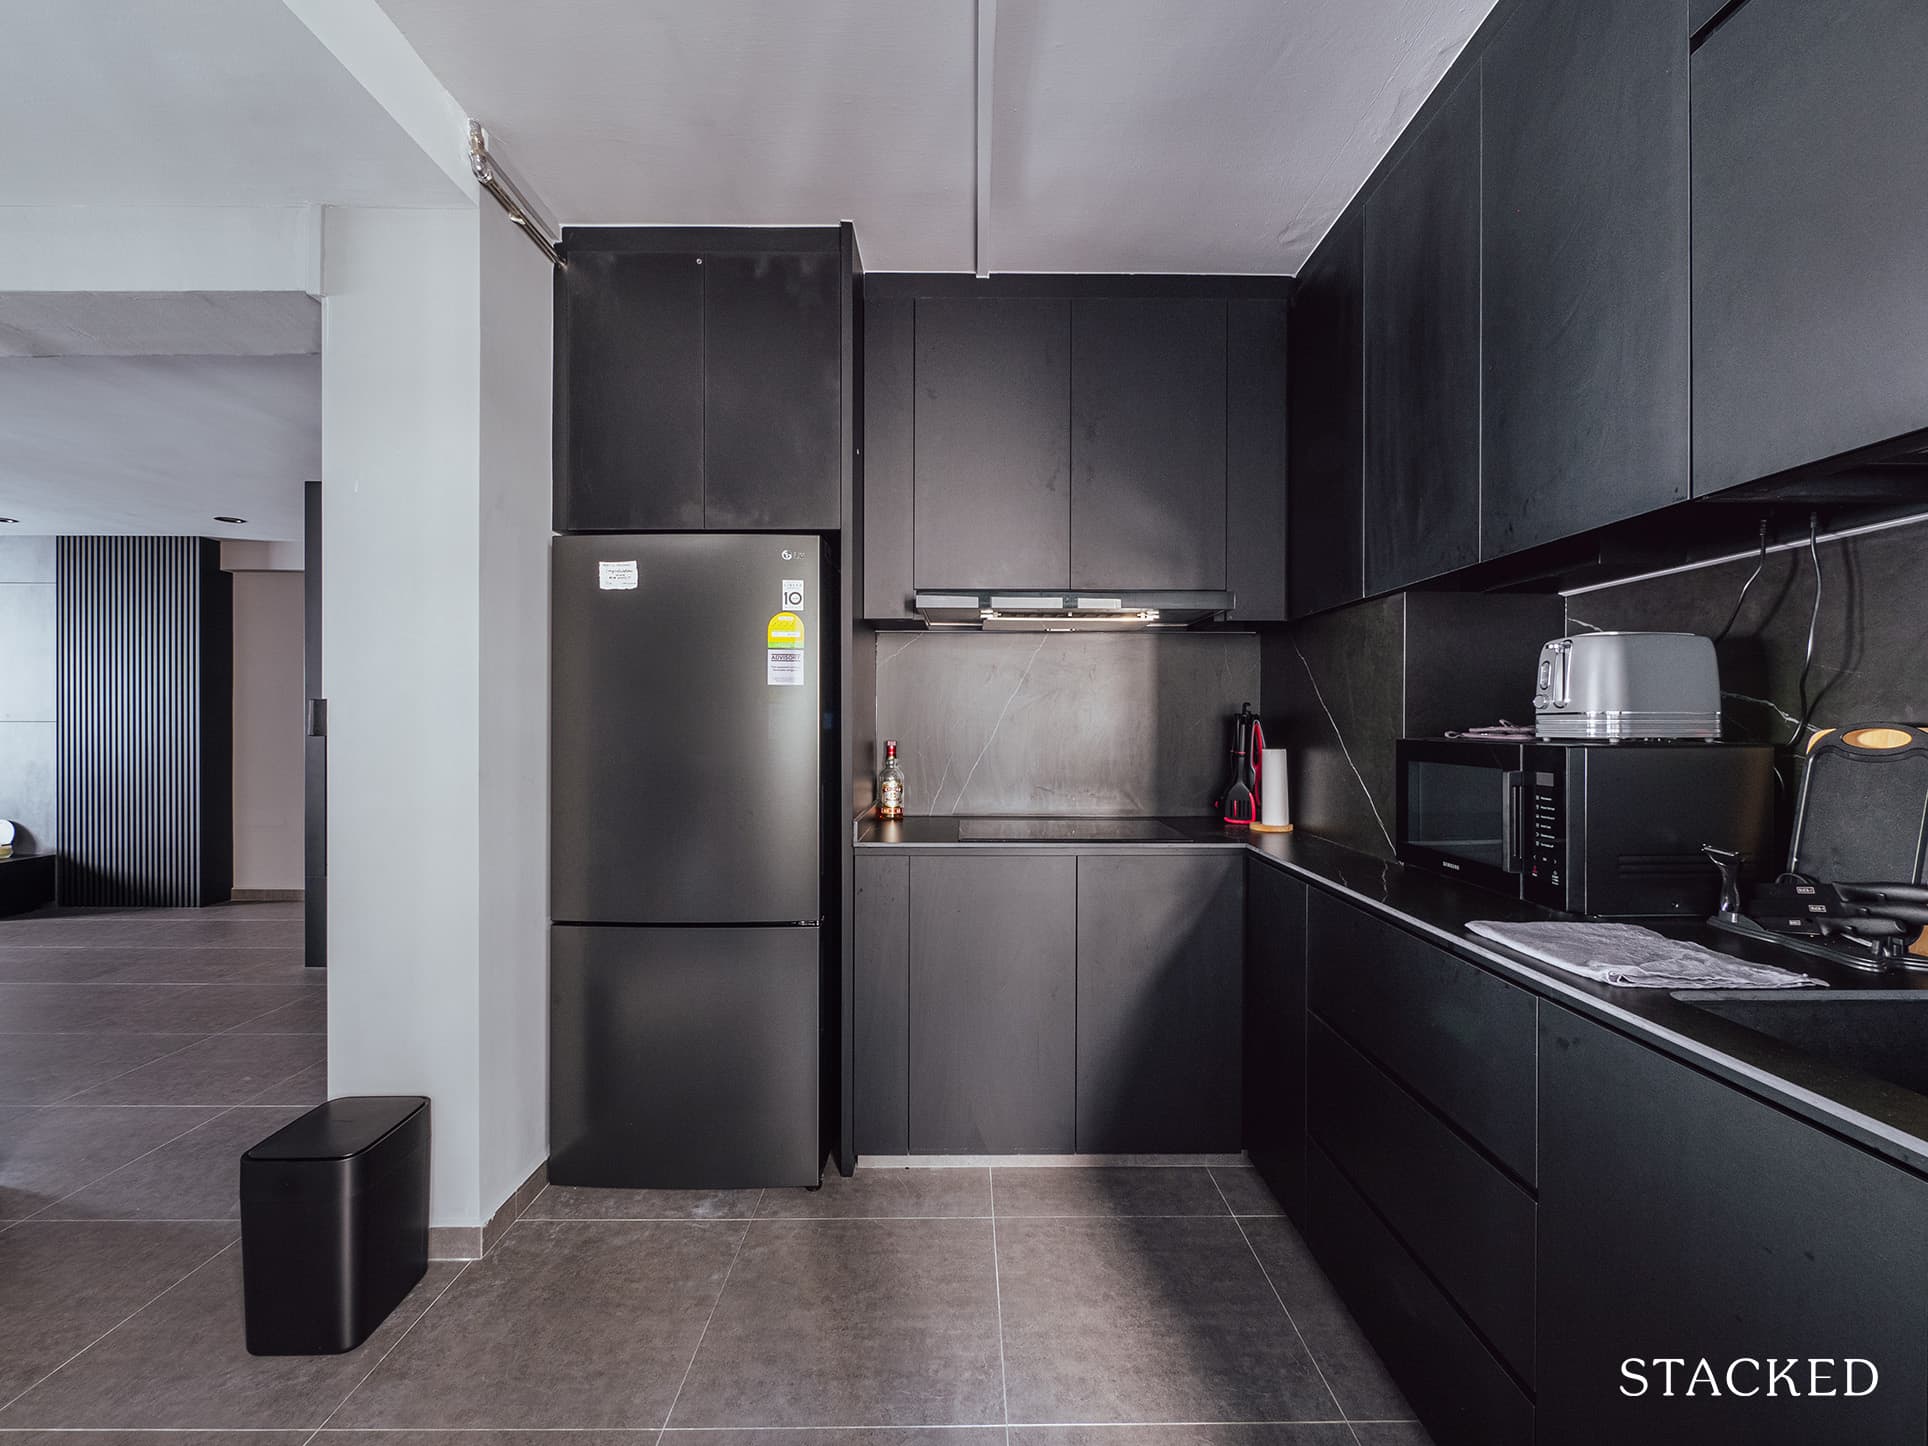
Most of the changes in the kitchen were functional, but the couple ensured that the furnishings followed their preferred colour scheme.
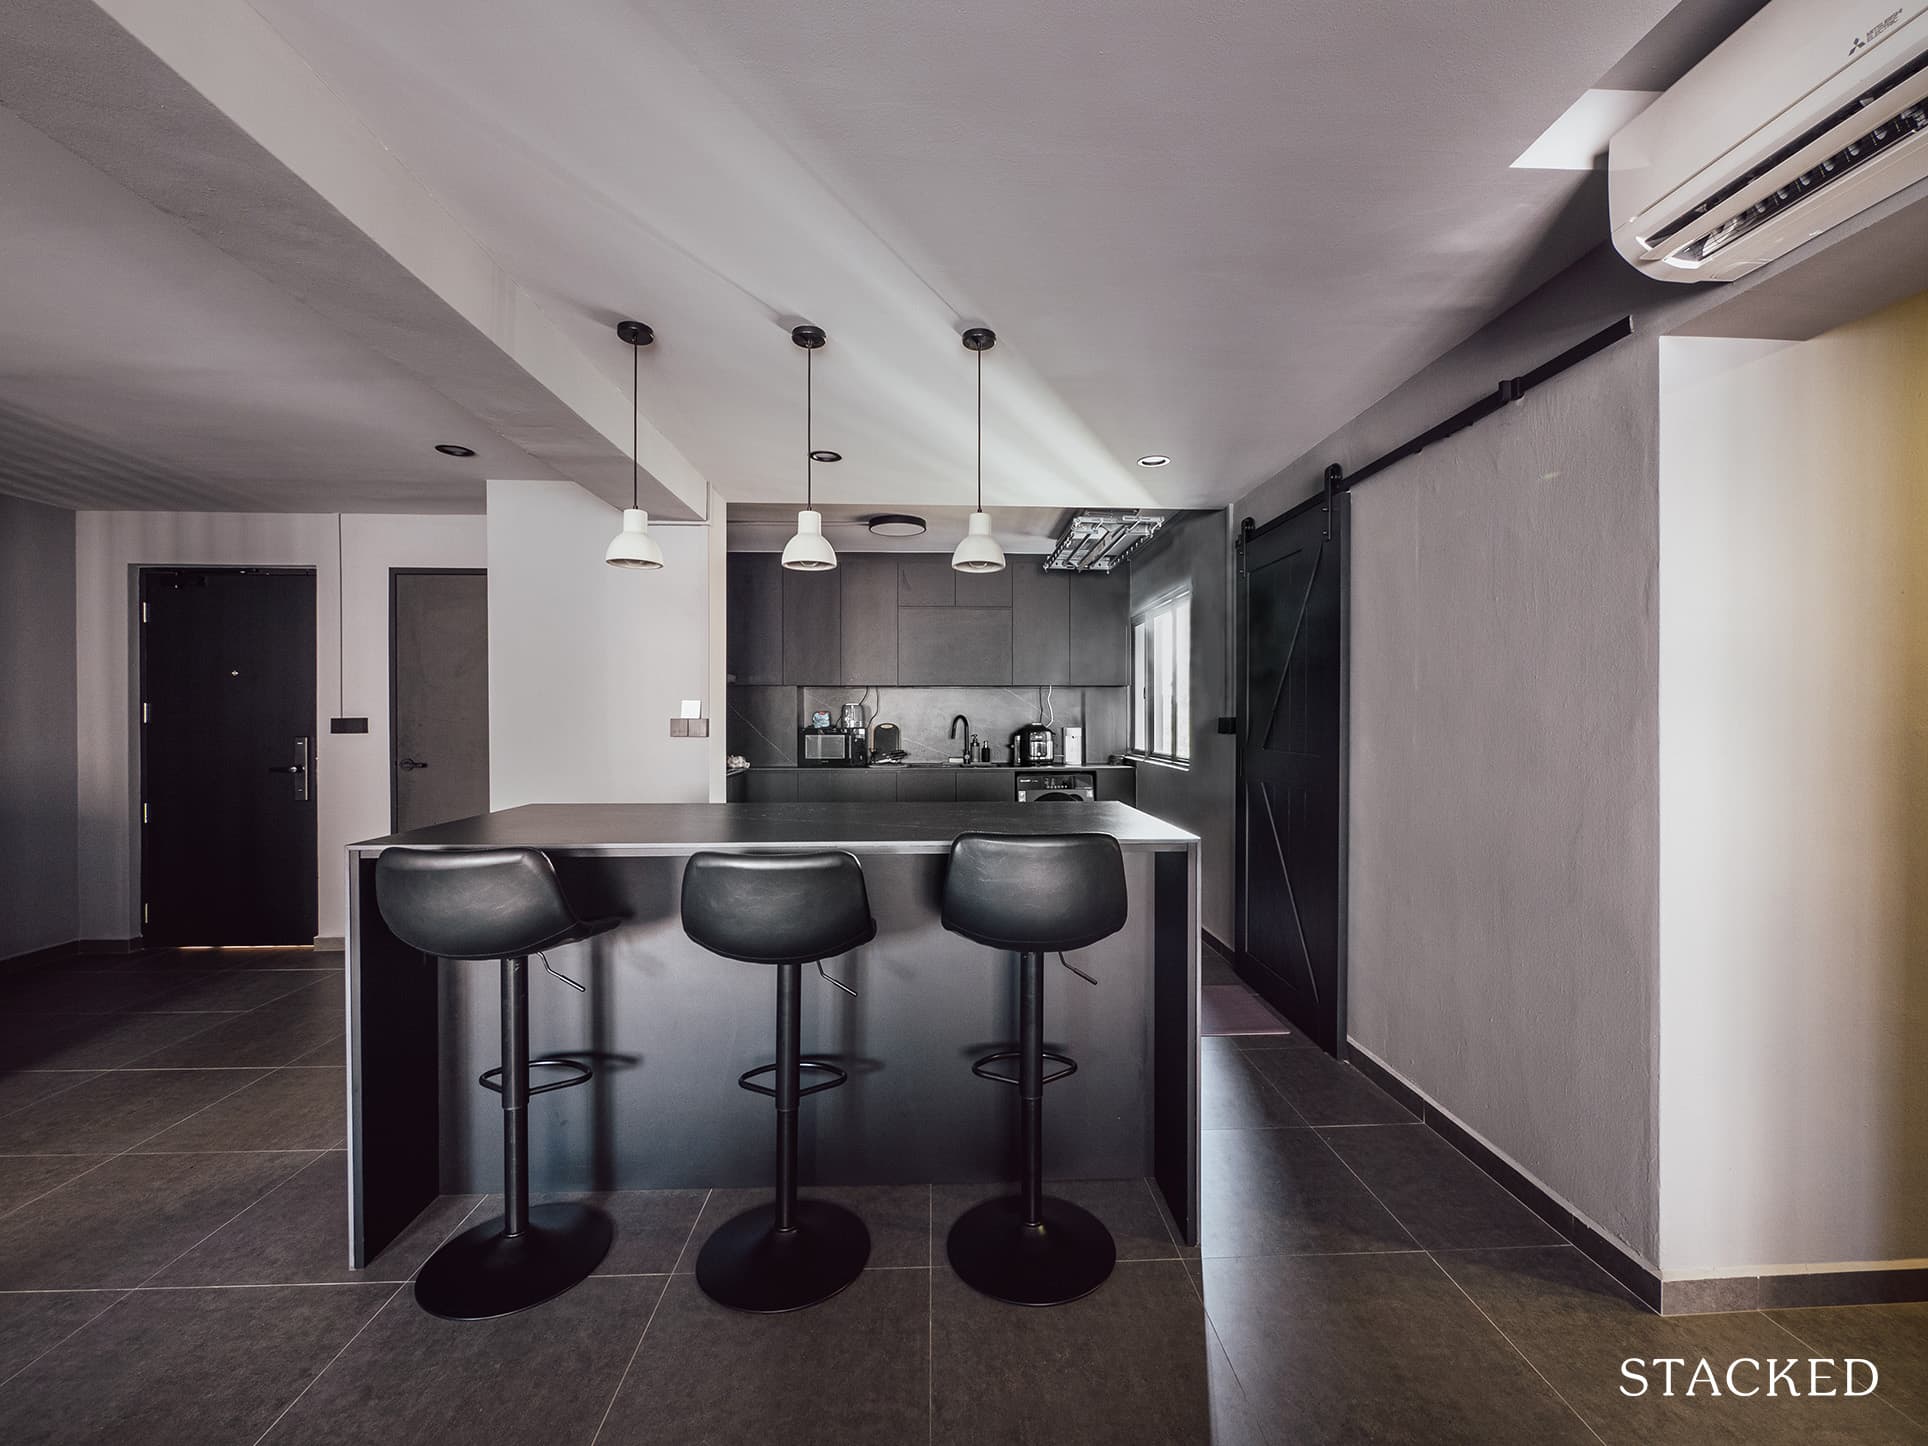
They changed all the cabinets, added an island, and changed the gas stove to an induction stove. Their countertop laminates were supposed to be traceless but they still did leave wet marks and stains. And as they shared, while dark surfaces do look sleeker, you will be able to spot dust particles more easily.

They also added LED lighting underneath the cabinets for a more upmarket feel.
At the end of the hallway that leads to the bedroom is a neon sign “yellow” – written in simplified Chinese – creating a techno-industrial vibe.
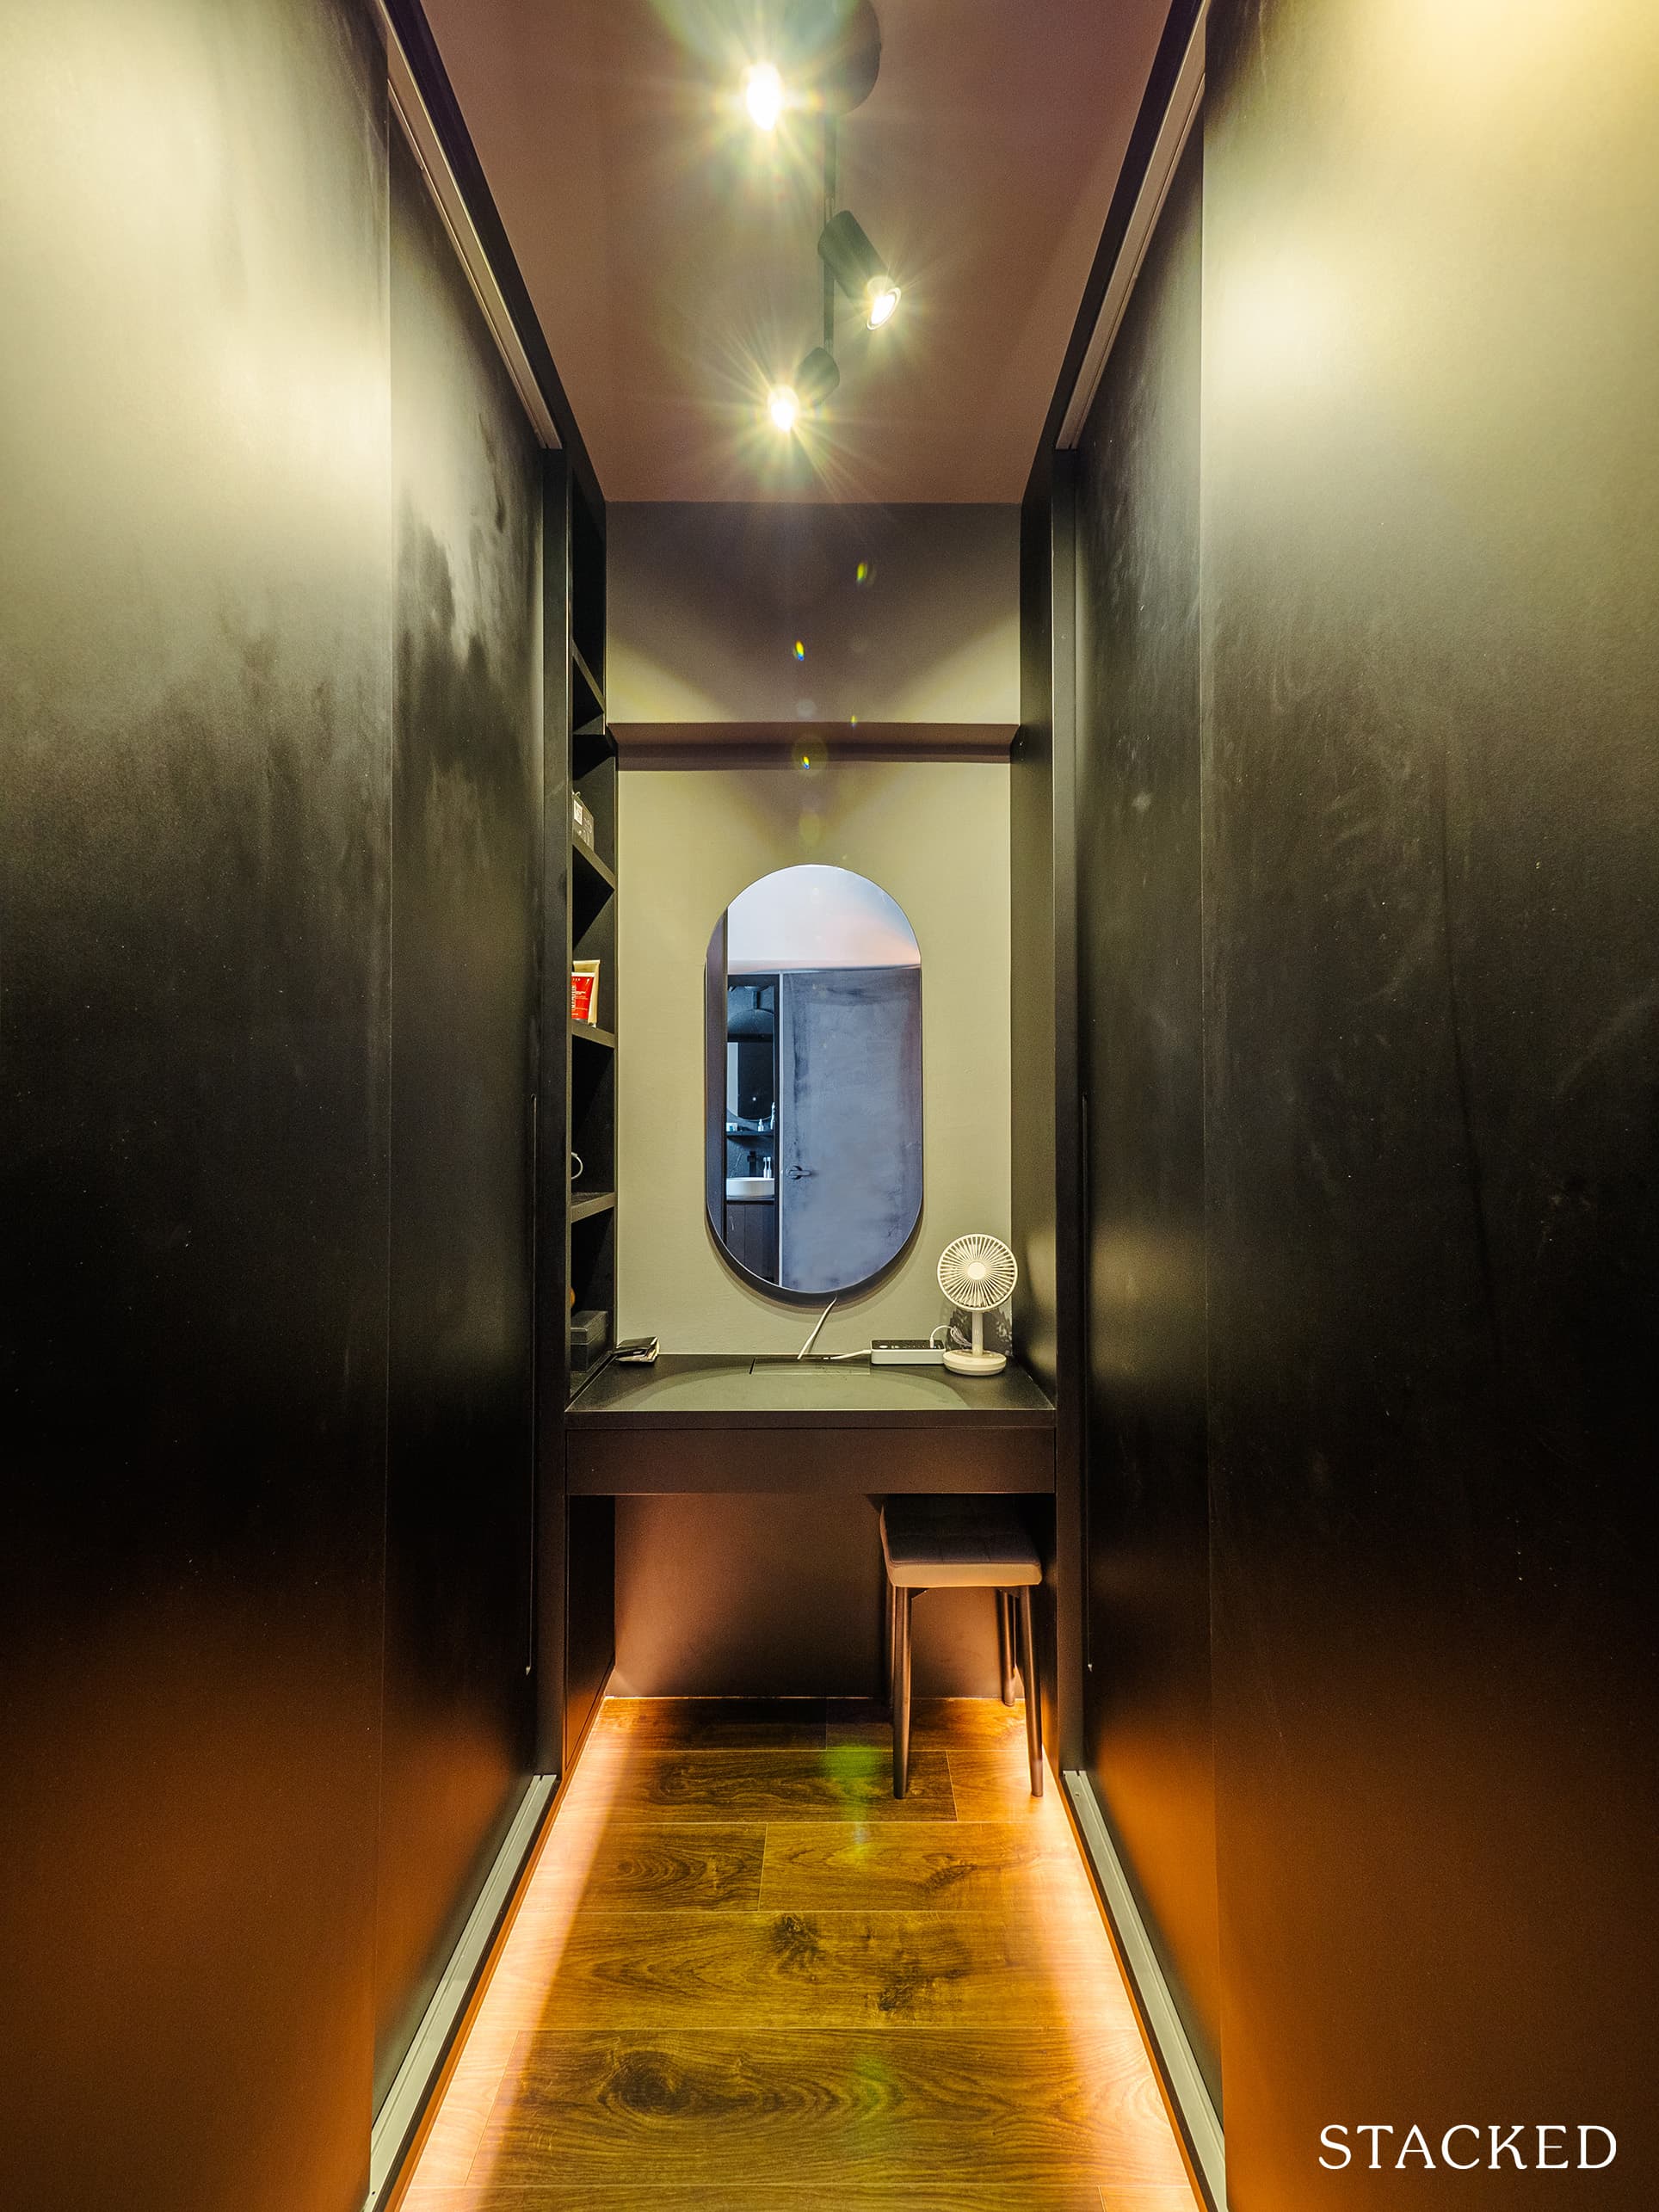
The master bedroom also retained the same dark-coloured theme. Although made of dark wood vinyl instead of tiles, the floors give off a cosy atmosphere. Here, Charlene even made a special headboard niche for Nigel.

She even added a mini walk-in wardrobe in the area – sitting between the hallway wall and their closet.

All these dark elements combine to create a more sultry vibe, making you feel like you’re staying at a boutique hotel.
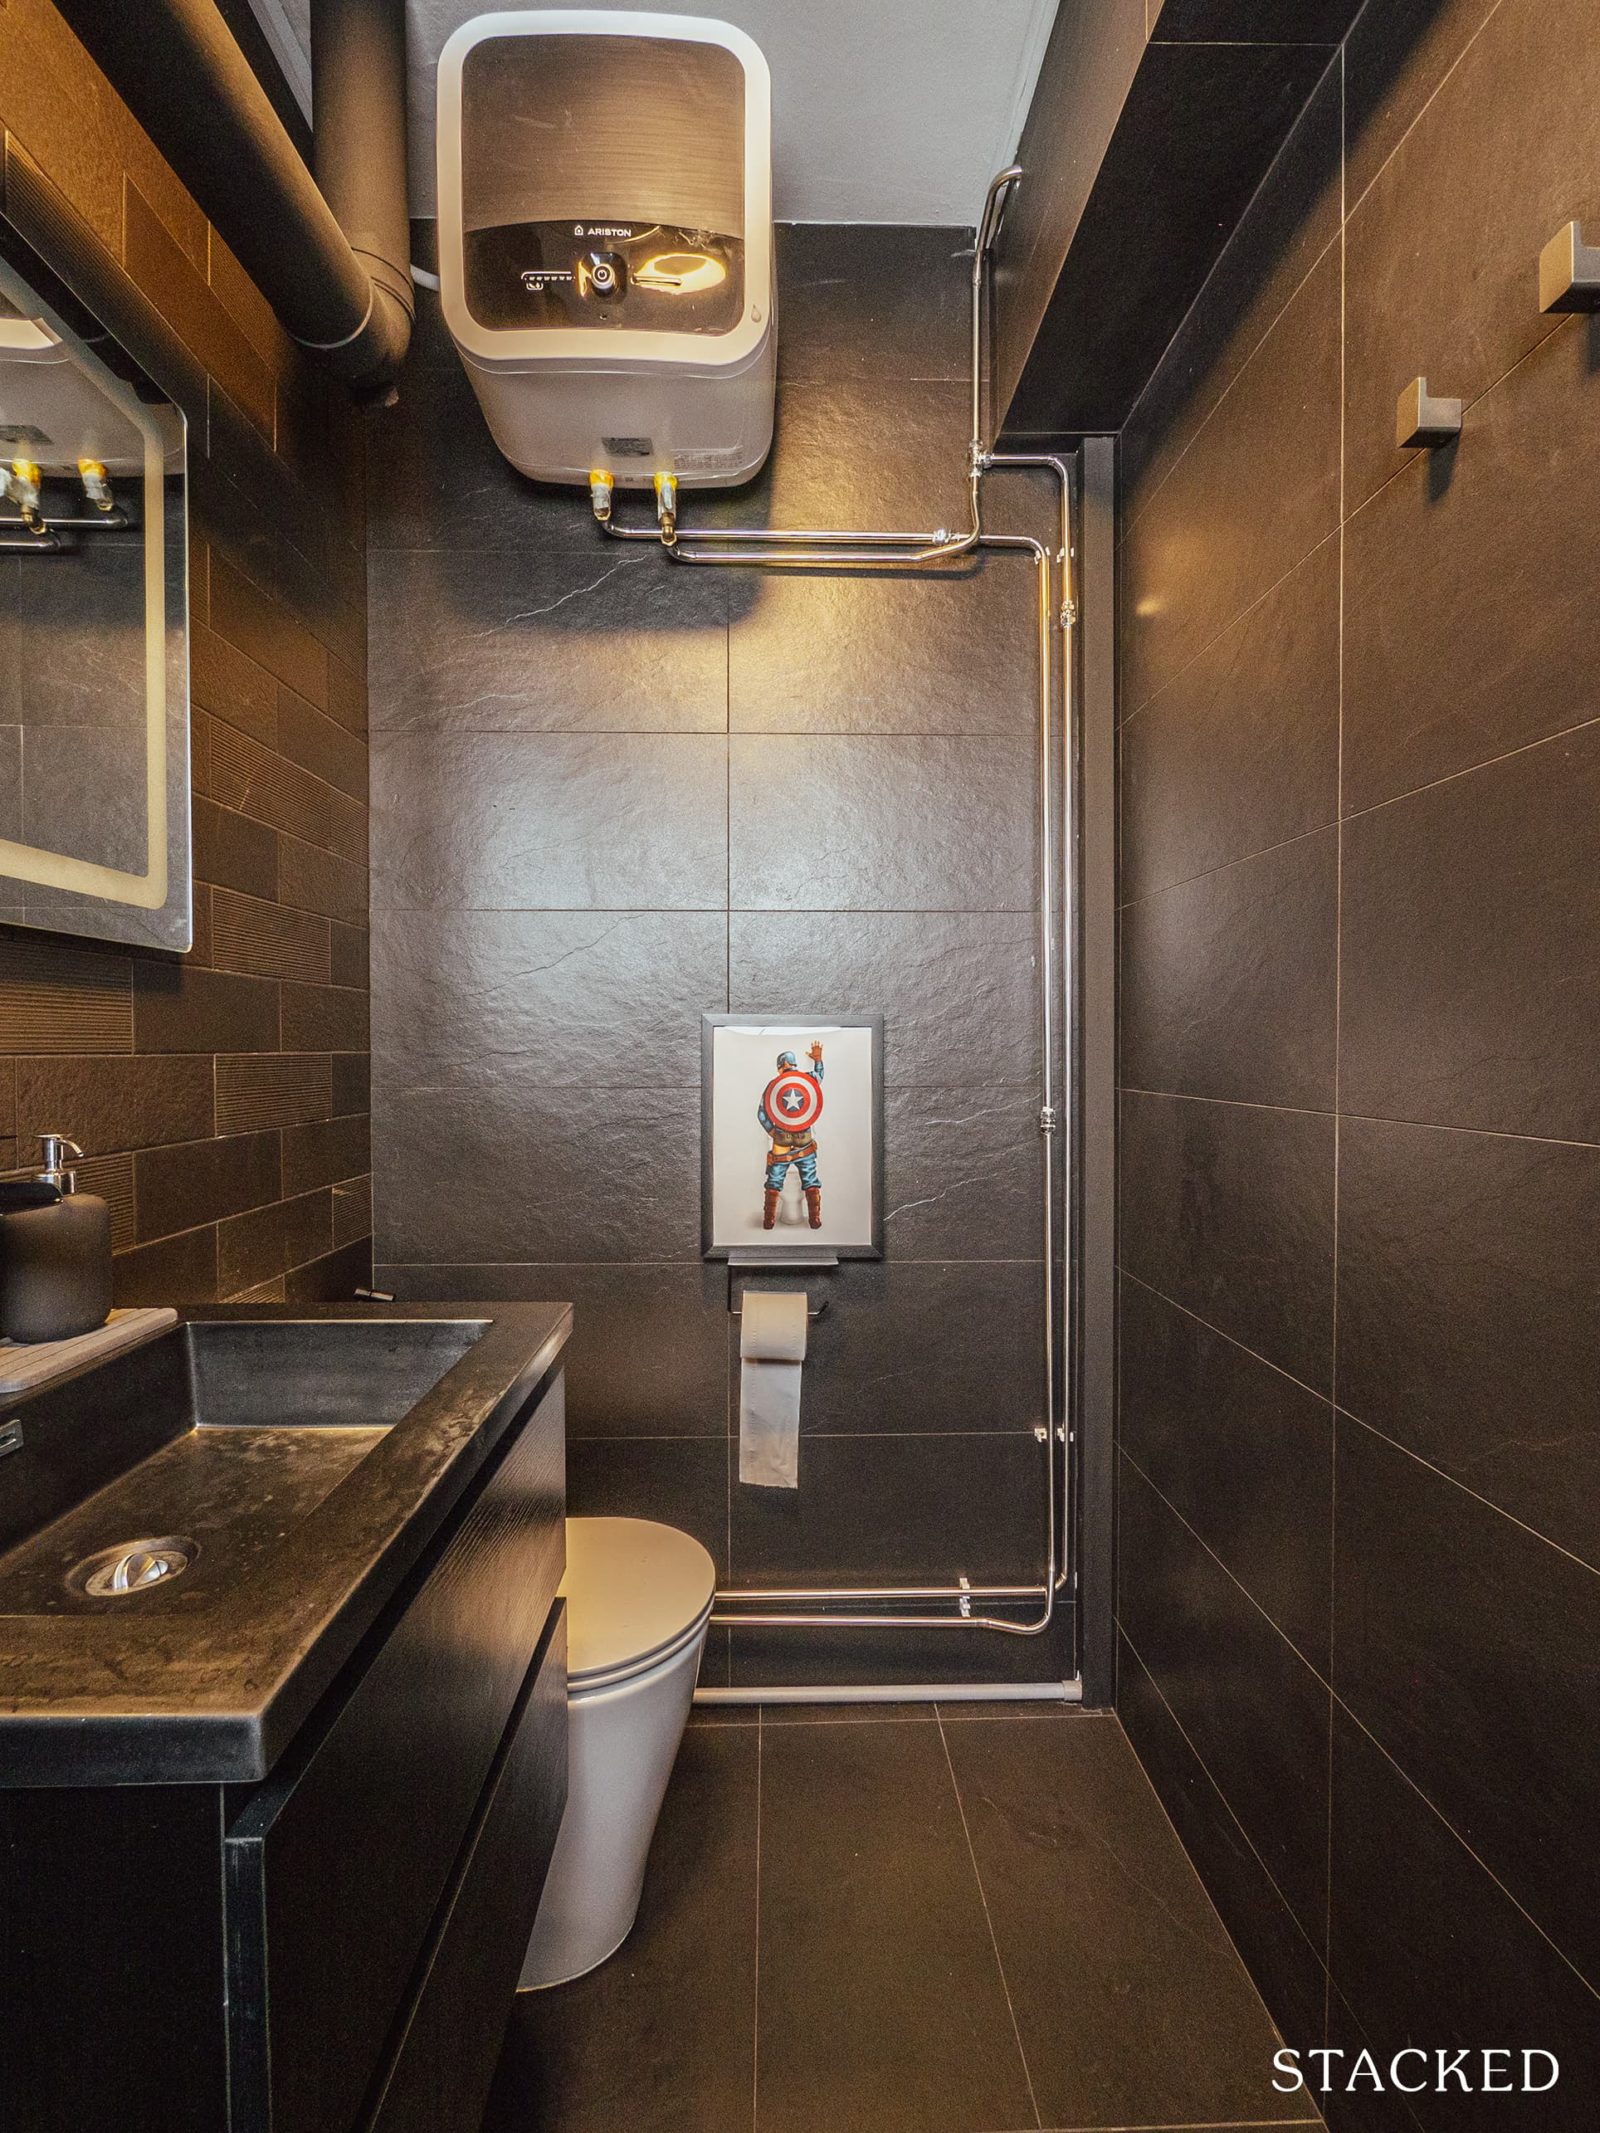
Conversely, their master bathroom is a decidedly brighter spot, with a wooden look sporting the bath area to complement the dark tiles of the rest of the bathroom.
Even though the two common bedrooms didn’t go through dramatic transformations, simply repainting the walls and laying the same vinyl as the master’s bedroom made them exude the same calming effect.
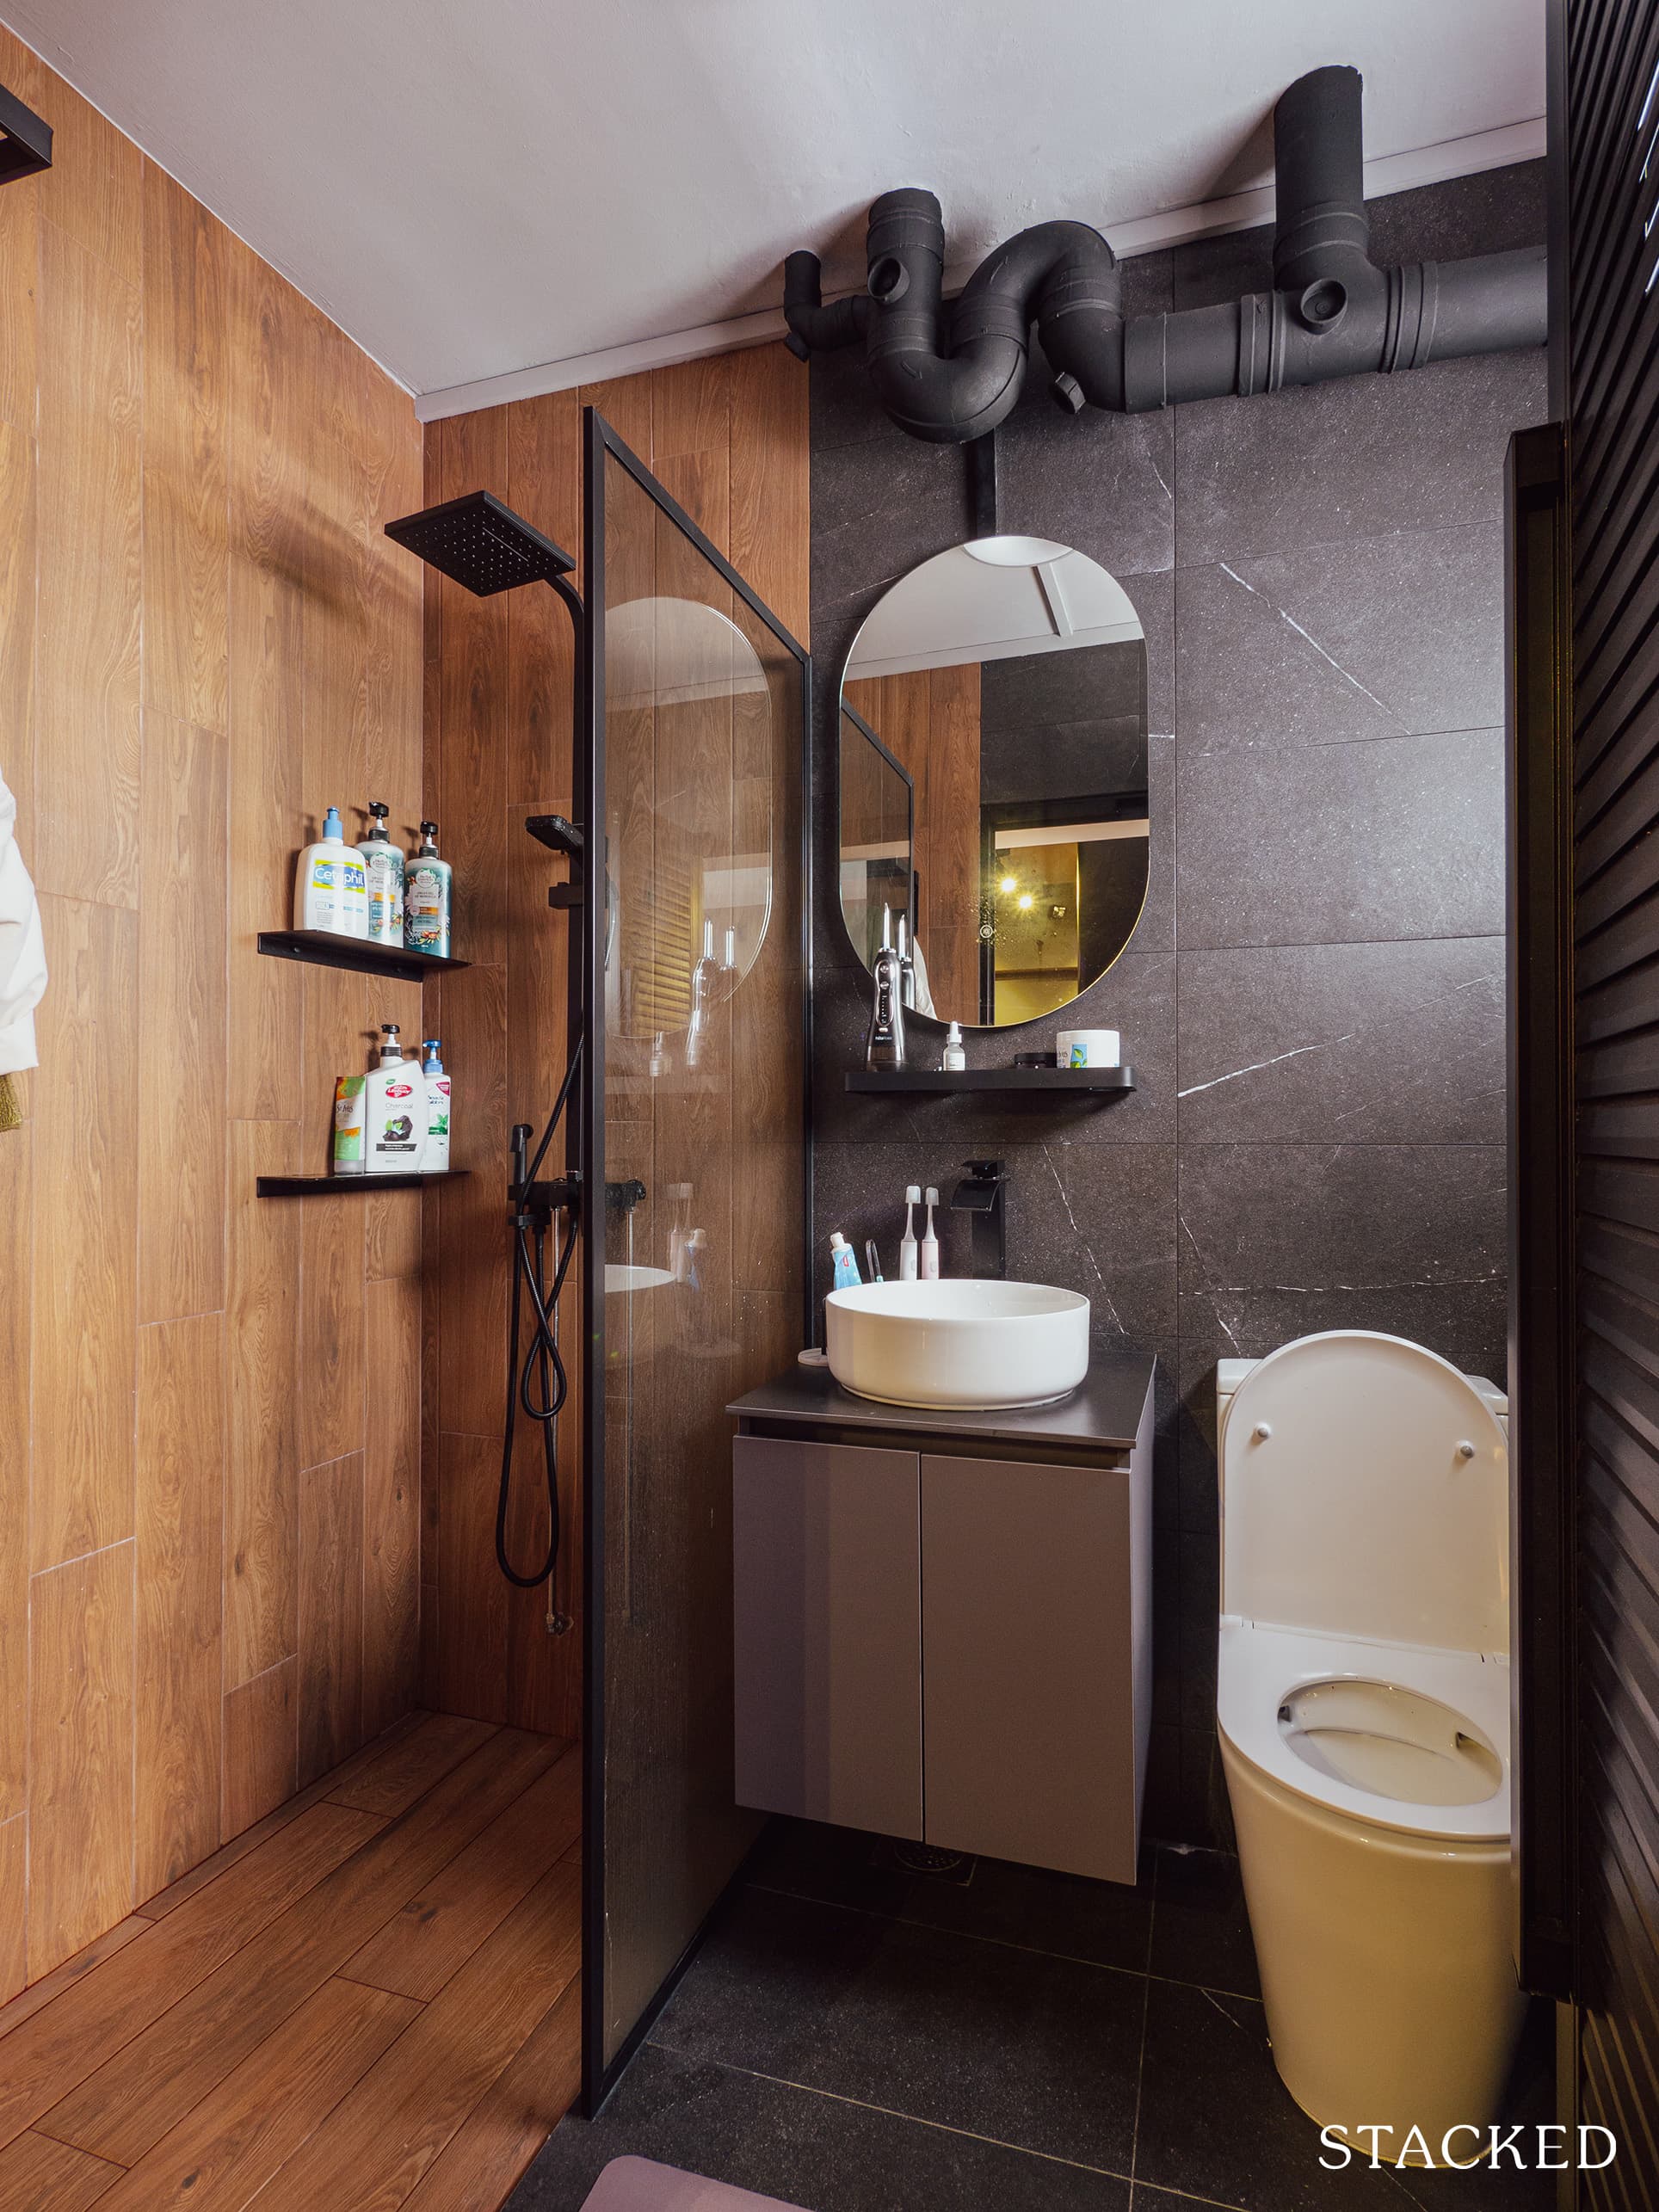
While some people may shy away from dark colours in the bathroom, it does have a very striking look when executed well. The bathrooms give off an old-school vibe – it’s like you’re in 1920s New York, especially with the pipes exposed.
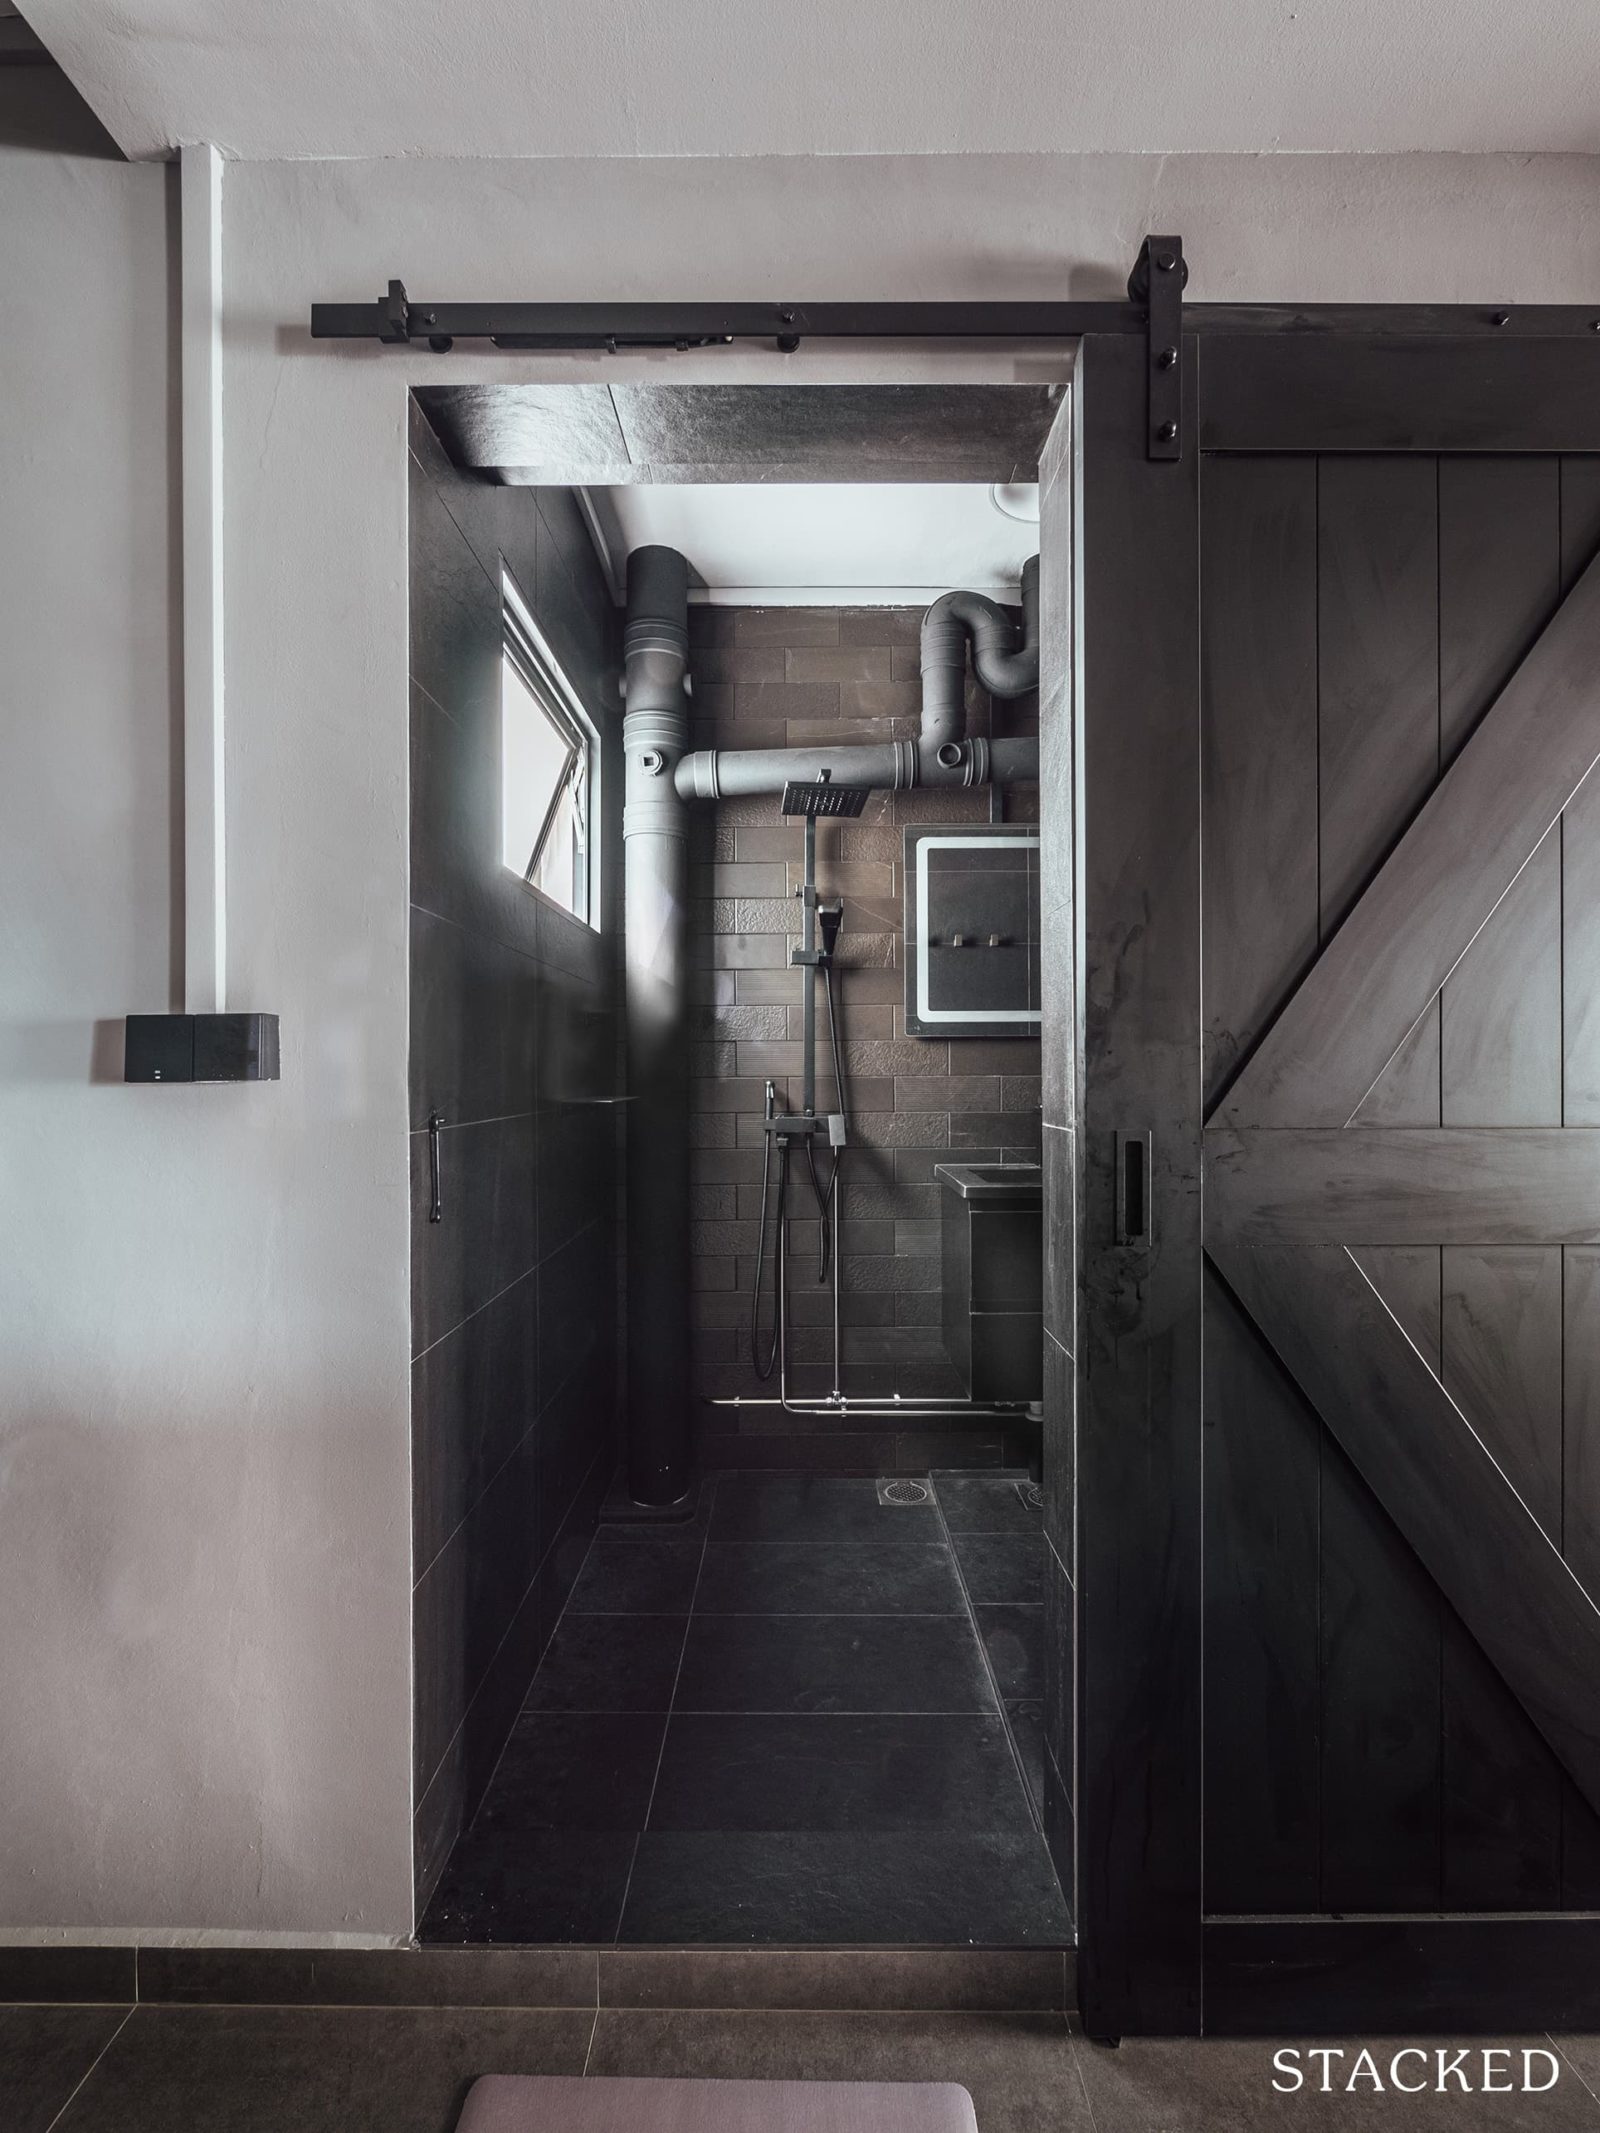
And to add even more pizzazz to the common bathroom design, the couple decided to use a barn door for the entrance – adding a lot of character to the bathroom as well as the dry kitchen area.
As always, while price plays a significant part when looking for an ID, it shouldn’t be the only factor you consider. Your chosen ID should also be in alignment with what you want to achieve.
For Charlene and Nigel, it was Danny from Fifth Avenue Interiors who fit the bill. “Even though he gave one of the highest quotations, when we met him, he was the first one that got our concept right off the bat,” said Charlene. The couple also loved his attitude – frank, easygoing, and reliable. Plus, he works with great attention to detail.
The cost of preliminary works and professional services provided by Fifth Avenue Interiors are already inclusive of their overall contract cost. Except for PE fees needed for permit applications, the couple didn’t have to incur separate expenses for tasks such as design and soft furnishing consultation, 3D computerized perspective drawings, and material and colour proposals.
So although Fifth Avenue gave them one of the most expensive quotations, their ID was very beginner-friendly – providing services that can accommodate even first-time renovators.
Fifth Avenue divided the total reno work into 11 phases after the planning stage. Here’s a breakdown of the cost and what specific work each covers:
Total Cost: $8,000
The demolition work involved in this phase is not limited to just the wall hacking. It also covered the hacking of doors, including the one in the main entrance and the aluminium sliding door on the balcony.
Additionally, the work included demolishing the floors and wall tiles for the entire house and window grilles. It also covered the hauling and unloading of materials, as well as the clearing of debris to the NEA designated site.
Total Cost: $26,812.50
Masonry work involved laying down HDB-approved screed and waterproof membrane in the common and master’s bathroom. Installing the wall and floor tiles was also part of this work. However, the cost for masonry work in each bathroom is less than half of what the living room incurred.
Laying down the screed and homogenous tiles in the living room area amounted to $6,930.00. Clearly, the floor area was the biggest contributor to the cost of masonry work in every area of the house.
Total Cost: More than $2,000
The subtotal for the plumbing work is $1,990, but this doesn’t include the Licensed Plumber fees and submission. Additionally, the actual work didn’t involve the replacement of the main pipe.
The piping work included running and installing exposed stainless steel hot and cold piping for the kitchen and bathrooms. Other tasks included in the plumbing phase include the installation of a washing machine tap, kitchen sink with faucet, water closet, and bathroom accessories.
Total cost: Approximately $8,330
Fifth Avenue Interiors performed plastering work for the entire house wall, including the two toilets and kitchen ceiling only. They also did plaster work for the false ceiling with cove lights using gypsum boards in the living area, dry kitchen, and corridor area.
Total Cost: $3,050
For the paint works, it included painting the entire home’s internal walls, ceilings, kitchen walls, door frames, and sewage pipes. The contractor used oil-based sealant for all the walls. Plus, they also threw in a free disinfection treatment service.
GUSH cair fresh is the paint they used, which has zero VOC and has air purifying capabilities, so no paint odour lingers. For the ceiling, they used GUSH Anti-Mould ceiling paint.
Total Cost: $2,000
These tasks constitute the installation of Louvres PD Slide and Swing Doors in the common and master’s bathroom areas. It also covers the 10-millimetre thick tempered glass installation in both bathrooms.
Total Cost: $1,400
Door works involve the supply and installation of doors on the master bedroom, bedroom 2, bedroom 3, and storeroom. As such, the task of setting up all the solid core laminated doors (together with their handles and hinges) is multiplied by four, as well as the $350 cost.
Total Cost: More than $3,590
The contractor supplied and installed white powder-coated aluminium casement windows with clear glass in several locations, including the balcony in the living room and kitchen. They also installed top-hung windows with laminated glass in the bedrooms and bathrooms.
Total Cost: More than $20,500
Carpentry work took the second largest chunk of the budget, second only to masonry. Fifth Avenue Interiors was responsible for the design and fabrication of bottom and top hung cabinets in the wet kitchen area.
This task also covered the stand-alone island counter in the dry kitchen area, shoe cabinet divider and TV feature wall in the living area, and the bottom cabinets under the window in various rooms. They also designed and constructed sliding wardrobes in the bedrooms and vanity counters in the bathroom.
Total Cost: $6,850
Supply and installation of countertops constituted this set of tasks. For the kitchen’s island counter and bottom cabinets, they installed 12 millimetres thick Vulcan (single profile). They also installed the same material on the bathroom vanity for both the master’s and common.
Total cost approximately $900
Chemical washing and general cleaning of the place after reno fall under the miscellaneous work category. Supplying and laying cardboard protection for the whole unit during the reno is also part of these miscellaneous tasks.
The final outcome of Charlene and Nigel’s home was exactly as they envisioned it. Although they weren’t really sure what furniture to get for the house at first, their chosen colour scheme significantly lessened the restrictions.
“These colours are quite simple to match since they go well with most colours, as compared to matching wood browns and the different shades of brown a ‘walnut’ can be,” Charlene said.

Since the couple sourced their furniture from different shops, they still came together nicely because of the black and grey scheme.
Speaking of sourcing, here’s how they went through the process.
They started with local stores such as Hipvan, Ikea, etc., to help them get a general sense of the type of furniture they wanted. Then, they realised that Taobao offers great deals as well.
“So even though we would still look at local stores from time to time, we always look for alternatives on Taobao and compare prices,” Charlene shared.
Charlene recalled one such experience. “For our dining table, we already decided from the start that we wanted a live edge table. But one table like that can easily cost $2k and above.”
They tried getting it from Taobao but decided to just source it from Table Guys. For one, “quality is assured,” said Charlene, “and the price difference can’t make up for it. We also fell in love with the wooden slab at first sight so there’s that.”
For Taobao sourcing tips, the couple summarised it into three key points. Get the right keywords, wait for sale events, and always check the reviews. They also try to be on the lookout for the underdogs.
When asked about their favourite part of the home after renovation, Charlene said it was the living room. “The big space before and after just makes us feel so happy,” she said with a wide smile.
Dealing with renovation delays was one of the greatest challenges the couple had to go through.
While the pandemic was a significant factor, Charlene said they also played a part in the delay. “We were being too chill with the deadlines even though internally we were so crazy about wanting to move in ASAP,” she said in retrospect.
“We didn’t really overcome it, but we heard from our friends that if we want something done fast, we can just give our ID a hard deadline to follow.”
As such, their advice to homeowners planning to take a renovation journey is to push forward with the project consistently. It’s the same advice they’d give themselves if they ever do this again.
“We were not pushing enough for things to move forward. So if I get to do it again, we will be driving it as much as we can,” Charlene said with emphasis.
Also, looking forward at least one month in advance can help you make preparations early. This way, you’ll always have things prepared as soon as your contractor is ready to move forward to the next phase.
Charlene recommends checking with friends and other homeowners who recently did a reno for deals and tips. It will help you save money and ensure you don’t repeat the same mistake.
This article was first published in Stackedhomes.