

I try a DIY home facial using suction cups for a quick face lift during this CB period

PHOTO: AsiaOne/Melissa Goh
Beauty parlours and spas are some of the non-essential businesses that have shuttered during this circuit breaker period.
Since we're all staying home and getting creative with our home cooking and DIY projects, why not throw in a little 'me' time for some home DIY facial using cupping therapy, to make sure your skin is looking healthier than before.
Yes, I'm talking about the same cupping therapy used in traditional Chinese medicine (TCM). "But won't it leave bruises on your face?" was the question that popped up when my mother introduced it to me.
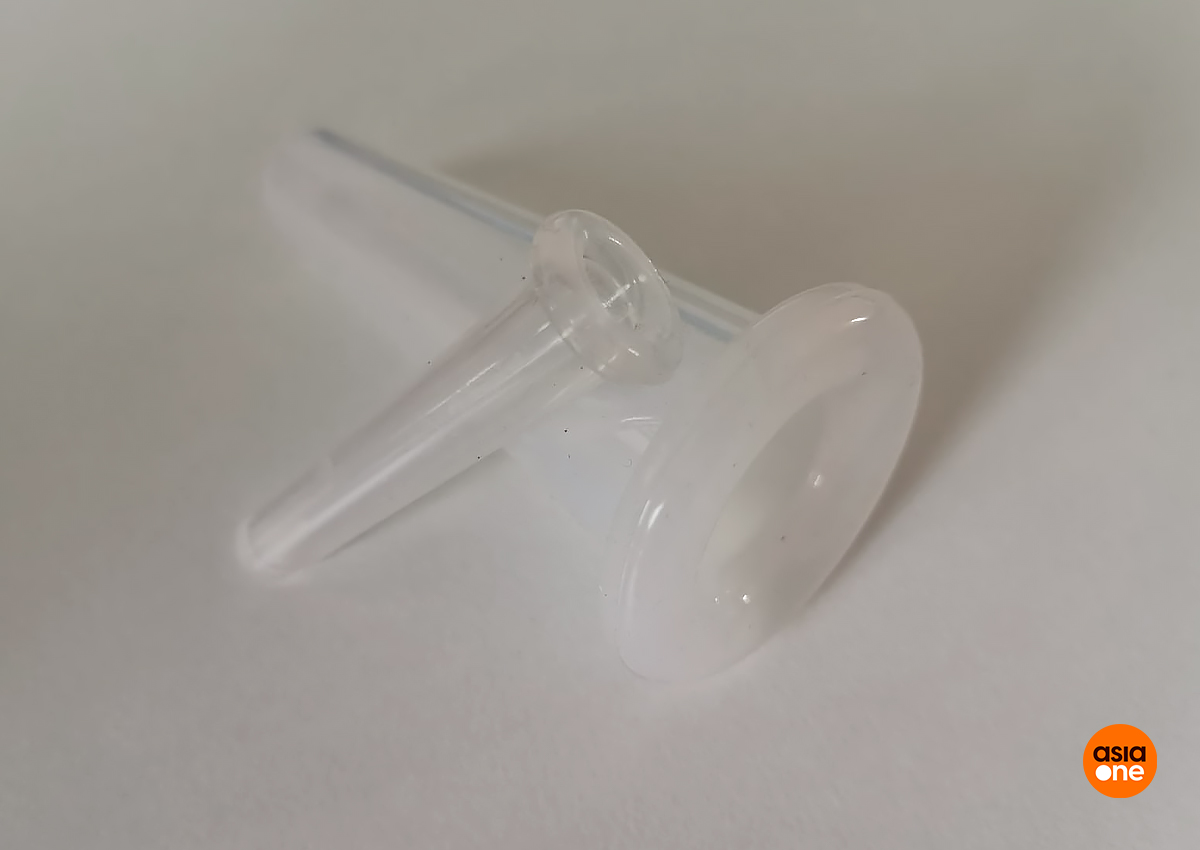
Face cupping differs slightly from body cupping as it uses silicone cups that are gentler on the skin, instead of glass cups that are traditionally used on the body. And don't worry, there won't be any fire involved, only slight suction and upwards pulling of the skin.
Face cupping is known to improve blood circulation, reduce puffiness, minimise wrinkles, strengthen skin elasticity, promote collagen production, and more.
While I got my mum to show me how it works (before circuit breaker measures were set in place), this facial treatment can be easily recreated at home. All you need is one small and one large silicone cup, which can be bought online and will only cost you less than $3 for a set.
Before every facial treatment, you'll want to prep your face by giving it a good wash, followed by a light exfoliation to remove any dead skin cells.
As there are going to be slight tugging during the face cupping sesh, you'll want to moisturise your face to reduce any friction caused by the silicone cups.
[[nid:482505]]
I used a good amount of coconut oil on my face, which doesn't only smell nice, but also has anti-bacterial and anti-fungal properties.
Before getting right into using the silicone cups, do a quick massage in an upwards circular motion to ensure the face oil or moisturiser is well-absorbed.
Gently pat your jawline in an upward motion to lift and relax the muscles.
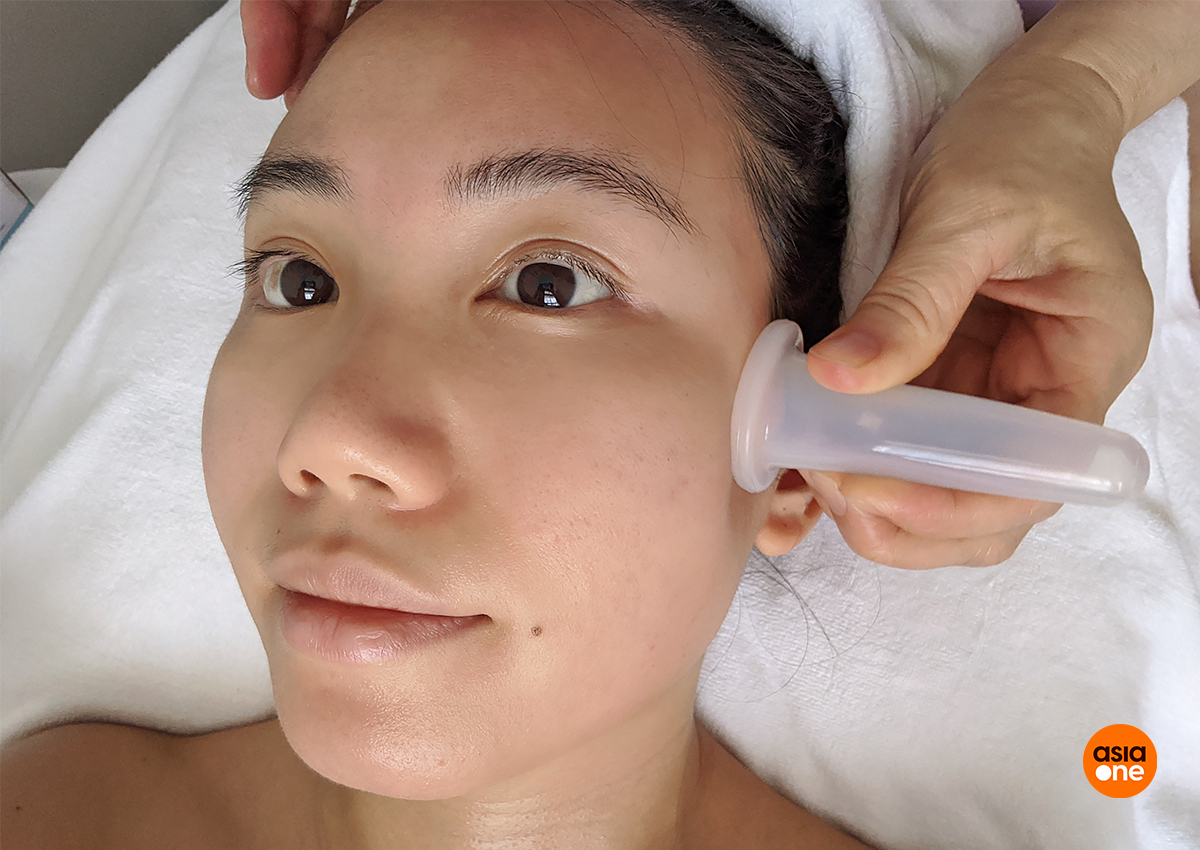
The larger silicone cup will be used on areas such as your cheeks, forehead, as well as your neck and chest.
Using the larger silicone cup first, drain the lymph nodes by outlining your jaws with the silicone cup and sliding it down to the neck and chest.
Repeat steps on both sides of the jaws and neck, making sure you press, slide and release the silicone cup with each move.
Moving on to the next step, the cheeks. Using an upward motion, slide the silicone cup up from your jaws to the cheeks repeatedly on both sides, this will help with blood circulation and you'll notice your cheeks looking fuller after.
Once you're done with the cheeks, it's time to move on to the forehead. It's always important to do in it an upward motion as you don't want to be dragging your skin downwards as it will cause them to become saggy in the long run.
From your temples, slide the silicone cups towards your hairline, repeat the step until you've done the entire forehead.
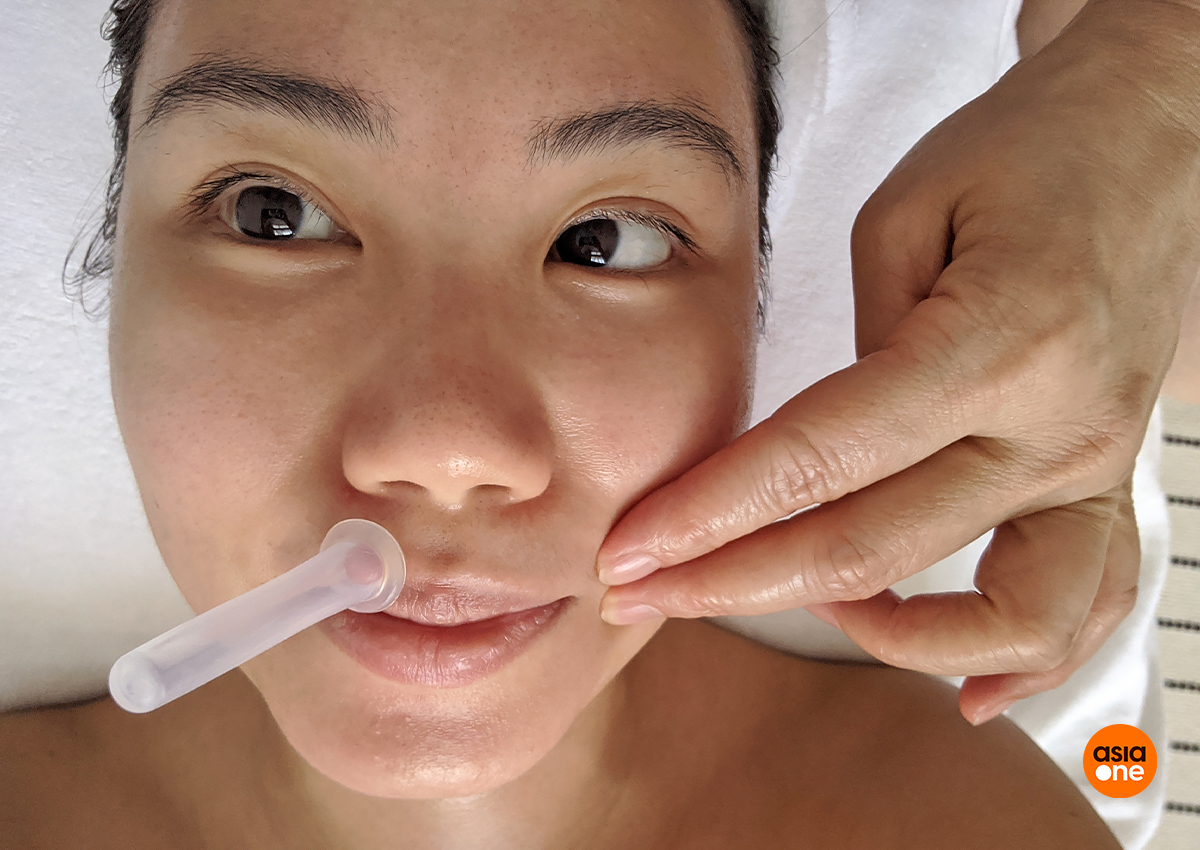
With the larger areas of your face done, you can move on to using the smaller silicone cup to reach into more delicate areas of the face.
The smaller silicone cup will be used on the nose, T-zone, and around the mouth.
Working from the crease of the nose, slide the silicone cup in a short and swift motion towards the tip of the nose. Repeat this step for the entire nose.
From the bridge of the nose, slide the silicone upwards to the T-zone. The silicone cup is placed just above the eyebrows. Following the shape of your brows, glide the silicone cup in the same squeezing and releasing motion.
For fuller lips, you want to trace the silicone cup on the edge of your lips. Don't leave the silicone cup on one spot for too long, or your skin will start to discolour and bruise, as the skin around the lips is slightly more sensitive.
Once the cupping treatment is done, cleanse your face and follow it up with your usual skincare routine.
And there you have it, a simple DIY facial that you can do at home to give your face a quick lift in less than 30 minutes.
The cupping therapy might leave you with slight redness on your skin, but it should fade away in less than an hour.

You might want to go easy with the number of times you do this treatment too, spacing out a couple of days in between treatments to let your skin rest and restore after each session.
After the cupping therapy, my skin looks plumper and lifted, probably from the blood circulation from the treatment. It also made my skin look healthier and refreshed.
Click here for AsiaOne's Circuit Breaker Survival Guide (CBSG).
melissagoh@asiaone.com