

The ultimate design brief for your interior designer in 7 steps (sample template included)

PHOTO: Stackedhomes
Renovations are prime grounds for a misunderstanding; because some concepts are tough to put into words.
To avoid wasting both time and money, it’s important to know how to express exactly what you want to your Interior Designer (ID), and there are better ways to do it than by just using Pinterest and mood boards. Here’s a step-by-step template for homeowners:
When Xinni and KH went about renovating, they knew there had to be a clearer way to express what they wanted. In this article, we use their renovation template as an example of how best to communicate with an ID, and get the results you want.
It’s the absolute best guide we’ve ever seen – clear and structured and just a joy to look at. They’ve also very kindly provided a template for you to follow (click here to access).
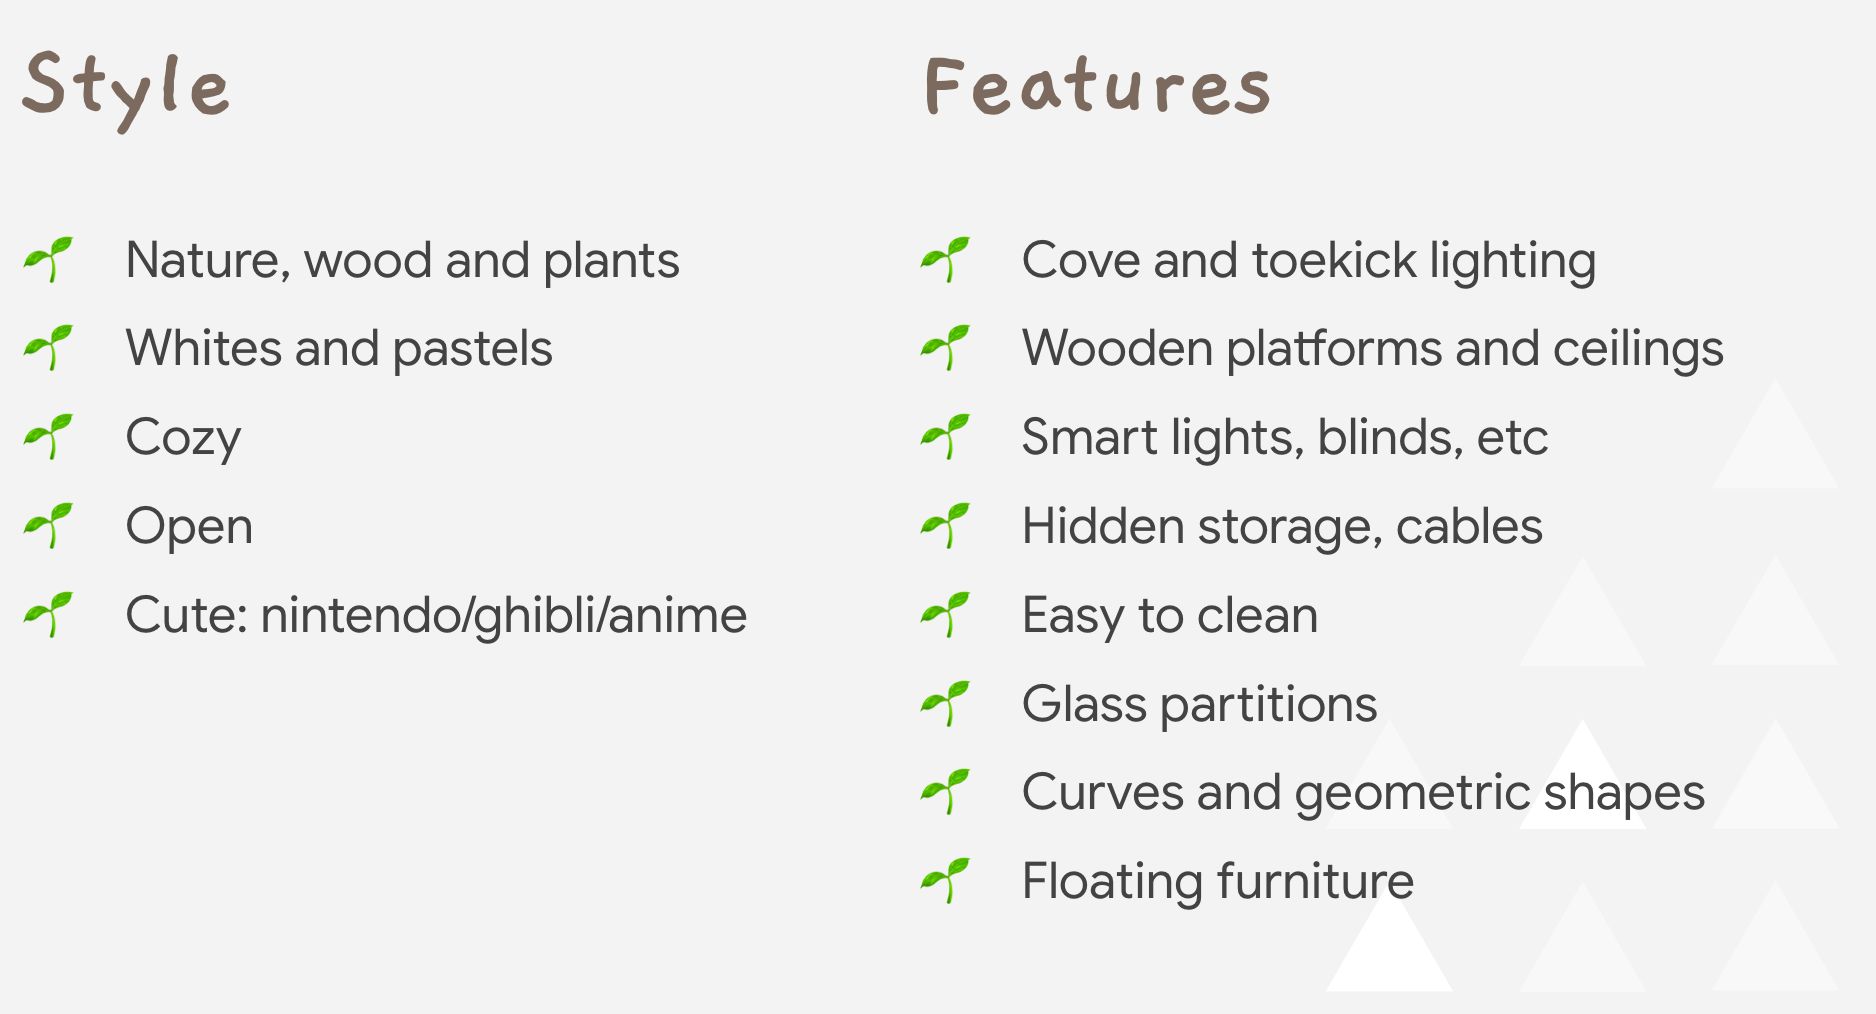
Try to distill your overall vision into three or four main stylistic elements. This is a particularly good example, with the highlights defined as nature (woods and plants), whites and pastels, cozy, open, and cute.
It helps if you have an exact design theme in mind, such as rococo, French cottage, shabby chic, etc.; but remember that a single theme can be interpreted in many ways. E.g., the extent of “weathering” in shabby chic designs can be to varying degrees. So it’s still best to list three or four highlights for the theme.
Do also list features that are important to you, such as being easy to clean, minimal use of partitions, extra storage space, etc.
If you don’t have the software or can’t draw, most ID firms can provide a sales designer to help.
Consider how you want to use the floor space, and how you might position the furniture. The tricky part is getting the scale right – unless you’re quite precise in measurements, the furniture may not fit as well as you may think.
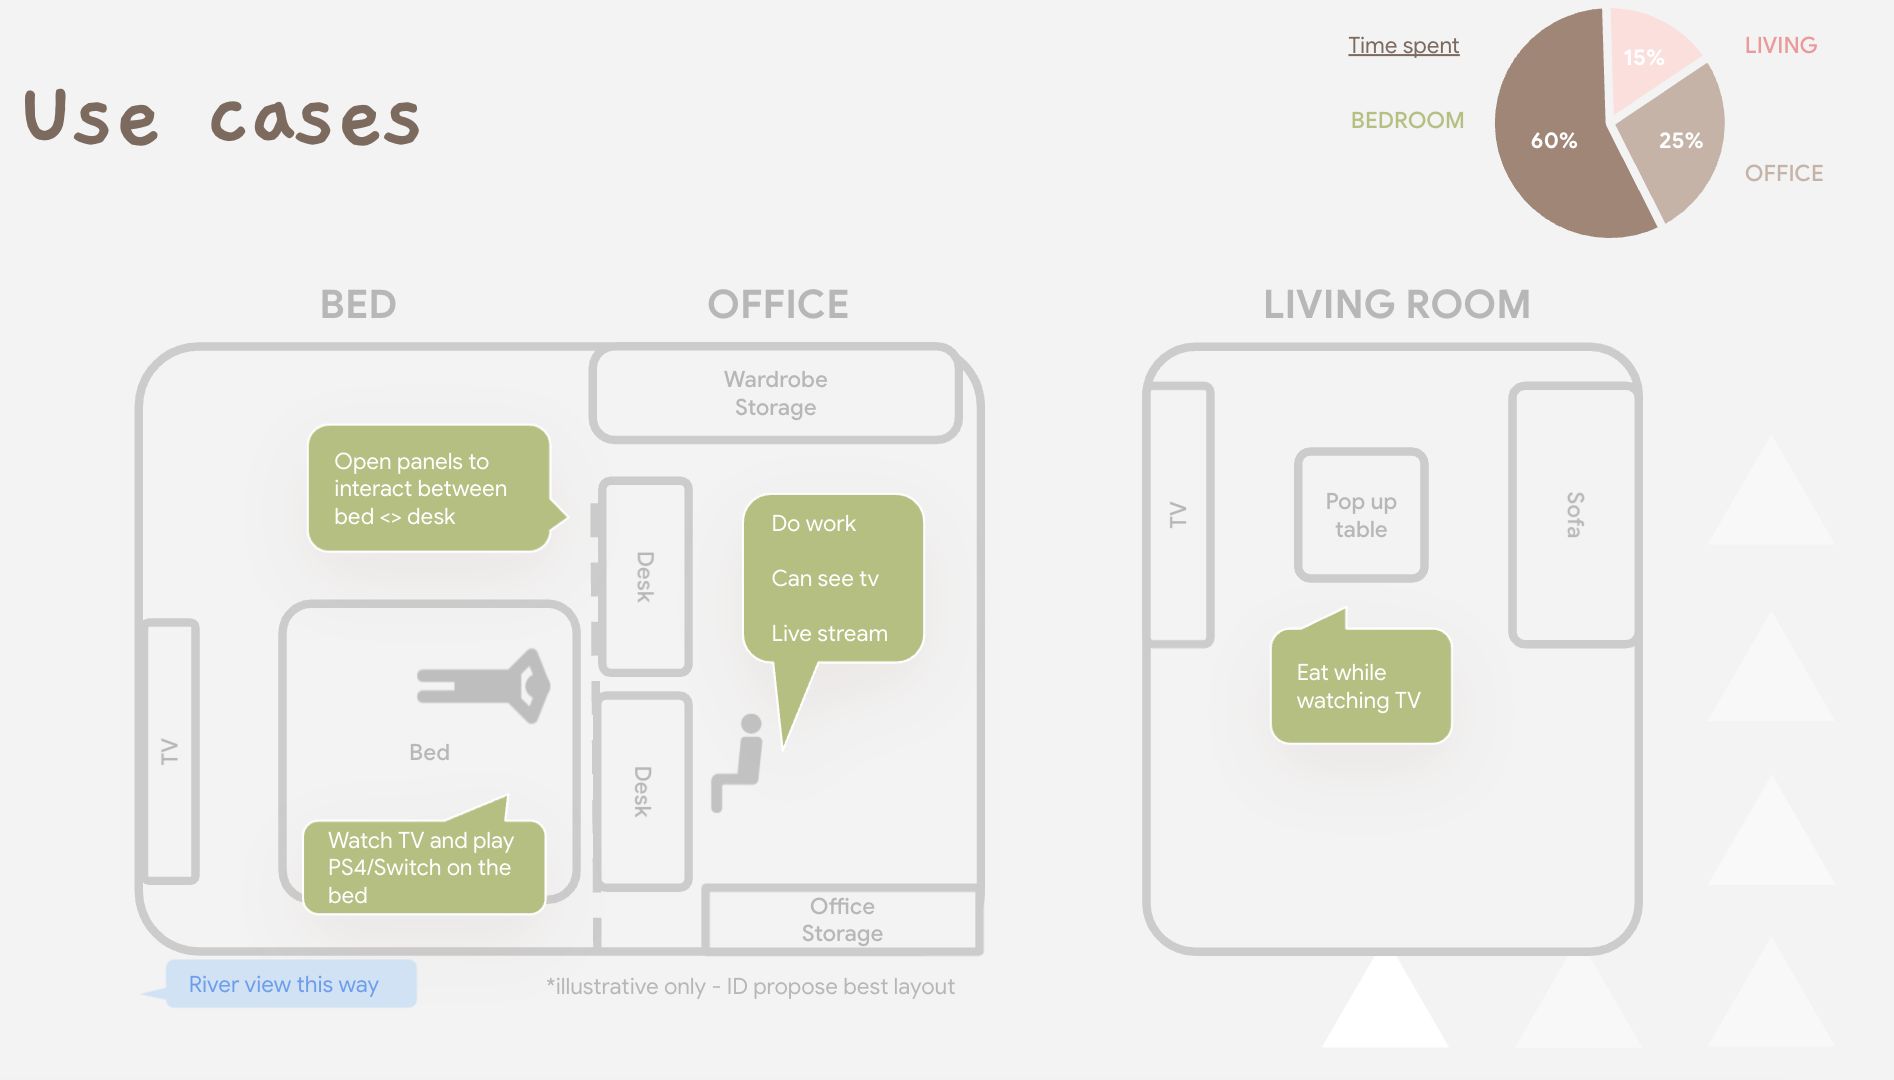
If you haven’t bought any furniture yet, however, sketching the floor plan is a useful way to know what dimensions to shop for.
Your ID can mark out the load-bearing walls on the floor plan, so you know which walls can be hacked, and which are immovable.
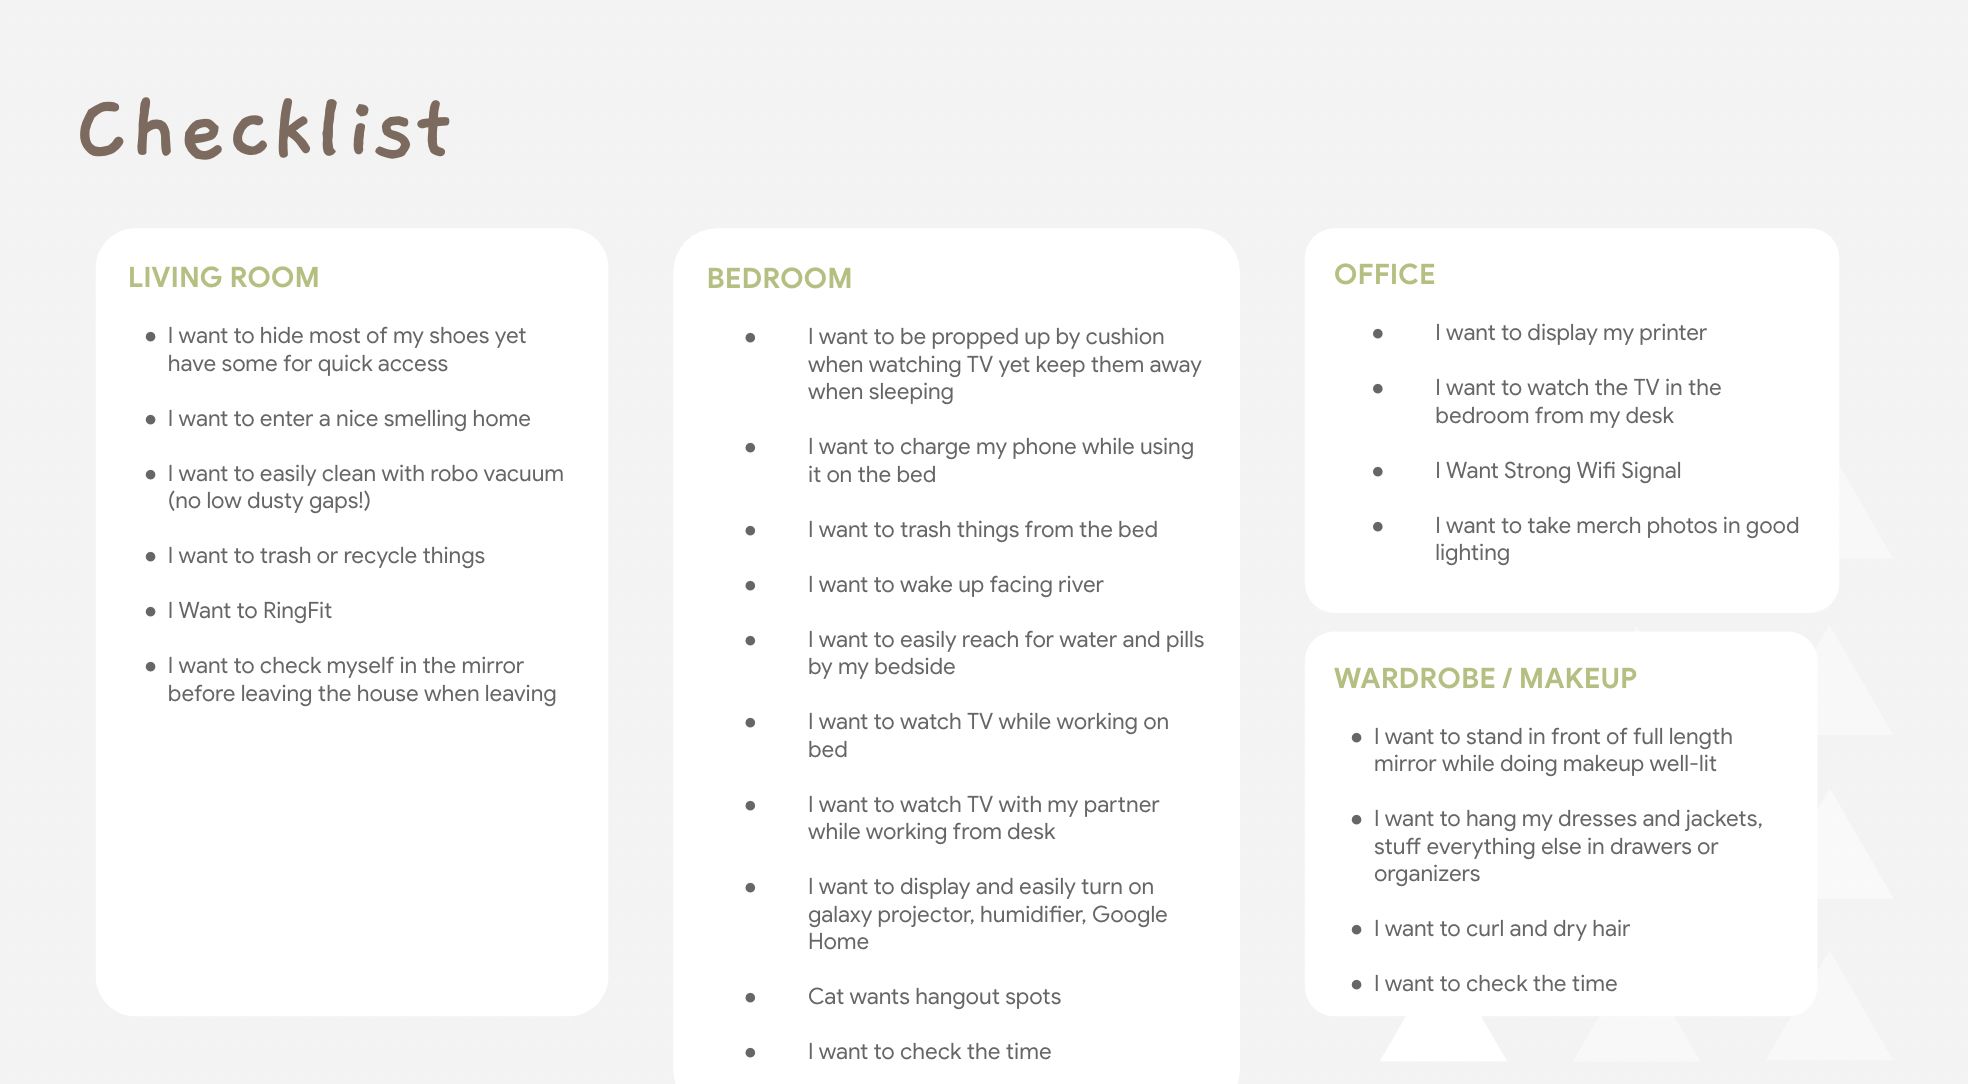
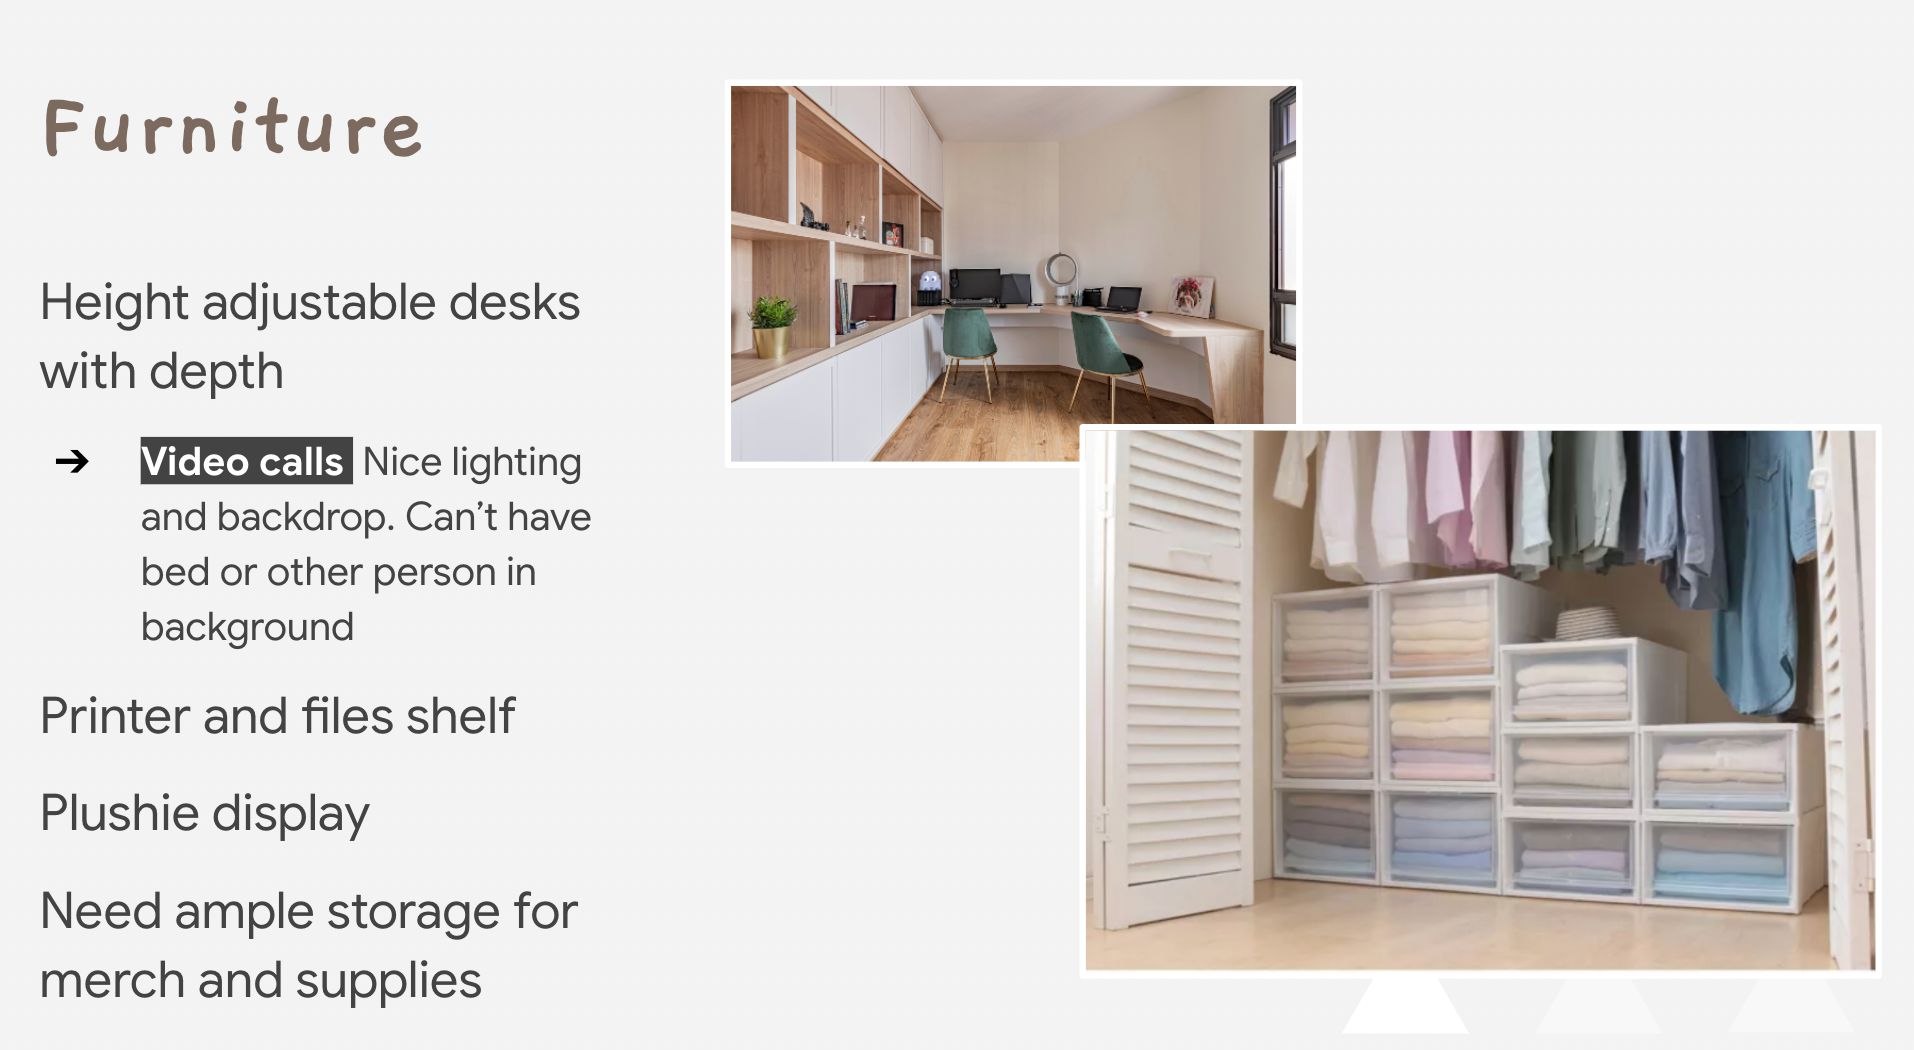
While you’re at this, create a checklist for each room. For example, you might want to specify that the kitchen will double as a dining room, or that you want to entertain guests there; this can prompt your ID to suggest appropriate additions, such as kitchen islands.
In this example, note that the vibe and furniture for each room is specified. Your ID can help with more details later, such as providing colour swatches for the paint job in each room, or providing a furniture list.
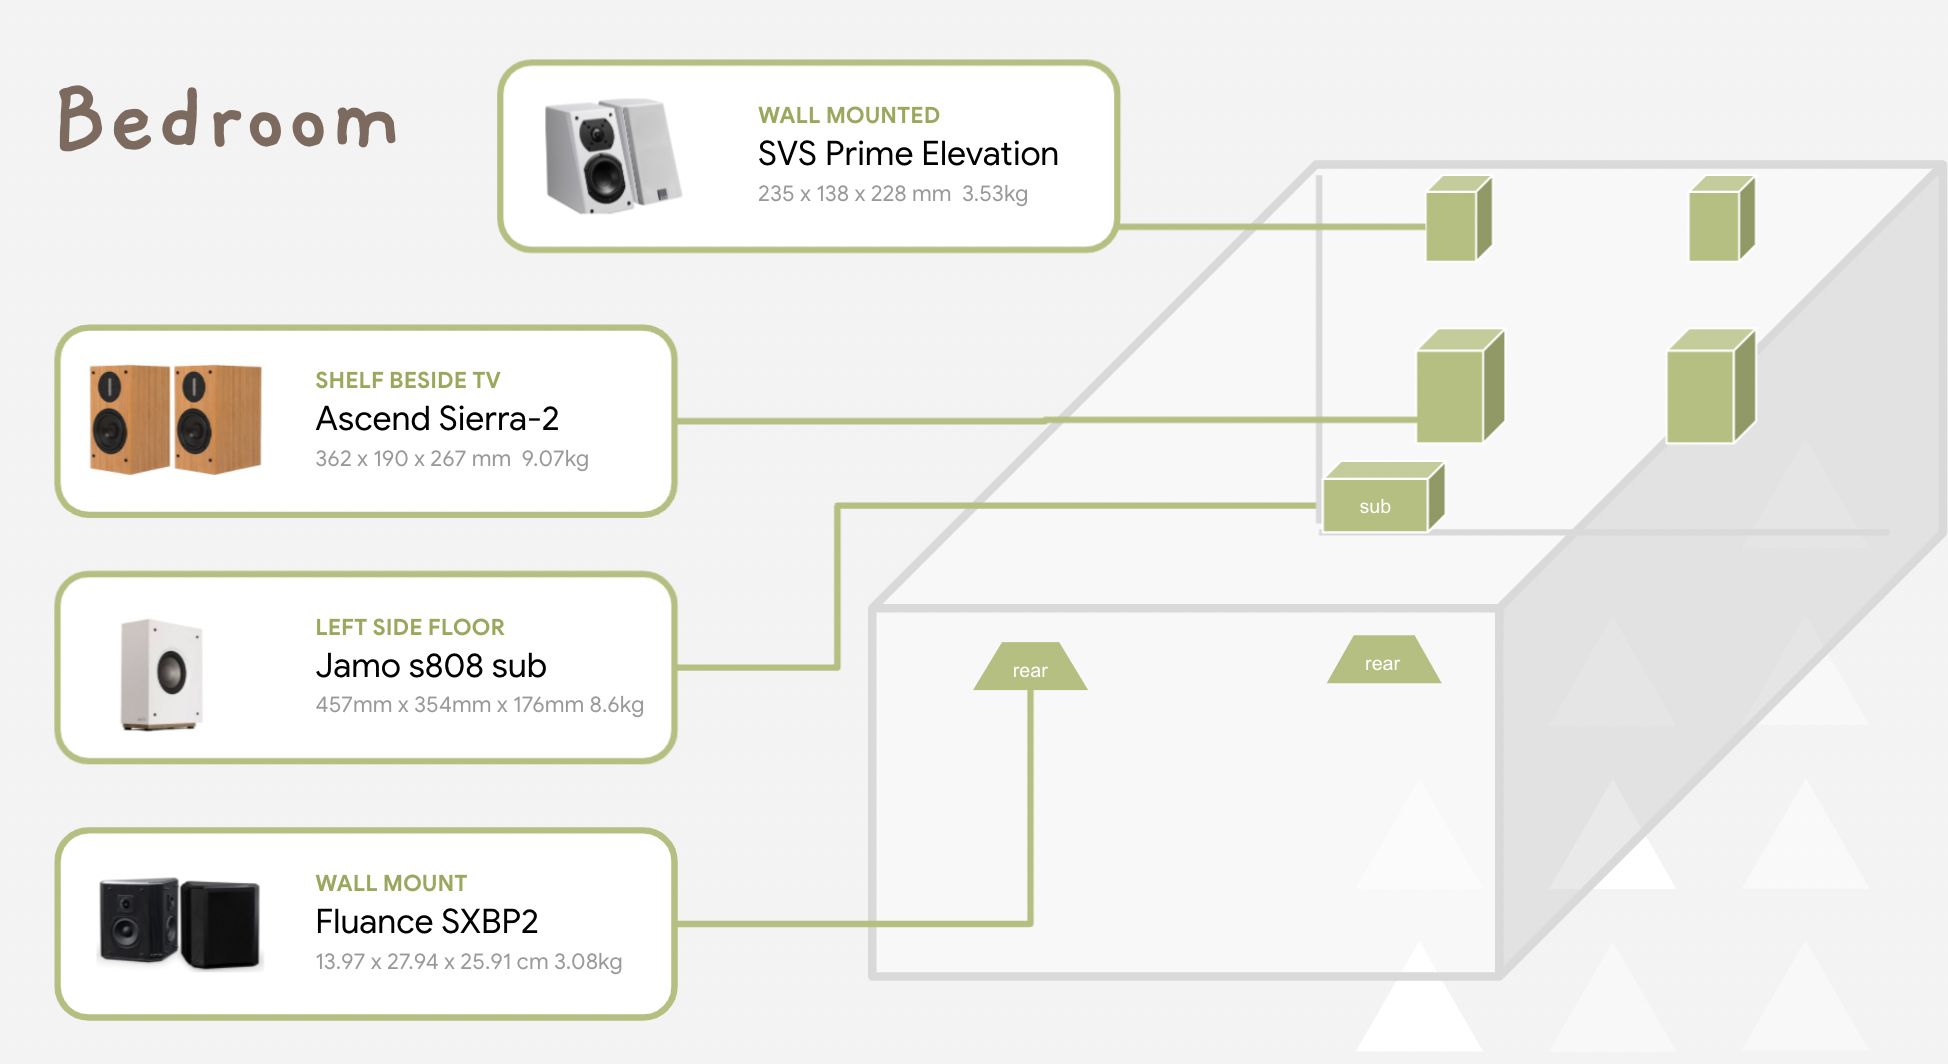
You don’t need to include details of every single appliance or gadget. Just highlight some of the larger systems, which your ID may need to factor into the overall design. A common example of this would be home theatre systems, as the positioning of the speakers is quite important.
If you have professional or hobby spaces in the home (e.g., a photography studio, painting studio, or recording studio), you’ll have to brief your ID on the equipment involved.
One of the key things to look out for is the positioning of power points. If you don’t tell your ID how you’ll set up your sound system, for example, you might find a lack of power points where you need them. Do specify this in your room descriptions (see above).
In some cases – such as smart lights or locks – an ID may have connections with vendors; they can sometimes get you the gadgets for cheaper.

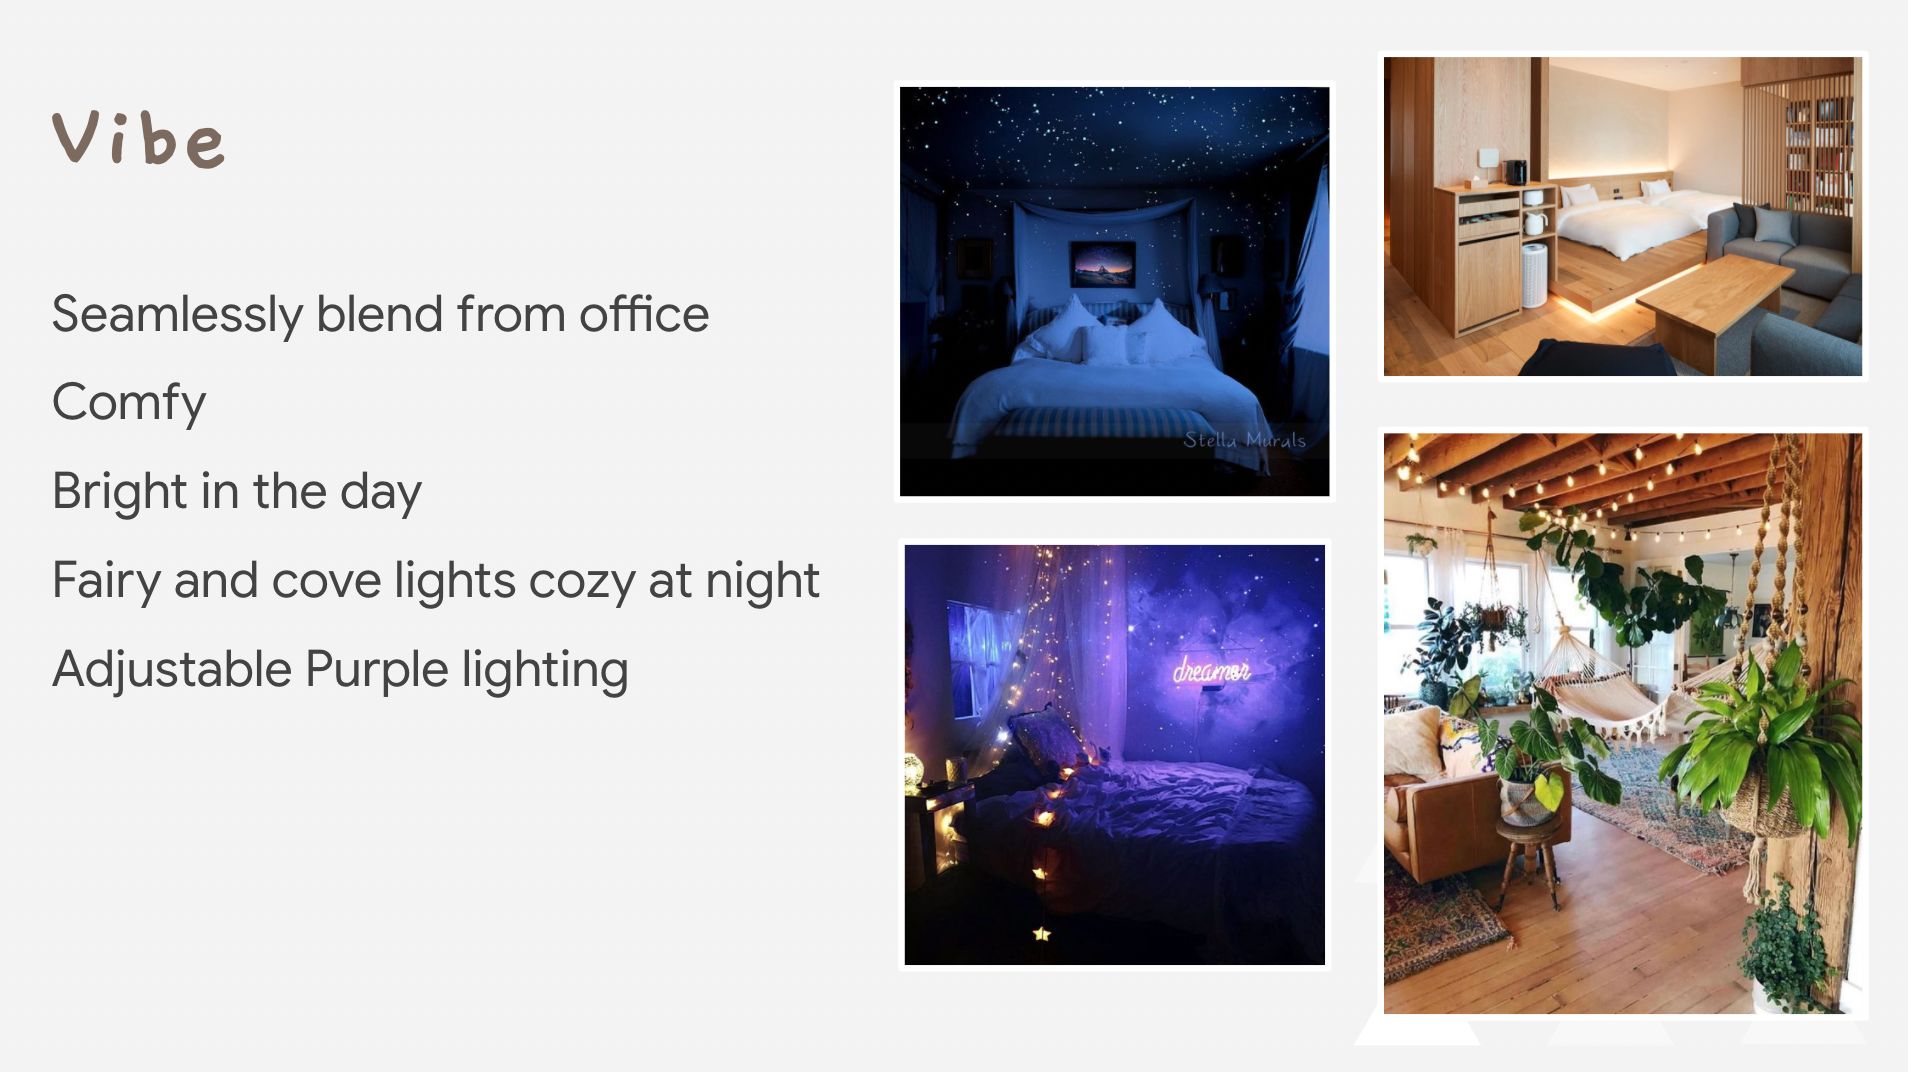
Written descriptions are not great, when it comes to describing décor. It’s better to browse online stores, interior design magazines, or other visual sources; save these images, and show them to your ID to give a sense of what you like.
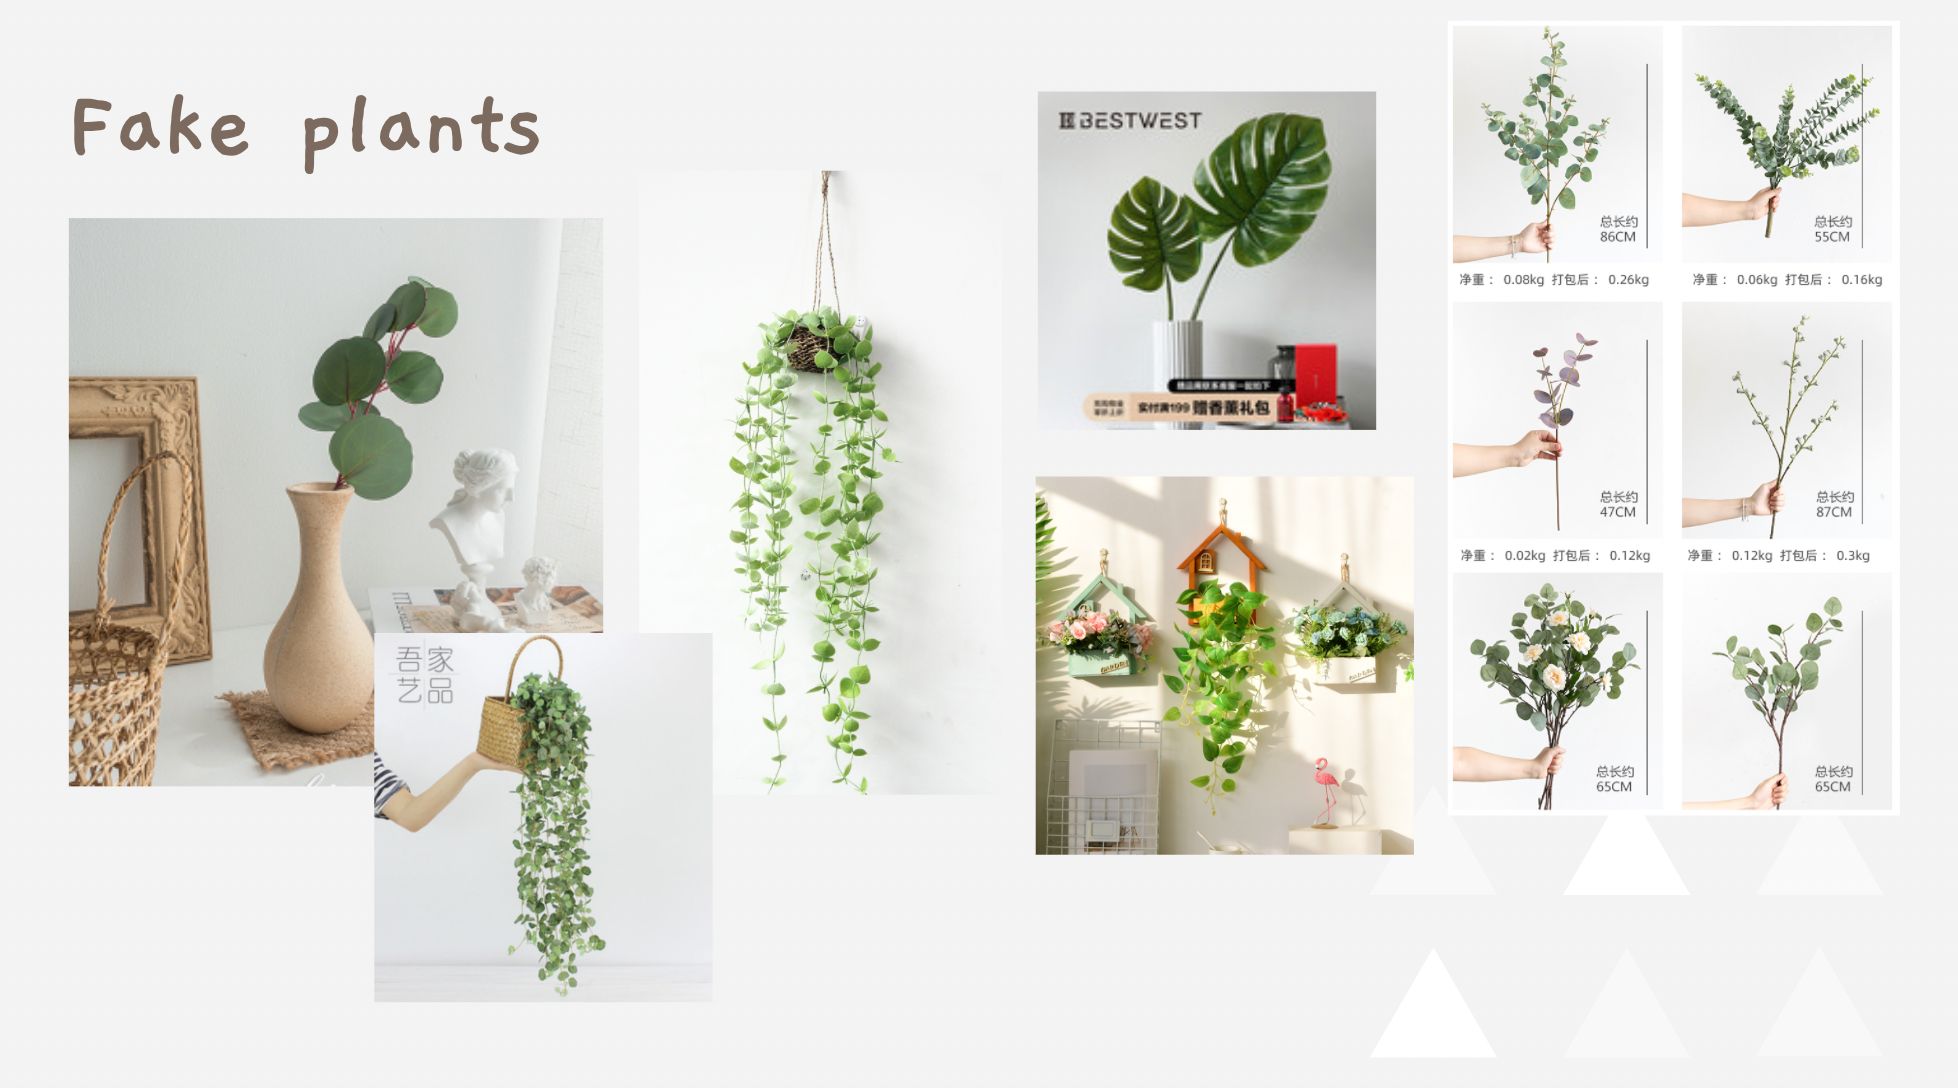
At the same time, you could also be looking up prices, which will help you piece together a reasonable budget. Your ID can also help you source for the decorative pieces you want, possibly at a discount.
Note that some IDs have their own production capabilities; they may be able to create custom-built designs that are close to what you see in the magazines and websites. This can save you quite a bit, as opposed to having to buy and ship over the original pieces.
Get your ID to provide an initial budget, for everything you’ve requested so far.
This will help you to identify the most expensive elements, and if it’s necessary to find alternatives. In most cases, your ID can recommend substitutes; such as textured vinyl that imitates wood, instead of actual wood flooring.
A time estimate is also helpful, as this affects how quickly you can move in. For landlords, you need to know how soon you can start taking on tenants; some landlords start marketing the property as early as a month before renovations are fully complete.
Your ID can also provide the overall plan of renovations at this point. There’s a chance you can move in before the renovations are 100 per cent complete; sometimes the ID can plan works so that important rooms are completed first.
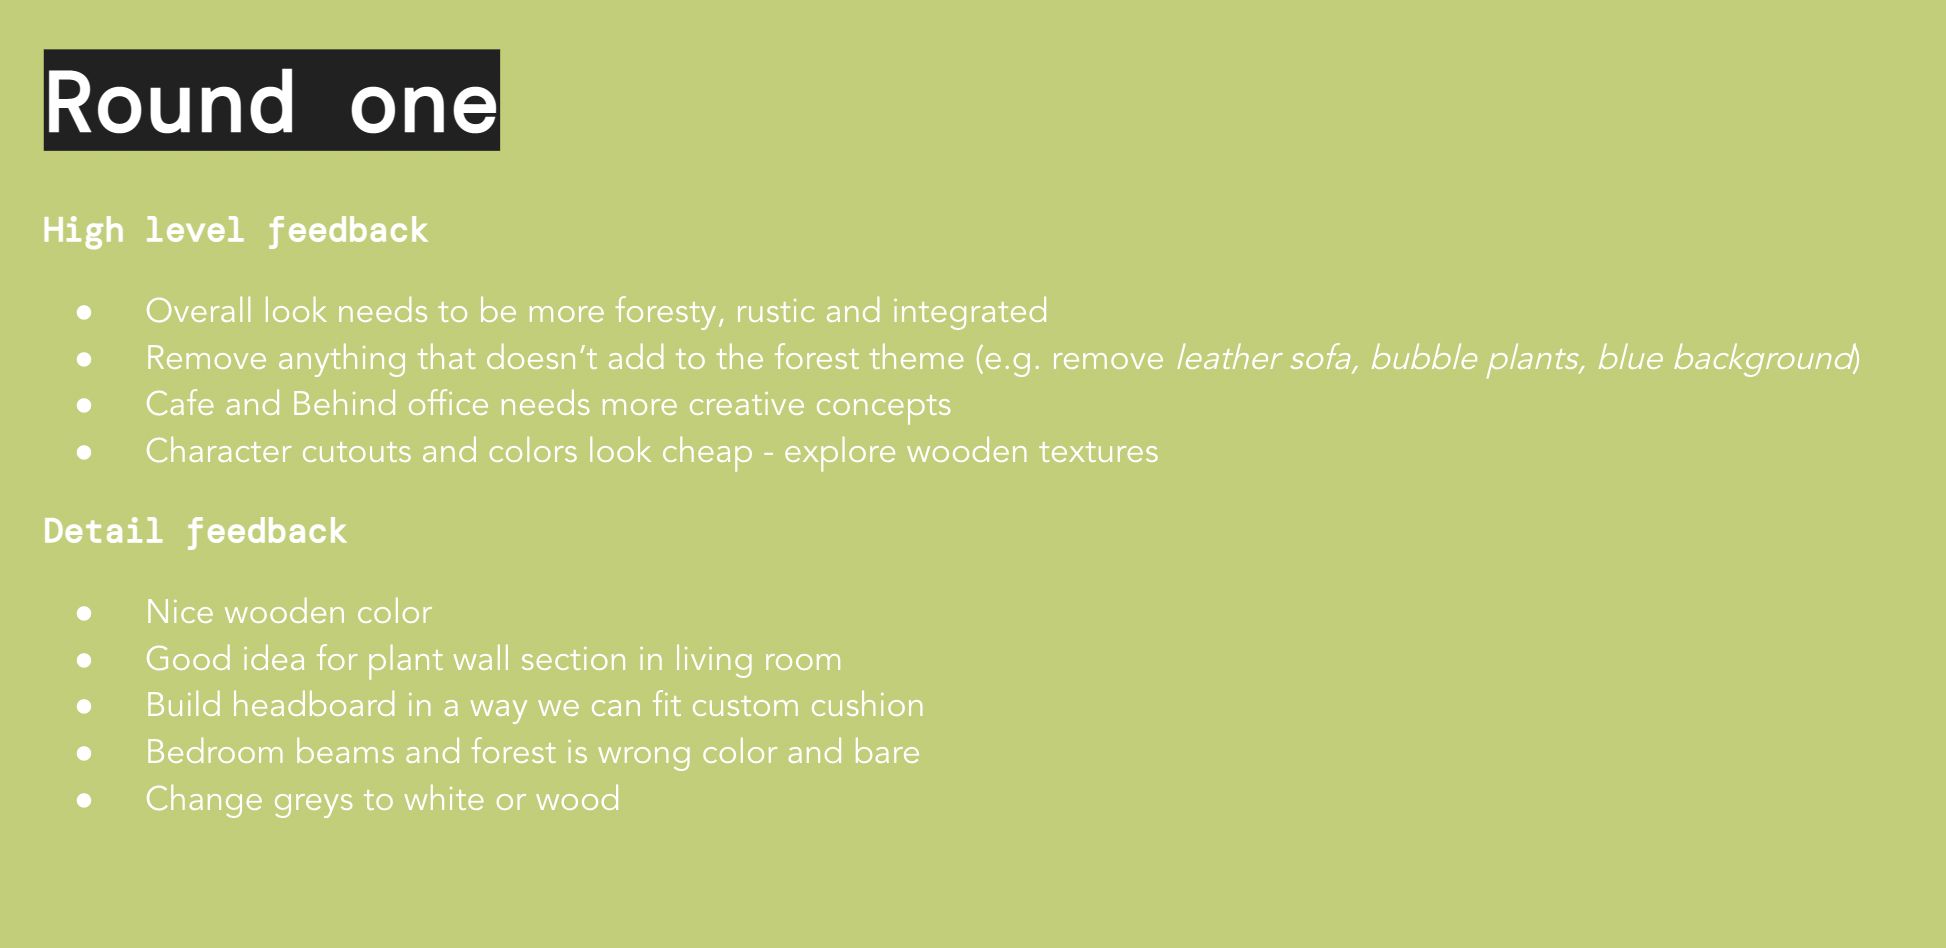
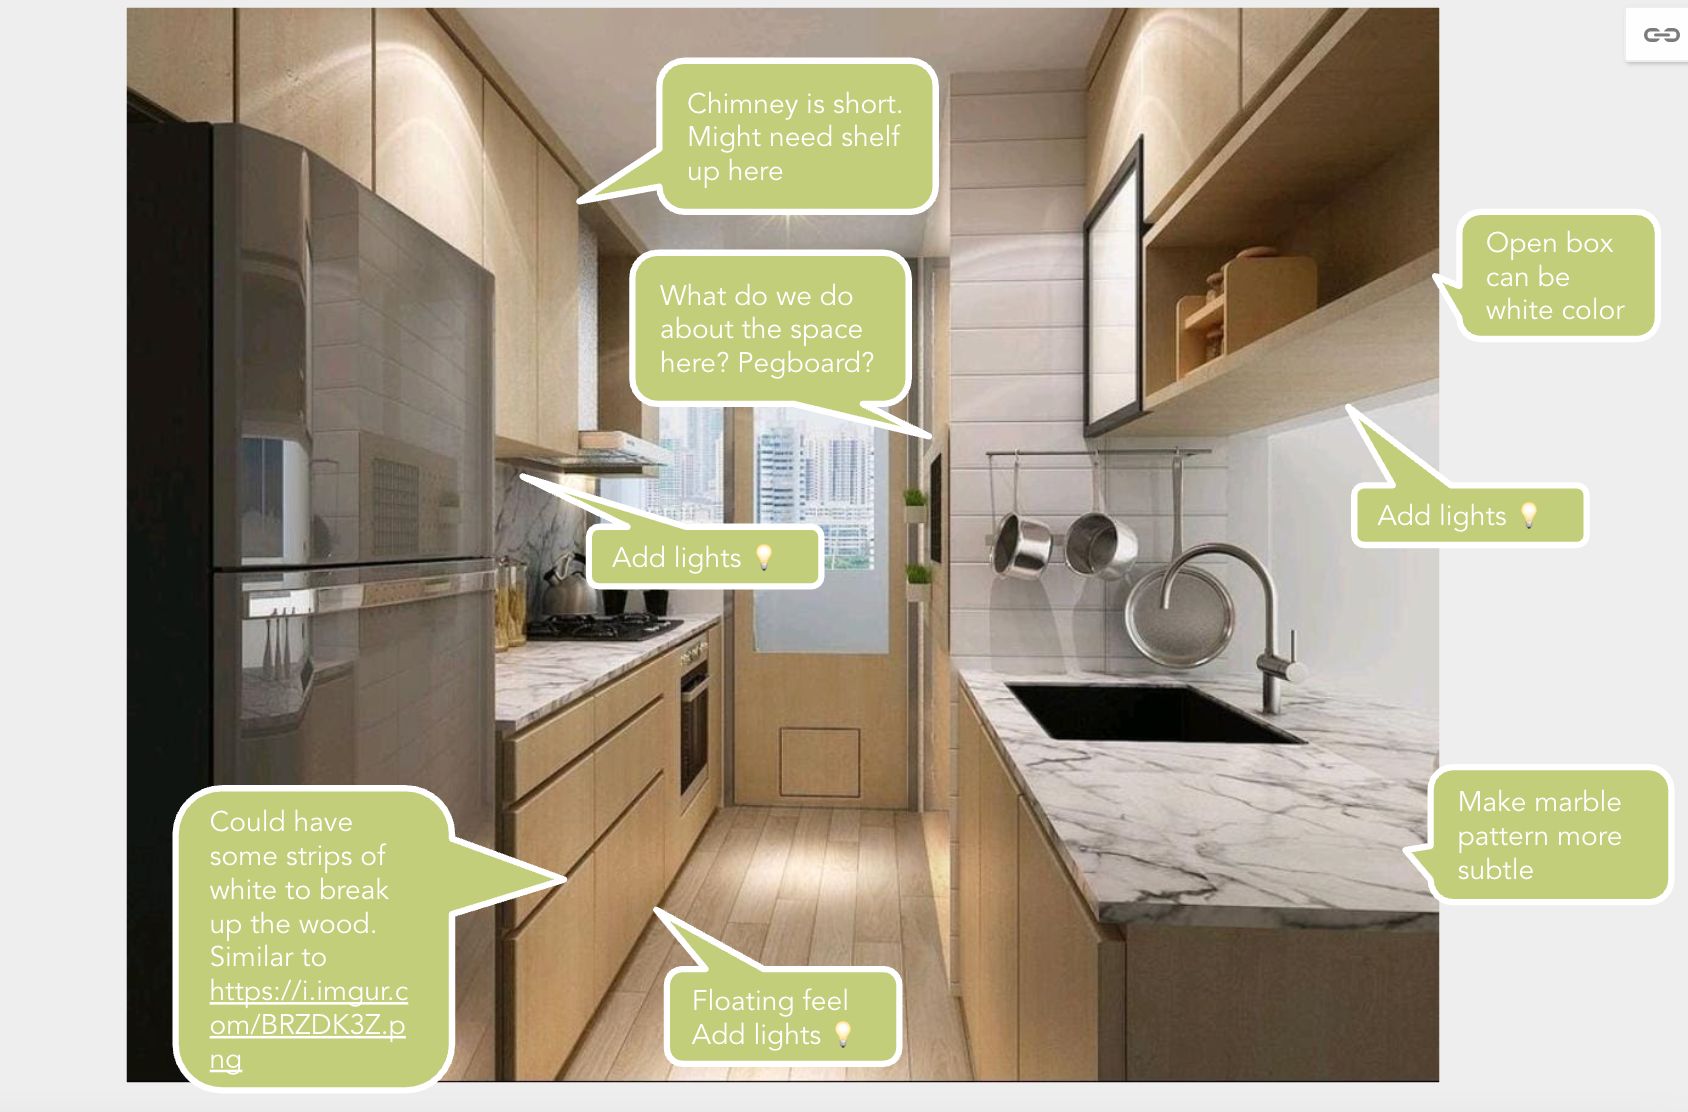
As your ID presents images, provide feedback on what you like, and want to change. You can do this by directly writing comments and tagging images, as in this example. As an alternative, use a shared Google doc, which allows for direct updates.
(This is easier than emailing multiple files back and forth, as you tend to get confused on which one is the latest version).
You should expect to go through a few different rounds of revision. This isn’t just to refine your vision, but to adapt your plans to certain realities (e.g., if certain design features are too costly, you may have to revise your plans for some rooms).
Planning for renovations should not be a one-step process. It’s usually something that changes as different versions and milestones are reached, and it’s best to remain involved throughout.
A common mistake is to throw all of these out. This can make it tough to find replacement materials, if they’re needed later.
For example, if your wallpaper rips, you’ll need to know where to find the exact same design to replace it. If you want to repaint, it helps to know the exact hue or brand that was used the first time around.
You should keep your renovation template, along with all the relevant paperwork, for future reference.
This article was first published in Stackedhomes.